
Author:
Željko Jagušt
Publish Date:
October 30, 2023
Estimated Reading Time:
23 minutes
Welcome to our comprehensive guide on Debian 12 Linux recommended applications. Whether you’re new to Debian or a seasoned user, optimizing your system with suitable applications can significantly enhance your desktop experience.
Table of Content
Introduction
In this article, we’ll walk you through a handpicked selection of top applications for Debian, ensuring that your minimal installation becomes a powerful and versatile platform tailored to your needs. From productivity tools to multimedia software, we’ve got you covered with essential recommendations to boost your Debian desktop to its fullest potential.
Prerequisites
An installation of the Debian minimal system is a requirement for this guide. Don’t worry; we’ve got you covered here also. We have a complete guide on how to install the Debian minimal system along with an initial customization guide of the same:

Debian 11 Server – Minimal Installation Guide
Follow this guide for a Debian 11 Server minimal installation, providing a solid foundation for any server setup or project you want to build.

Debian 11 Server – Initial Customization Guide
Discover introductory steps to streamline performance, security, and administration in our Debian Server Initial Customization guide.

Encrypting your hard drive is something you may consider if you intend to install GNOME Desktop Environment along with Debian on your notebook computer. Hypothetically, you may leave your notebook unattended, and it might get stolen. With a hard drive encrypted, accessing the data on your laptop and booting the operating system will be almost impossible. In combination with our Debian 11 Server – Minimal Installation Guide, you can also check our guide on encrypting hard drives:

Securing Your Data – Installing Debian Linux with Disk Encryption
This step-by-step guide will teach you how to set up “almost” full disk encryption on the Debian Linux operating system.
Since almost all applications described in this guide are “Desktop”, you will also need a desktop environment. If you cannot decide which one to use, please feel free to check our guide on how to install the GNOME Desktop Environment:

Install GNOME Desktop Environment on Debian – Easy Guide
Discover the GNOME Desktop Environment elegance and modern features. Follow our Debian installation guide for a seamless experience.
Region, Keyboard and Time Settings
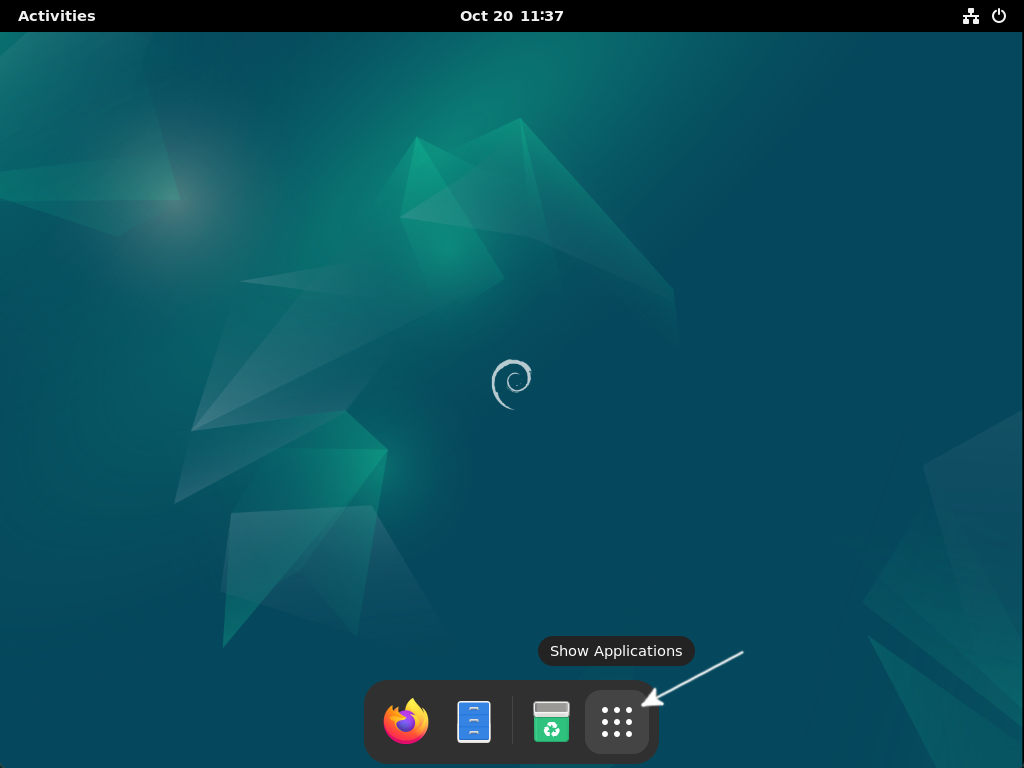
The region, language, keyboard layout, and time settings are something you probably already configured during the installation of the Debian Linux, but it’s worth checking them out, just in case. Some applications may depend on those settings, so first, please click on the Show Applications button in the dock menu:
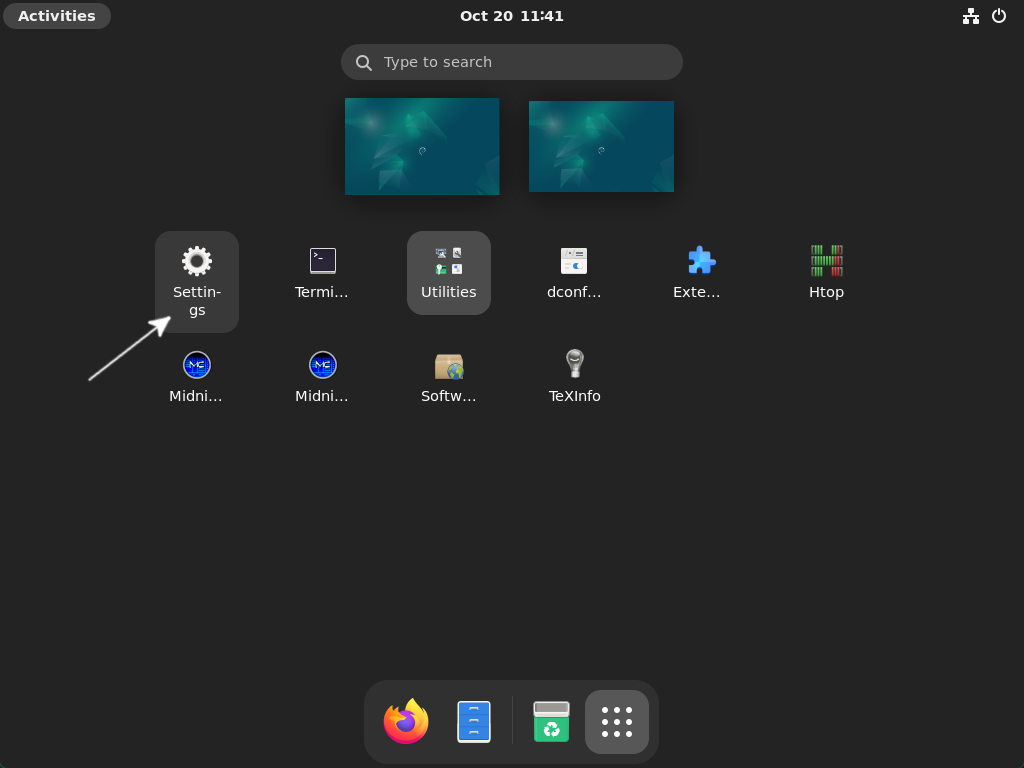
Click on the Settings button:
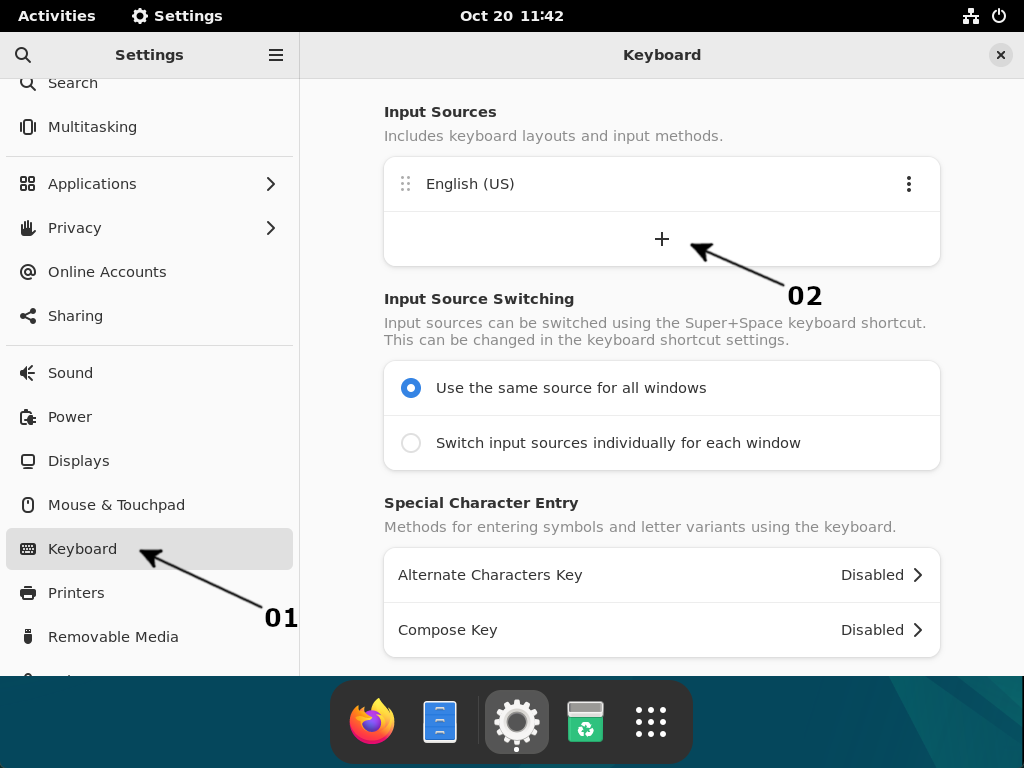
In the left pane, scroll down and click on Keyboard (01). Then, in the right pane, click on “+” (02) below Input Sources:
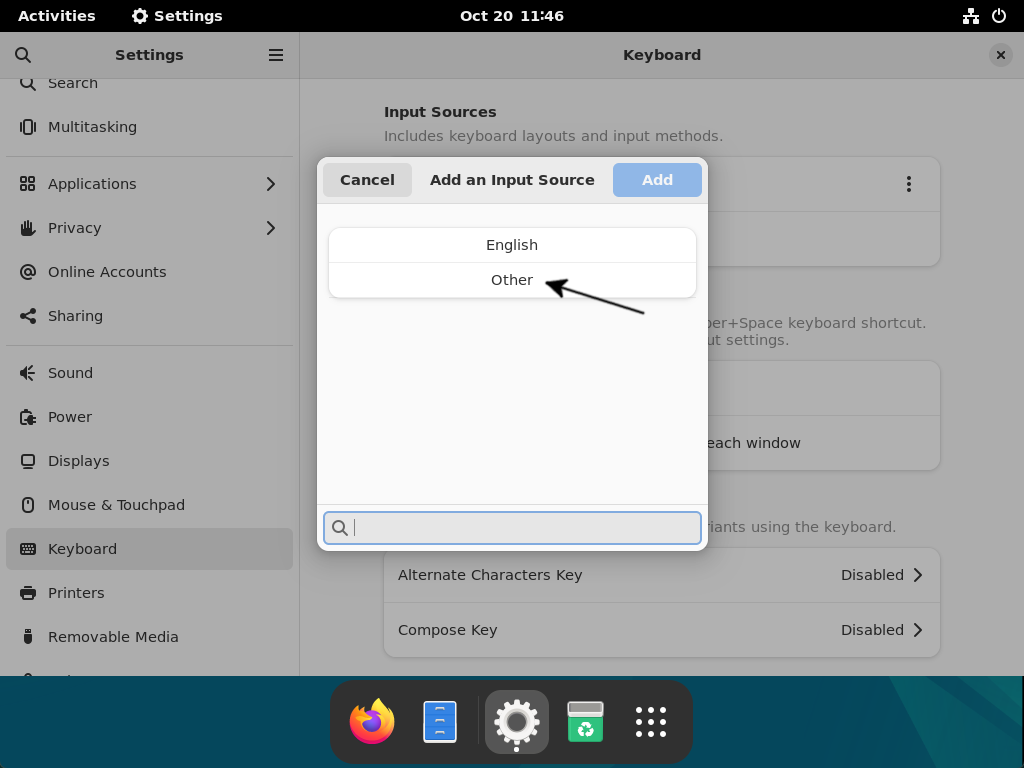
Once the window pops up, click on the three “vertical dots” button:
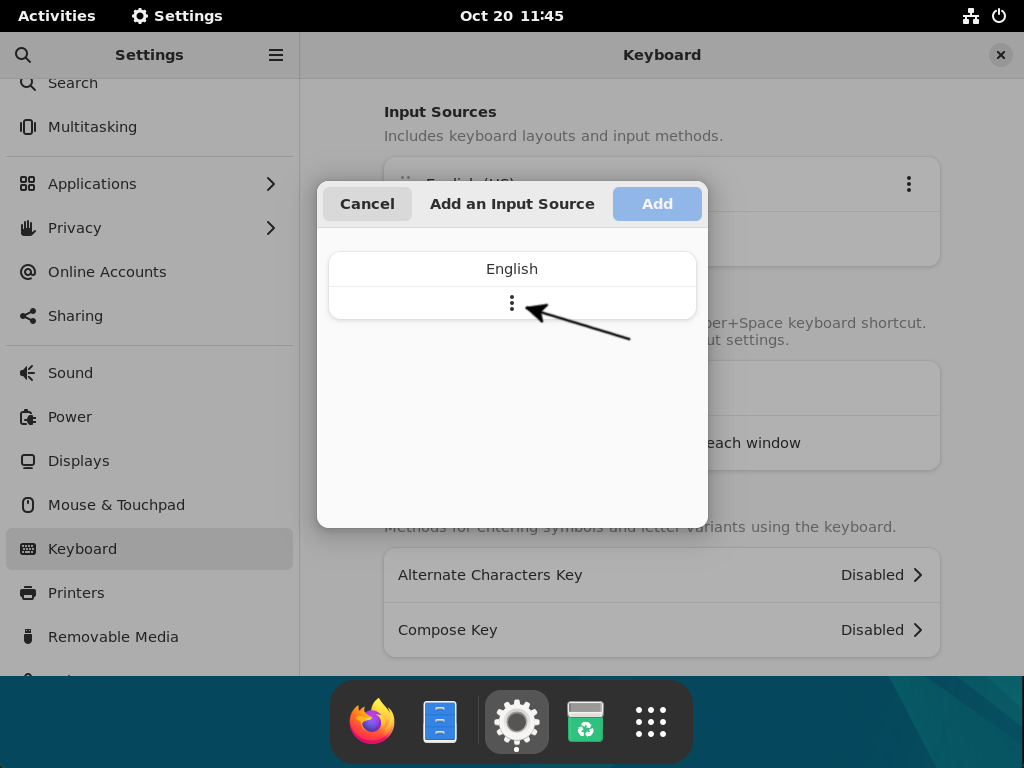
Now click on Other:
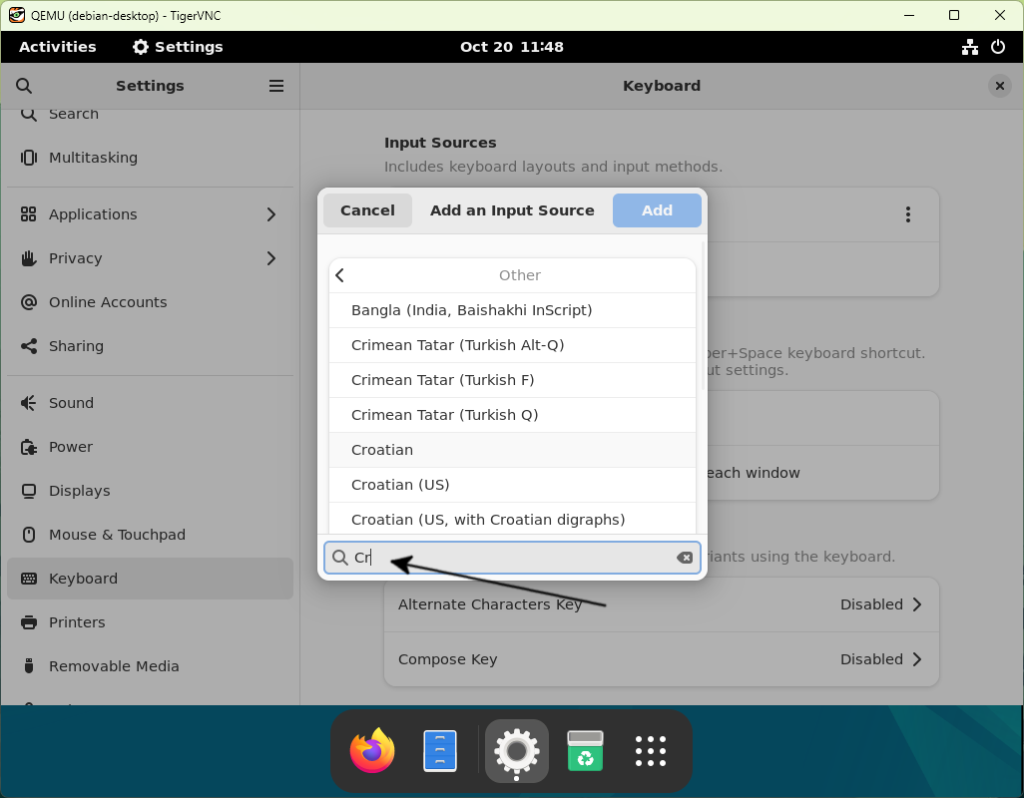
Start typing the desired country code in the search bar, and then select the value you wish for the additional input source (as I live in Croatia, my selection is Croatian). Click the Add button once you decide which other input sources you want to add:
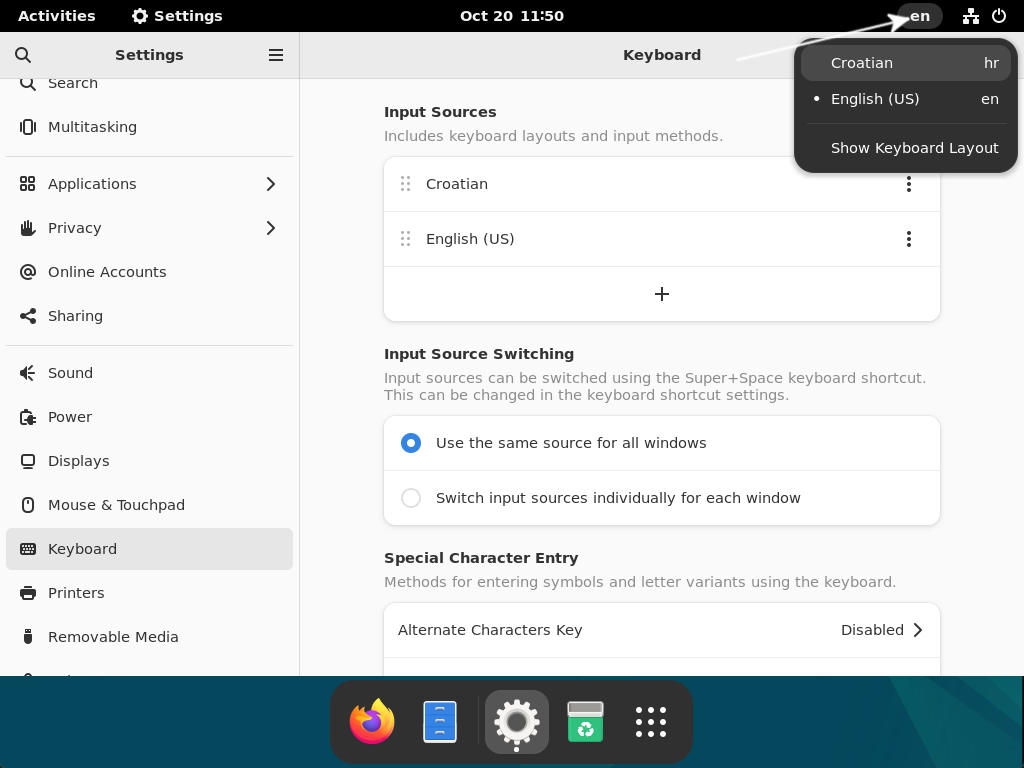
To set the selected input source as the default one, please click on three “vertical dots” button, and then click on the Move Up option:

Switch to your newly selected input source by clicking the “language” button in the top panel, and select it there:
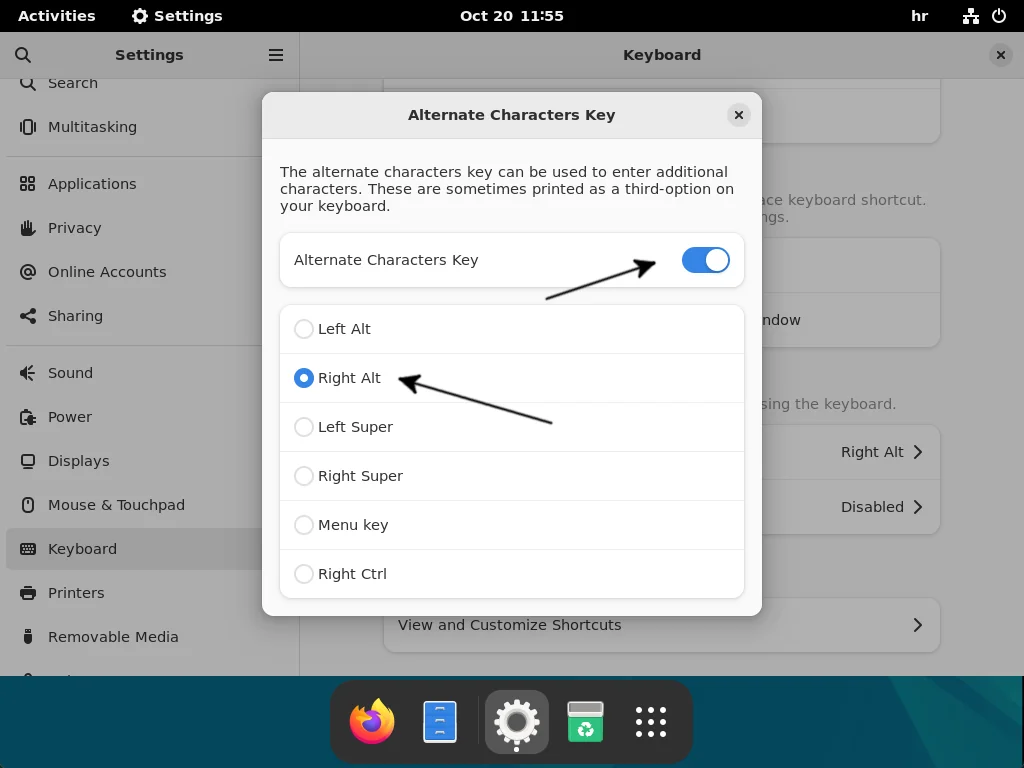
You can set the Alternate Characters Key here also:
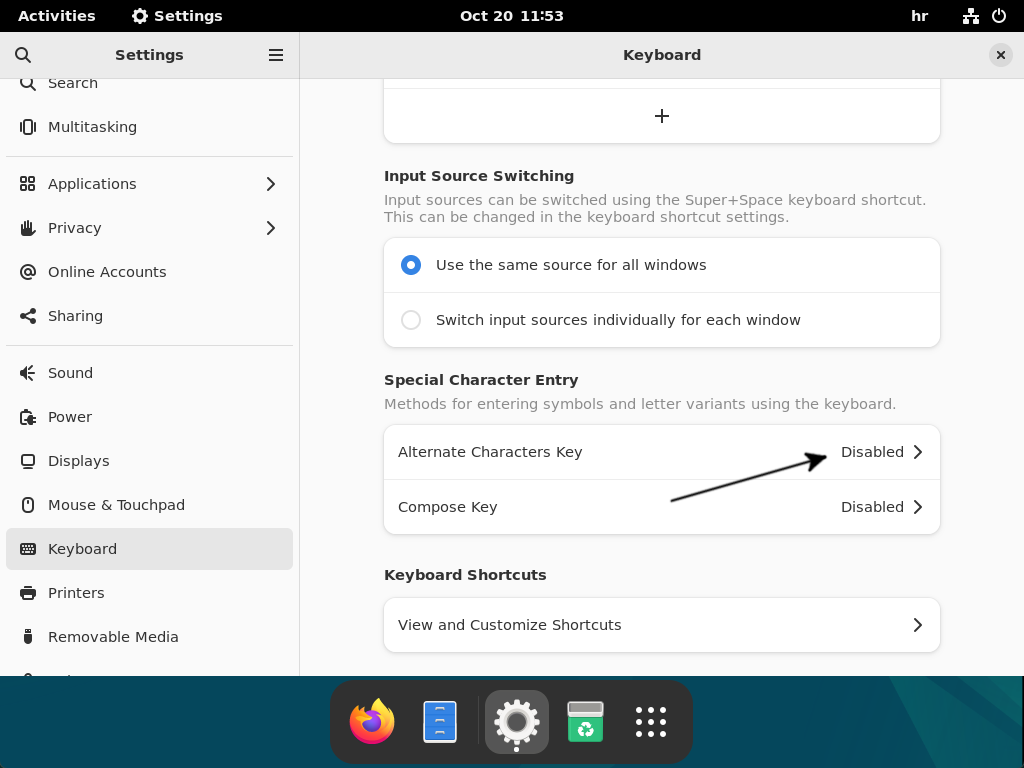
Usually, the alternate characters is the right Alt key (Alt Gr) on your keyboard, but you are free to set any other that is offered on the list:
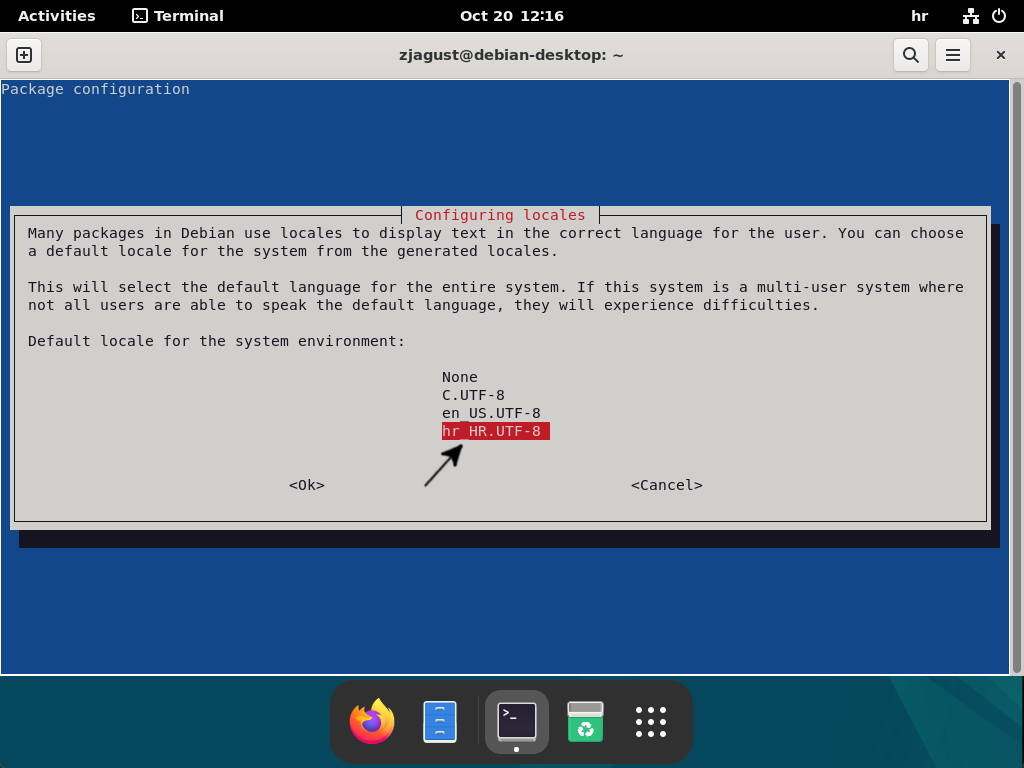
If you haven’t set additional locales during the installation, you can do so by reconfiguring the “locales” package. You can do it by executing the following in the Terminal:
sudo dpkg-reconfigure localesTo add the additional locales, find the wanted country code on the list, “mark” it with the space key on your keyboard, and press Enter to continue. I am from Croatia, so I selected hr_HR.UTF-8 (country code for Croatia):

In the next step, set your newly selected locales as a default one:
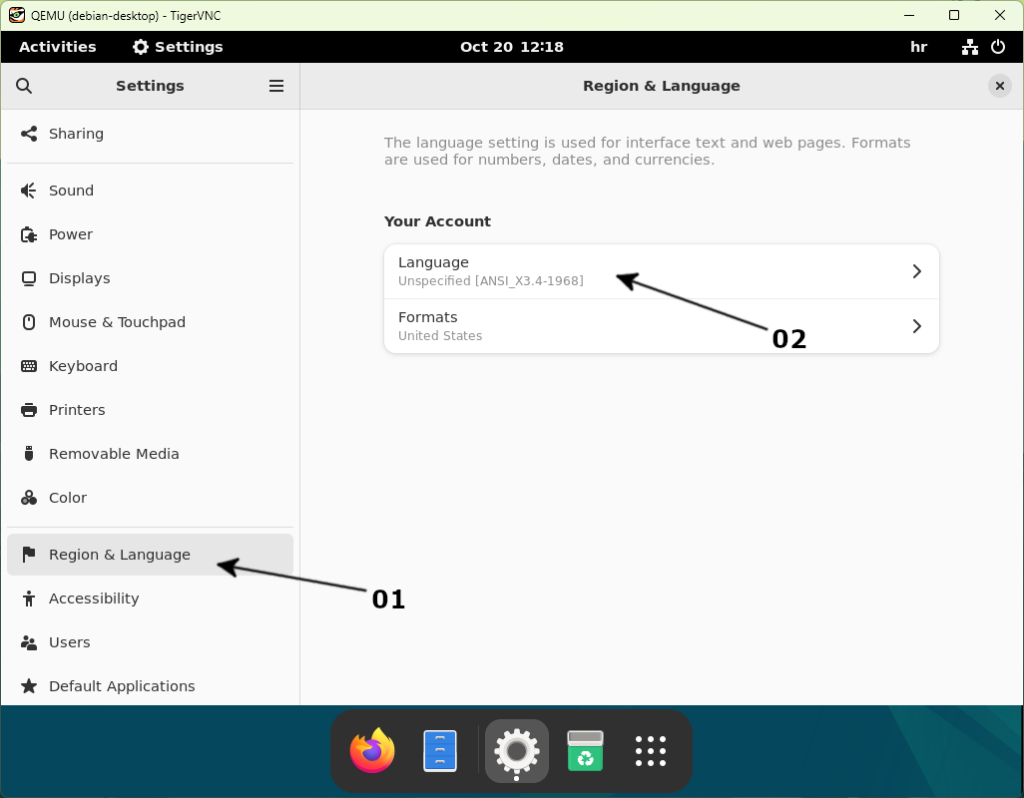
You can exit the Terminal now and go back to Settings. Click on Region & Language (01) and then Language (02). Here you will set the language for your interface and web pages:
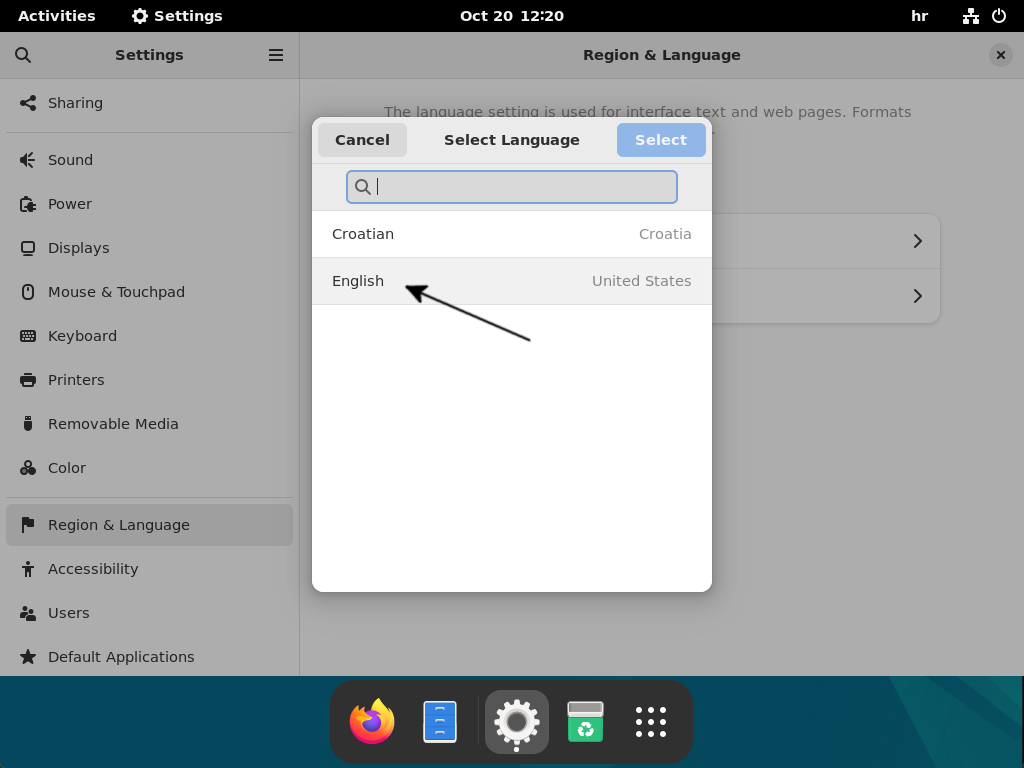
On the next screen click on the More button (three vertical lines):
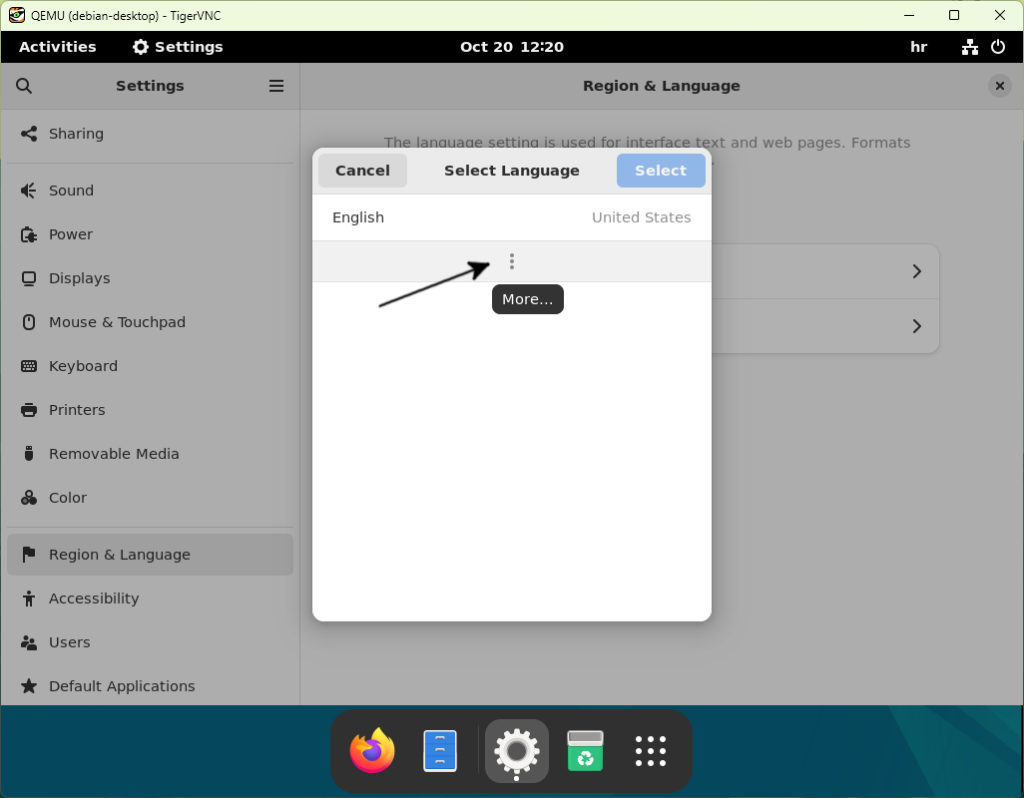
You will have the option of selecting English (default value) language here, with the option of choosing the language(s) according to the additional locales you installed in the previous step. In my example, I installed additional Croatian locales, so the Croatian language is my only additional option.
If you select an option other than English, the language chosen will be applied across your whole operating system. This means the OS interface and all other applications supporting localization will be “translated” into that language. I don’t like that, so I leave the default (English), but please feel free to select here whatever suites you best:
Once you select the language, you will be asked to log out to apply the settings, so you may just as well do that:
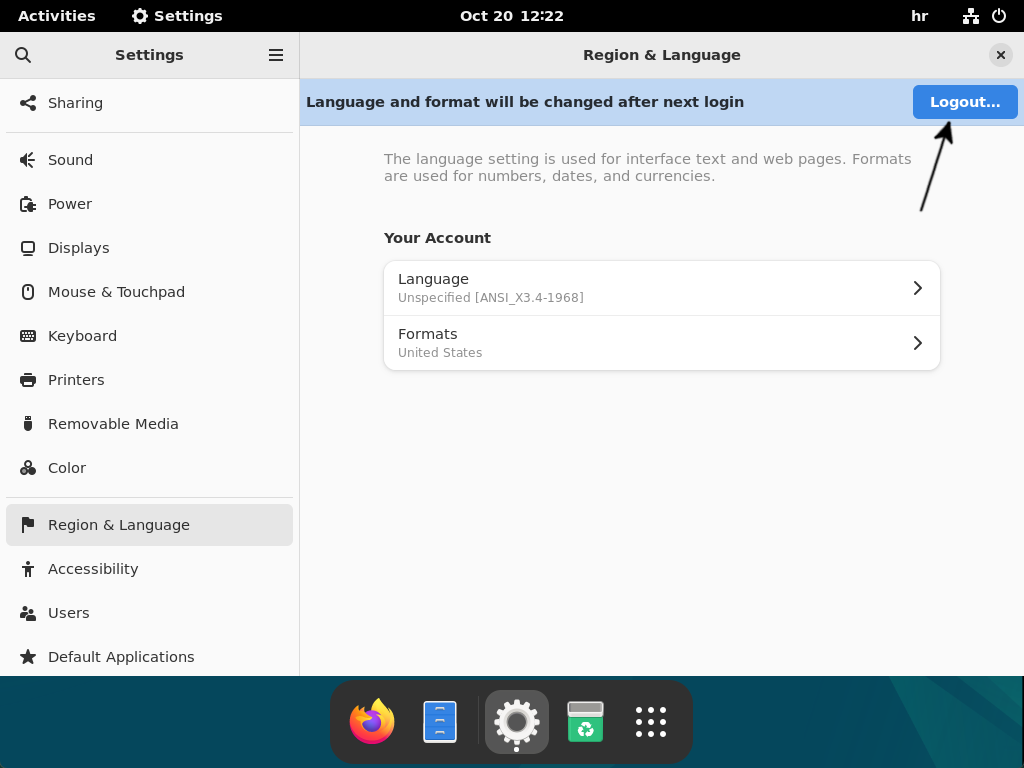
After you log back in, go back to Langauge & Region settings and click on Formats:

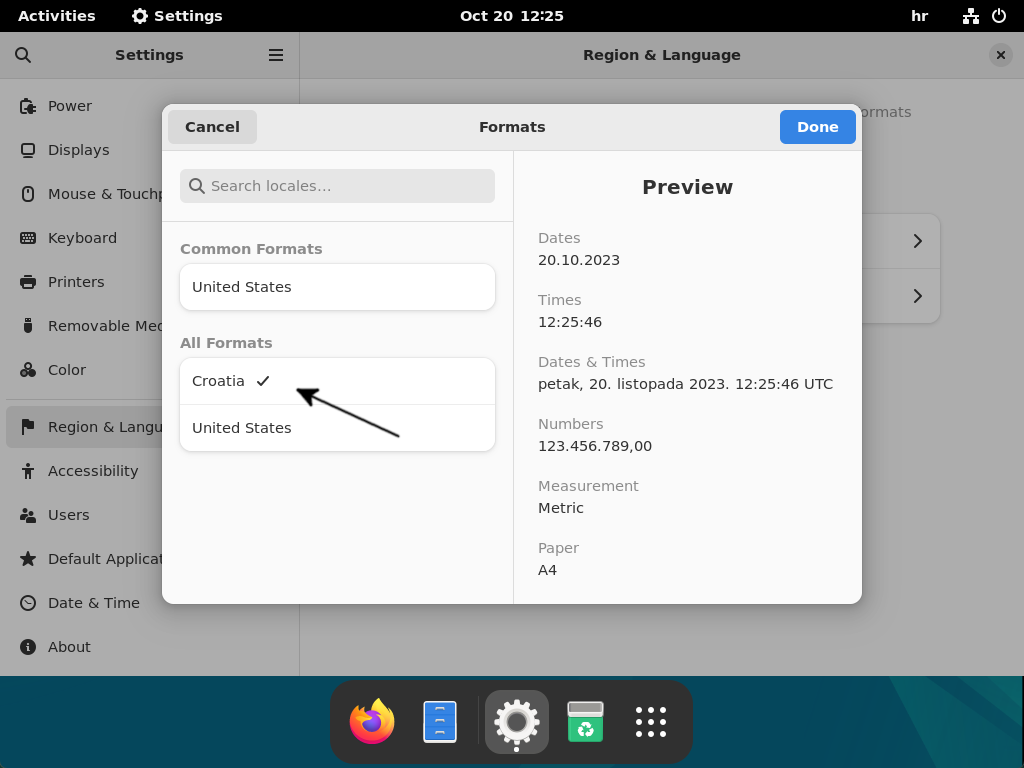
Setting the correct formats will “instruct” the operating system on how to format date and time, which currency to display (the one you use), how to format numbers (which separators to use), and which measurements standard and paper format to use.
Again, you will only have the option of default (English) and any additional locales you installed. In my example, I only have Croatian, so that is the one I will use:
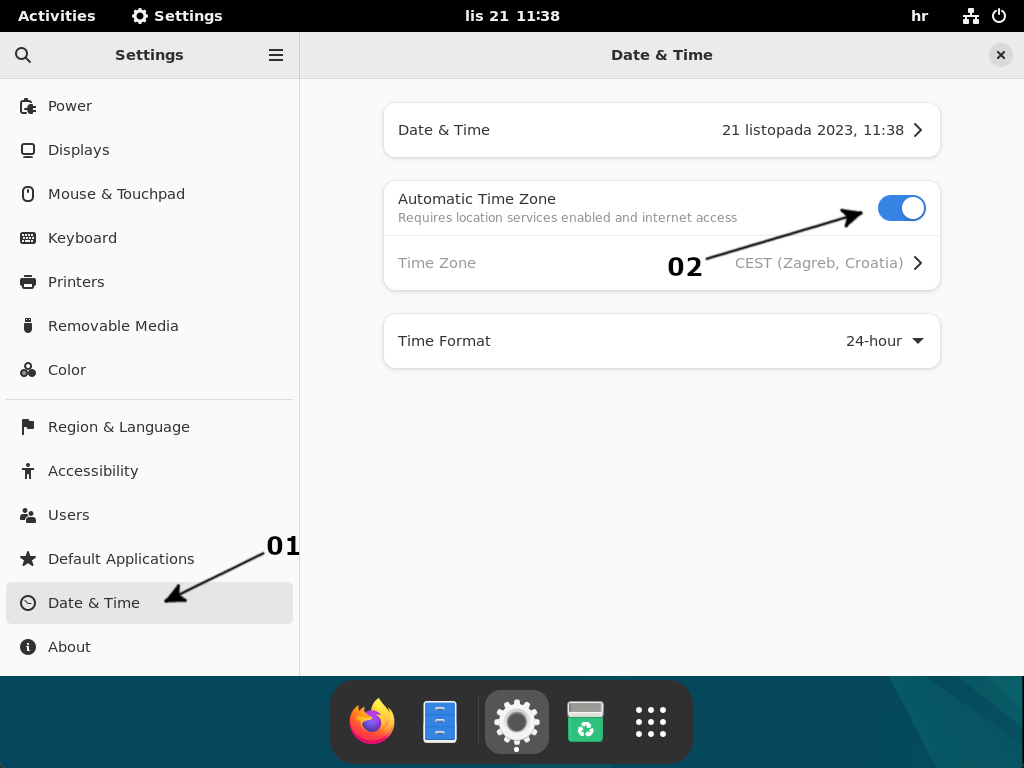
You will be asked to log out again, so do it. Once done, go back to the Settings and click on Date & Time (02) followed by Time Zone (02):
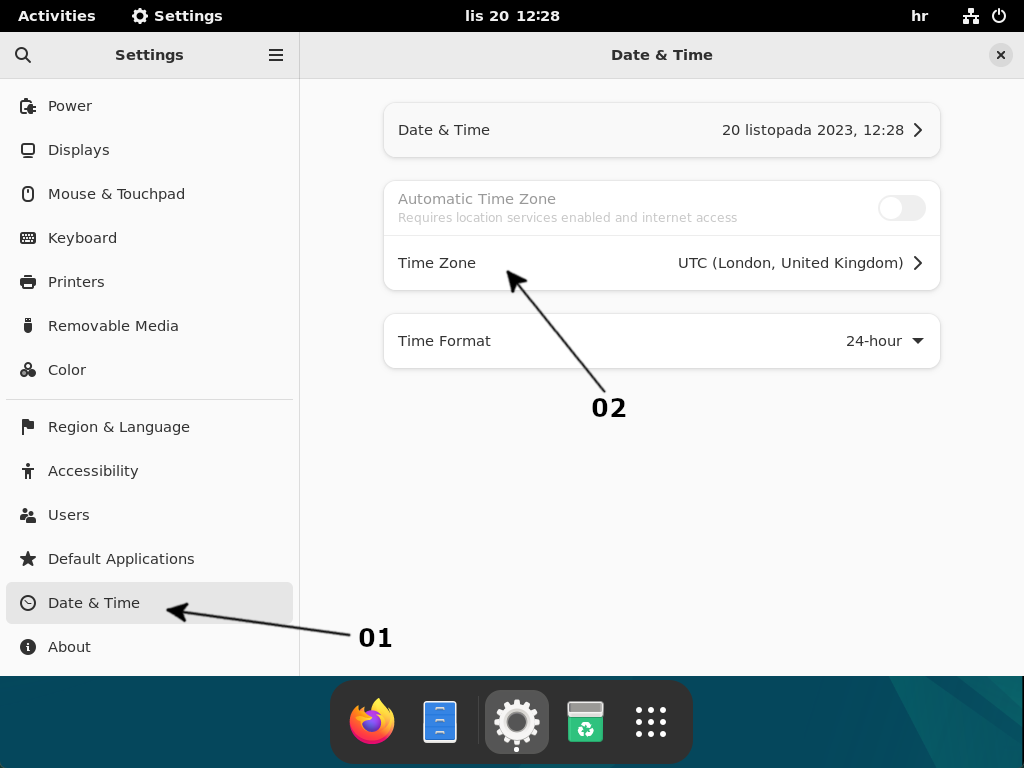
Once you click on Time Zone, a world map will be displayed with a search box on the top. Start typing the name of the nearest major location (city) in the search box and click on it once it pops up. In my example, I searched for Zagreb, which is the capital of Croatia:

As an alternative to setting the time zone manually, it can be set automatically if you enable the location service. To do so, go back to Settings and click on Privacy. In the privacy settings, click on Location Services (01) and then on the “toggle” button in the upper right corner (02):

With the location services enabled, go back to Date & Time settings (01) and enable Automatic Time Zone (02):
Our Recommended Applications
If you did everything described in our prerequisite articles, you got a nice minimal installation of the Debian operating system with the GNOME Desktop Environment. You also have a few essential applications installed, but nothing more.
In the rest of this guide, we will show you how to install what we think are the most essential applications for any desktop environment. We will divide them into sections (per “function”) so it’s easier to follow. Let’s go ahead and get started.
Web Browsers
Firefox is Debian’s default web browser, and you should already have it installed. If it’s the only browser you use, you can skip this section.
I like Google Chrome, and I will show you how to install the latest stable version from the official repository. The first thing to do here is to set up that repository and its signing key. We will start with the signing key. To set it up, please start the Terminal and execute the following:
curl -fSsL https://dl.google.com/linux/linux_signing_key.pub | sudo gpg --dearmor | sudo tee /usr/share/keyrings/google-chrome.gpg >> /dev/nullWith the signing key in place, you can configure the repository now by executing the following in the Terminal:
echo "deb [arch=amd64 signed-by=/usr/share/keyrings/google-chrome.gpg] http://dl.google.com/linux/chrome/deb/ stable main" | sudo tee /etc/apt/sources.list.d/google-chrome.listNow you can run the update and install the Google Chrome browser by executing the following in the Terminal:
sudo apt update
sudo apt install -y --no-install-recommends google-chrome-stable
Email Clients
There are a bunch of email clients available on Debian and Linux in general, and our pick is Mozilla Thunderbird. It is available to install from the official Debian repositories, is simple to configure, and has all the options a modern email client needs to have. To install it, please execute the following in the Terminal:
sudo apt install -y --no-install-recommends thunderbirdAs an extra here, check our article on how to filter your emails and protect from spam in Thunderbird:
Filter Email and Spam with Thunderbird
Your mailbox is a mess, and searching emails take forever? This article will help you filter email and rid you of spam forever.
VPN Clients
Just like with email clients, there is a wide selection of VPN clients available for Debian. While optional, if you work from home (like I do) and you must access your company infrastructure, you will most definitely need one. Our pick is OpenVPN. To install the OpenVPN client, please execute the following in the Terminal:
sudo apt install -y --no-install-recommends openvpnOpenVPN configuration is usually straightforward (you will need a configuration file and a key), and it can be achieved over Network Manager.
Office Tools
If you asked me not a year ago, I’d say you install LibreOffice or OpenOffice and be done with it. You can still do that, and it is perfectly OK, but I suggest another approach.
LibreOffice and OpenOffice (or similar) will take a certain amount of disk space and other resources on your computer. Since we live in the “Cloud Age,” you can avoid that using your Google Chrome browser and Google Apps. Specifically Google Docs, Google Sheets, Google Slides, and Google Keep.
To “install” them so they can be found in the GNOME application list, you first need to open your Google Chrome browser and sign in with your account:
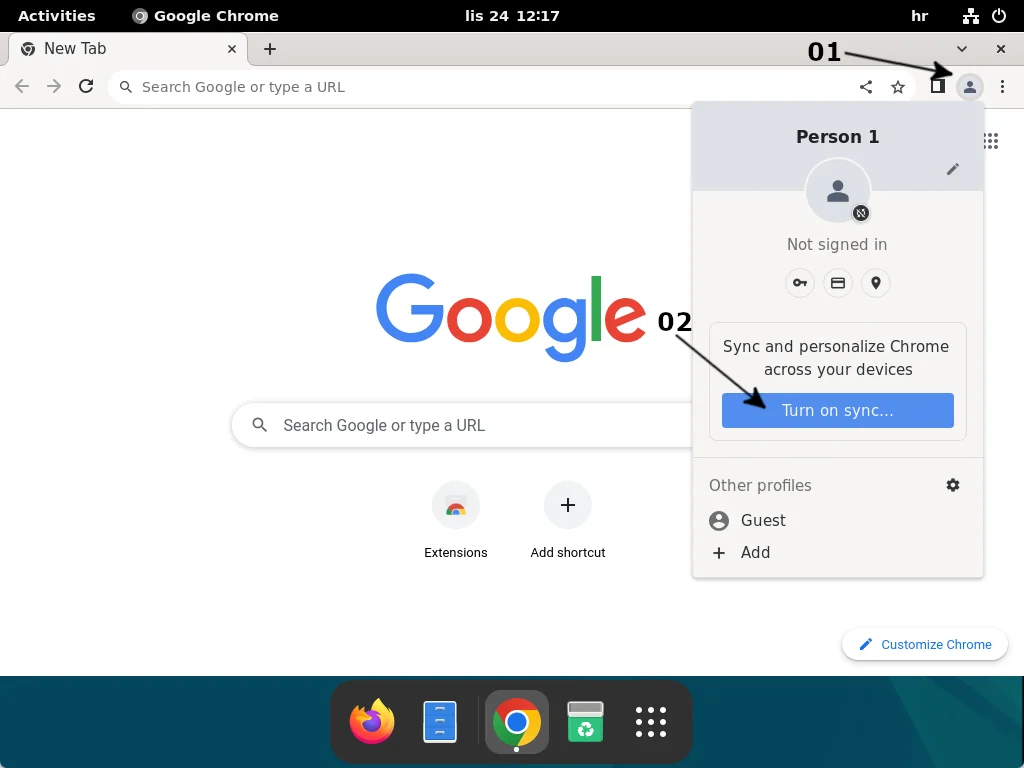
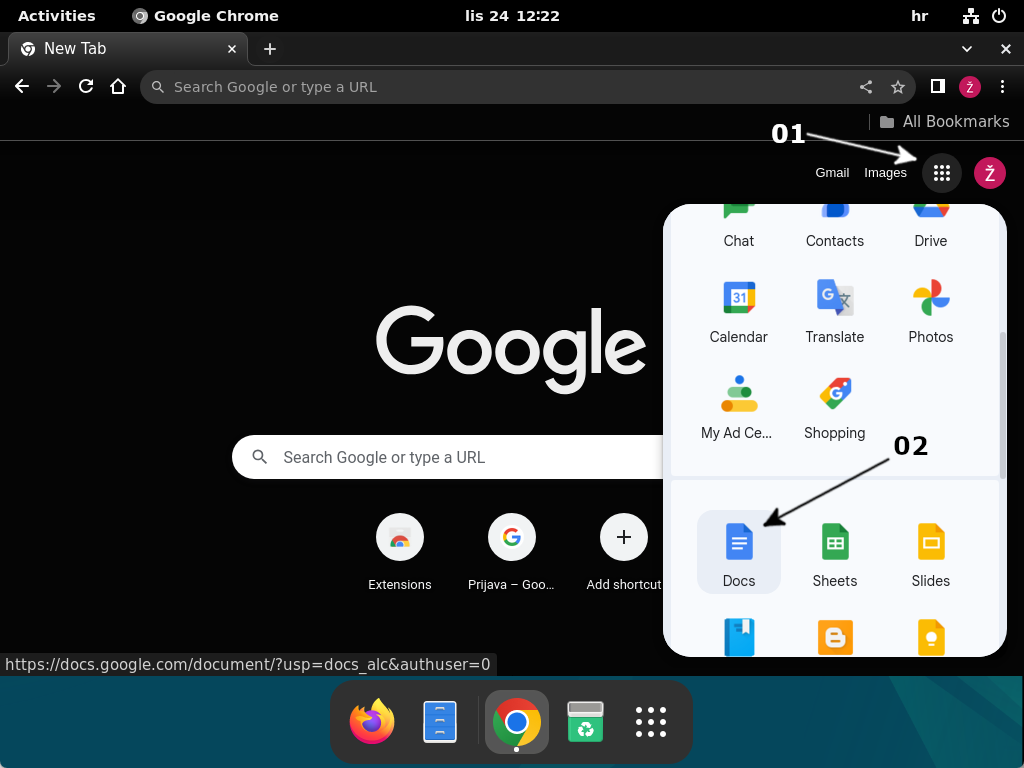
Once you sign in, click the menu button in the upper-right corner (01) and scroll down until you notice the Google Docs icon (02). Click on it:
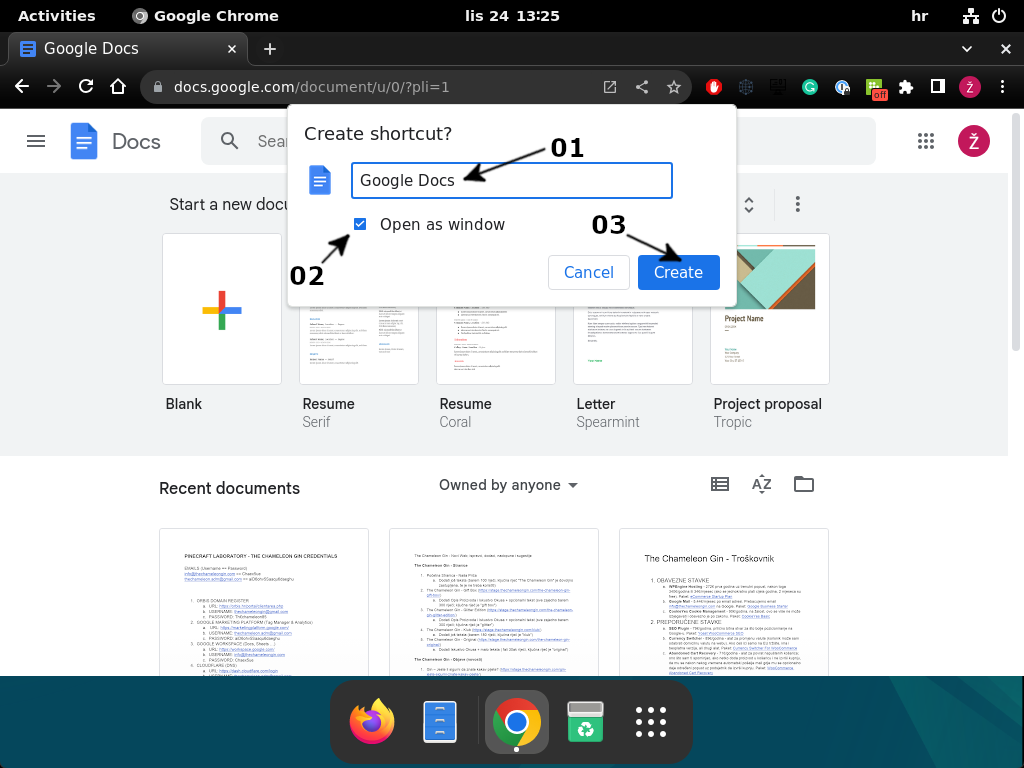
With Google Docs open, click the menu button in the upper-right corner (01), followed by More Tools (02), and then Create Shortcut… (03):

The create shortcut dialog window will pop up. Set the name for the shortcut there (01), check Open as window (02), and click on Create button (03):
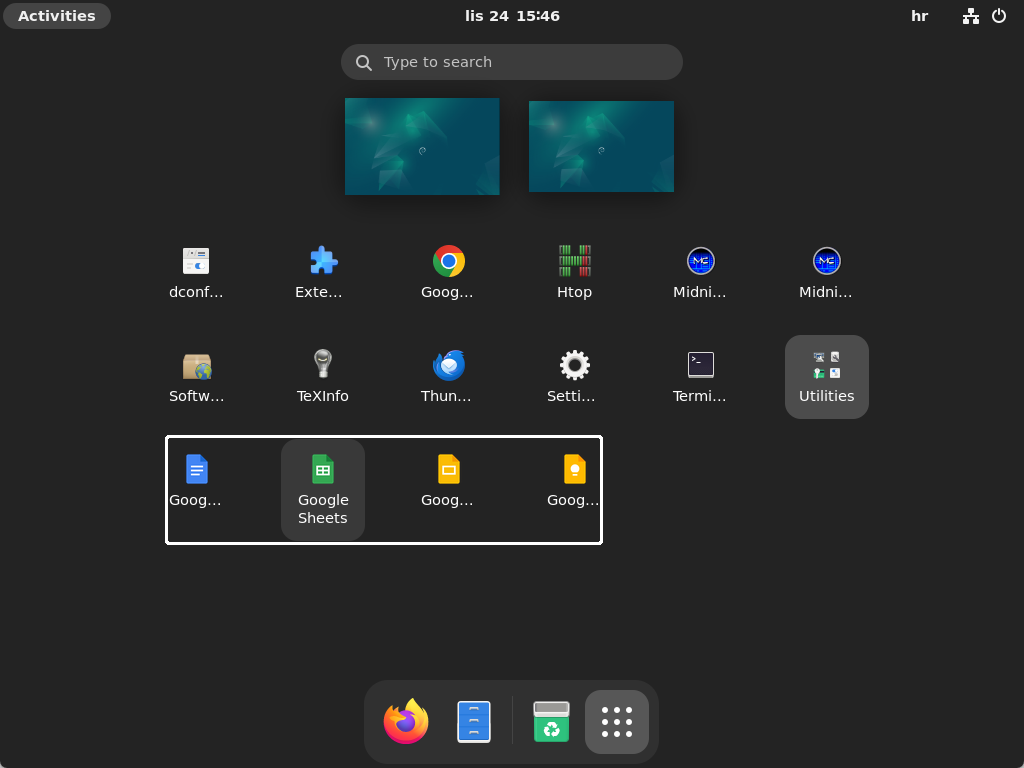
You can create shortcuts for the rest of the “Office” applications the same way the one for Google Docs was made. Once done, if you check the GNOME application list, you will see all of them there:
With a “setup” like this, you have a complete office tools suite without installing a single application. The only caveat of such a setup is a mandatory internet connection, which can be disregarded since we are (almost) constantly online.
Utilities, Editors & IDEs
This section will cover the installation of essential tools like an image viewer and calculator, utilities like Java support, and our recommendations for IDE/Editor for all your coding/development and text editing.
Let’s start with an image viewer, font viewer, PDF reader, and calculator. We will stick to native GNOME applications here, so our recommendations are GNOME Calculator, GNOME Font Viewer, Evince, and gThumb Image Viewer. You can install them by executing the following in the Terminal:
DEBIAN_FRONTEND=noninteractive sudo apt install -y --no-install-recommends gnome-calculator gnome-font-viewer evince gthumbFor Java support, install OpenJDK Java Runtime Environment (JRE). You can do it by executing the following in the Terminal:
sudo apt install -y --no-install-recommends openjdk-17-jreIf you require a Java development kit, install openjdk-17-jdk package instead of openjdk-17-jre.
To wrap up this section, our recommendation for a text editor and IDE (Integrated Development Environment) is VS Code by Microsoft. No panic here; VS Code is entirely open-source and an excellent code editor for all kinds of tasks. To install it, you first need to set the repository signing key. Open the Terminal and execute the following:
cd
wget -qO- https://packages.microsoft.com/keys/microsoft.asc | gpg --dearmor > packages.microsoft.gpg
sudo install -D -o root -g root -m 644 packages.microsoft.gpg /etc/apt/keyrings/packages.microsoft.gpg
rm -f packages.microsoft.gpg
Now, you need to set the repository. While still in the Terminal, execute the following:
sudo sh -c 'echo "deb [arch=amd64 signed-by=/etc/apt/keyrings/packages.microsoft.gpg] https://packages.microsoft.com/repos/code stable main" > /etc/apt/sources.list.d/vscode.list'You can install the VS Code now by executing the following in the Terminal:
sudo apt update
sudo apt install code
Graphic Editors
You can skip this section if you are not into graphics and do not require graphics editing software. As for our recommendations, we have two. The first one is Gimp, a feature-rich image editor and a great alternative to Adobe Photoshop. With a focus on “raster” editing, Gimp is an excellent choice for tasks ranging from basic photo editing to advance image manipulation. We use it to edit/prepare all photos for our website.
If you’re into vector editing, we recommend Inkscape, a cross-platform free and open-source vector graphics editing tool. It is also feature-rich software; you can use it to create all sorts of illustrations, including clip art, logos, typography, and many others. It is also an excellent alternative to Adobe Illustrator.
To install them both, please execute the following in the terminal:
sudo apt install -y --no-install-recommends gimp inkscapeGaming on Debian
Gaming on Linux, in general, was always (and still is) inferior when compared to Microsoft Windows and various consoles. So, we recommend getting a Windows-powered PC or a gaming console if you are a hardcore gamer.
Still, if you want to try gaming on Debian, you can install Steam. We will show you how to install a basic Steam launcher from the official repository, which is enough for the self-update mechanism and which will download the rest of the client. To do so, you first need to set the repo signing key. Open the Terminal and execute the following:
curl -fsSL https://repo.steampowered.com/steam/archive/stable/steam.gpg | sudo tee /usr/share/keyrings/steam.gpg > /dev/nullNow you can set the repository by executing the following in the Terminal:
echo "deb [arch=amd64,i386 signed-by=/usr/share/keyrings/steam.gpg] https://repo.steampowered.com/steam/ stable steam" | sudo tee /etc/apt/sources.list.d/steam.listTo ensure compatibility with 32-bit and 64-bit games in the Steam library, it is recommended that 32-bit support be enabled. You can do so by executing the following in the Terminal:
sudo dpkg --add-architecture i386Now you can run update and install the Steam Launcher:
sudo apt update
sudo apt install libgl1-mesa-dri:amd64 \
libgl1-mesa-dri:i386 \
libgl1-mesa-glx:amd64 \
libgl1-mesa-glx:i386 \
steam-launcher
If you start the Steam Launcher now, you will be asked to install additional packages:
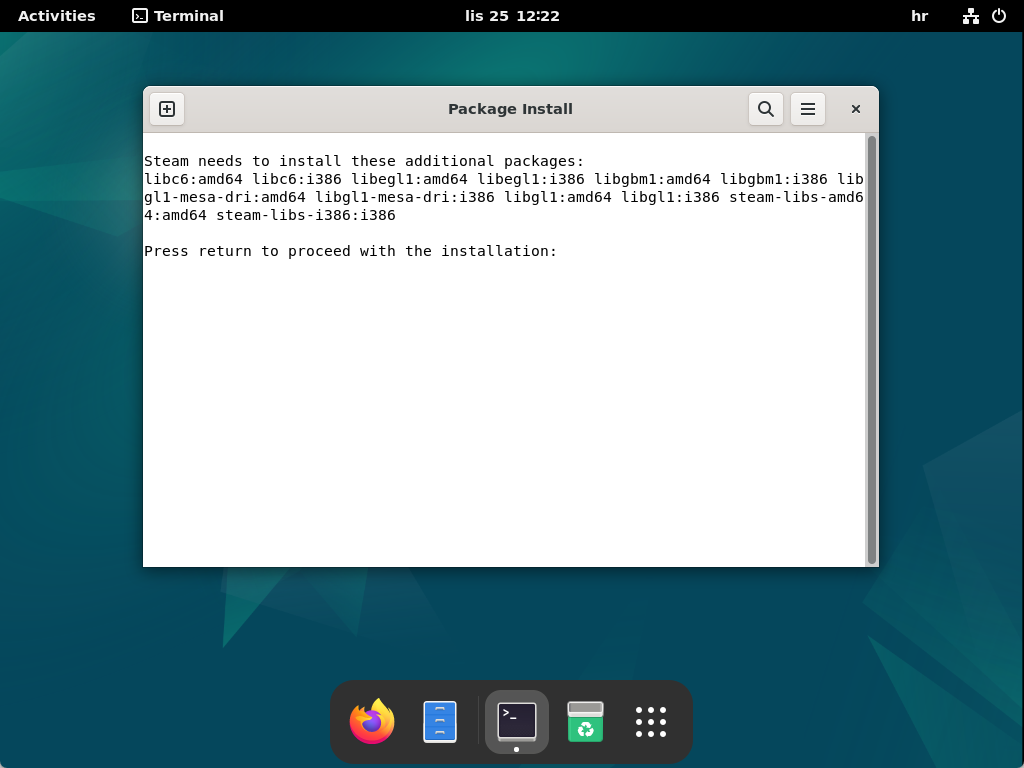
After pressing Enter, you will be asked to enter your login password and to confirm package installation, so please do so. Once you do it, the Steam Client installation will start:

Once the installation is complete, the Steam Client will start, and you will be asked to sign in or create a new Steam account. Either way, enjoy gaming on Debian!
If you’re into multiplayer gaming, we also recommend installing Discord. Discord is an instant messaging and VoIP social platform where you can find countless gaming channels you can join and participate in multiplayer gaming sessions organized there. To install Discord, you first need to download the installation package:
cd
wget "https://discord.com/api/download?platform=linux&format=deb" -O discord.deb
Once the package is downloaded, please execute the following in the Terminal to install Discord:
sudo apt install -y ./discord.deb
rm -f discord.deb
Collaboration Tools
During the COVID-19 pandemic, we saw a massive rise in the usage of collaboration tools, and the trend continued as work from home became increasingly popular. Today, any business is almost unthinkable without collaboration tools, and we have two suggestions for you: one that is nearly as old as the “modern” internet and one that is newer: Pidgin and Slack.
Pidgin is primarily an instant messaging client, but numerous plugins can extend its functionality. It allows connection to multiple chat networks simultaneously, and you can install it by executing the following in the Terminal:
sudo apt install -y --no-install-recommends pidgin pidgin-otrSlack is very similar to Discord but more business-oriented. It is a cross-platform instant messaging service where users can communicate through text messages, voice and video calls, file and media sharing, and many more. Also, as with Discord, the Slack installation is pretty straightforward. Installation file needs to be downloaded and installed with APT:
cd
wget https://downloads.slack-edge.com/releases/linux/4.34.121/prod/x64/slack-desktop-4.34.121-amd64.deb -O slack.deb
sudo apt install -y ./slack.deb
rm slack.debStreaming Apps
Streaming application development primarily targets mobile devices and smart TVs. On computers, you can use your browser to access streaming services, while applications are not so well represented. On Linux, they are very sparse, and only a few exist. Of those few, we will highlight YouTube and Spotify as the most popular.
YouTube doesn’t have an installer, and you can “set it as an app” the same way we did with Google’s “Office Suite” above in this guide (by creating a shortcut). As for Spotify, we’ll show you how to install it from the official repository. First, a repository signing key needs to be set:
curl -sS https://download.spotify.com/debian/pubkey_7A3A762FAFD4A51F.gpg | sudo gpg --dearmor --yes -o /etc/apt/trusted.gpg.d/spotify.gpgWith the key in place, a repository can be configured:
echo "deb http://repository.spotify.com stable non-free" | sudo tee /etc/apt/sources.list.d/spotify.listOnce both are in place, run APT update and install Spotify client by executing the following in the Terminal:
sudo apt update && sudo apt install -y spotify-clientMedia Players
Media players’ popularity and usage are dropping due to the rise of various streaming services and applications. Nonetheless, they are still very well represented, especially if you have a massive collection of MP3s, DVDs, and similar media. We recommend an all-in-one solution for you, something that can reproduce various audio and video recordings, and it does it very well—VLC Media Player.
You can install VLC Media Player by executing the following in the Terminal:
sudo apt install -y --no-install-recommends vlcOptional Recommendations
In the sections above, we’ve listed what we think are the most essential applications you should have on your desktop. They should cover most (if not all) usage scenarios and satisfy anyone’s needs regarding desktop setup. In the rest of this guide, we will list some optional but recommended applications that you should at least check out.
Password Managers
In a world where we use many online services in our everyday lives, it is essential to have strong passwords for every single one of those services. To help you with all those passwords, we recommend using a password manager, and our recommendation is 1Password.
1Password is a cross-platform, feature-rich, easy-to-use password manager that will help you store and manage all your login data, addresses, credit card data, and many more. The only possible caveat is it is not free. But you will get a 14-day trial, so you can at least try it. To start, go to the 1Password Pricing site and sign up for your 14-day trial. Once you have your trial account, you can install the 1Password client. To do so, please open the Terminal and set the signing key for the APT repository:
curl -sS https://downloads.1password.com/linux/keys/1password.asc | sudo gpg --dearmor --output /usr/share/keyrings/1password-archive-keyring.gpgNow add the 1Password APT repository:
echo 'deb [arch=amd64 signed-by=/usr/share/keyrings/1password-archive-keyring.gpg] https://downloads.1password.com/linux/debian/amd64 stable main' | sudo tee /etc/apt/sources.list.d/1password.listYou also need to add the debsig verify policy:
sudo mkdir -p /etc/debsig/policies/AC2D62742012EA22/
curl -sS https://downloads.1password.com/linux/debian/debsig/1password.pol | sudo tee /etc/debsig/policies/AC2D62742012EA22/1password.pol
sudo mkdir -p /usr/share/debsig/keyrings/AC2D62742012EA22
curl -sS https://downloads.1password.com/linux/keys/1password.asc | sudo gpg --dearmor --output /usr/share/debsig/keyrings/AC2D62742012EA22/debsig.gpg
Now you can update APT and install the 1Password client:
sudo apt update && sudo apt install 1passwordVirtualization
Virtualization allows running multiple virtual computers (virtual machines) on a single physical computer. Simply put, as an example, virtualization will allow you to test various operating systems before you decide which one to use. Theoretically, if your physical machine has enough resources (CPU, RAM, Disk Space, etc.), you can test them all at once by creating a dedicated virtual machine for each OS.
For basic “Desktop” usage, you can install Oracle VirtualBox, but I would not recommend it, as I consider it a bad piece of software. Alternatively, you can try a KVM/QEMU (libvirt) combo, something much more native to Linux but also a bit more complicated and not so out-of-the-box. Libvirt virtualization itself would require a lot more reading to get hold of, but if you would like to give it a try, check out our article on the subject:

KVM QEMU – Installation & Configuration Guide
Find out how to create a fully open-source virtualization environment in this QEMU and KVM installation and configuration guide.
Backup
While not mandatory, I would definitely recommend backing up at least your most essential data. If nothing else, take a USB flash drive and copy your essential data on it at regular intervals (schedule). For something more “robust,” there are countless services on Linux that will allow you to do regular backups of your data, from specific files and directories to whole disks.
To start with, I would recommend utilizing Google Drive. You will get 15GB of space (although shared with other Google services) for free, and you can access it from anywhere. We have a great article on how to backup essential data to Google Drive, so please feel free to check it out:

Google Drive Backup on Debian – Easy Guide
Learn how to backup files on Debian to Google Drive effortlessly with Rclone and Lsyncd. Secure your data on Debian today!
With this, we will conclude this guide. Please share if you liked it, and thank you for reading.