Author:
Željko Jagušt
Publish Date:
June 12, 2022
Estimated Reading Time:
11 minutes
I’ve noticed the same pattern after 20 years in system administration and several companies behind me. Email as a service was always present and mandatory, but nobody took it seriously. The same issues were always present, primarily cluttered mailboxes and constant problems with spam and malware.
Introduction
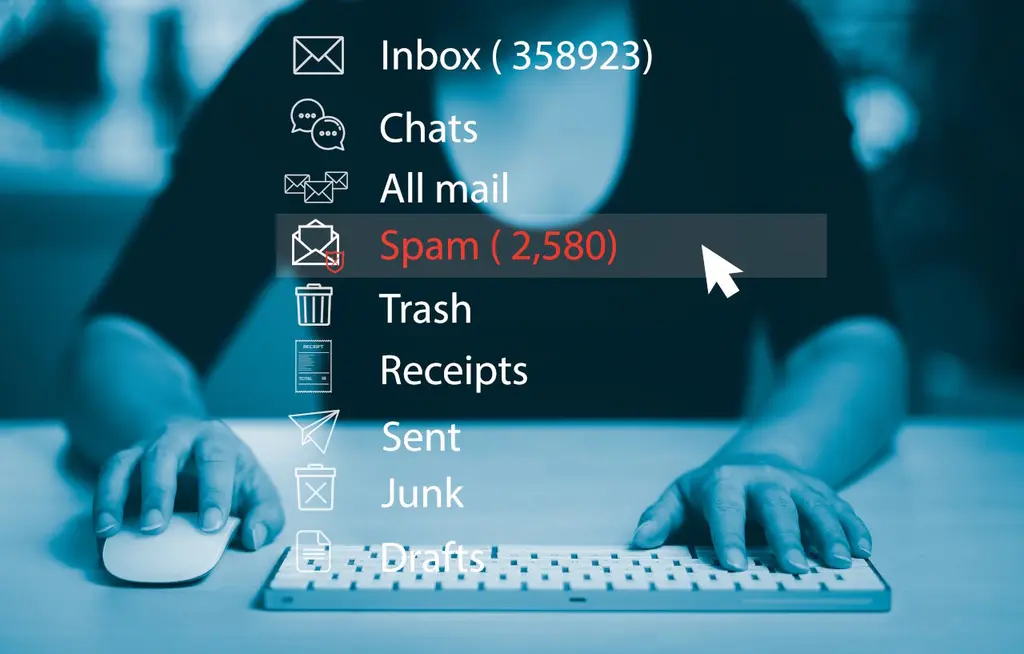
We all take email for granted. In our inbox, we read it (sometimes not even that), reply if needed, and then forget it. And it’s all OK until we get into trouble, where we have several thousand emails in our inbox, and spam starts hitting hard. Usually, we try to find a “quick” solution on the web in that situation, or we call someone we think will help us.
Now, let me tell you something. There is no quick solution. And since it is your email, it is your problem, not someone else’s. So take a few deep breaths, calm yourself down, stop being a lazy bastard, and take some time to resolve the problem. Yeah, it may be boring, but if you don’t fix it, the problem will not disappear, becoming even more prominent. You might as well start here.
Prerequisites
Although the same logic will work with most major email clients, this guide focuses on a Thunderbird Mail client. If you’re in doubt regarding installation, please feel free to check our Thunderbird installation guide:

Thunderbird – Installation & Configuration
Email is a service we all use daily. In this article, you will learn how to install and configure the Thunderbird email client.
Thunderbird Junk Settings
Everything related to spam, malware, and similar are considered Junk email. If you have an email account on one of the major free email services like Gmail, Yahoo, Outlook Live, and similar, you don’t have to pay much attention. Those services already have powerful spam filters that filter junk email almost entirely before it comes to your inbox. If you work for a big corporation with a mail server on-premises, you will (probably) not have to worry about that. In any other case, you must resolve the “spam problem” within your email client. Now, it’s pretty easy to do that with Thunderbird. Fire it up, and let’s get started.
With Thunderbird up and running, click on a menu button in the upper-right corner, and once the drop-down menu pops up, click on Account Settings:
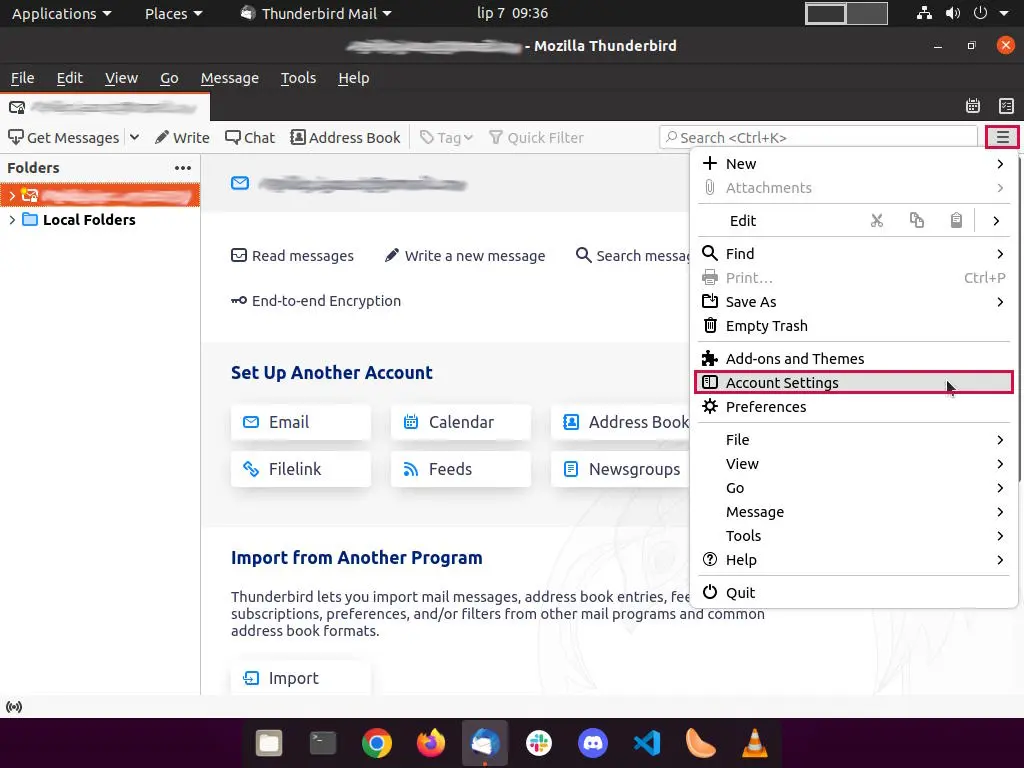
Source: zacks.eu
In Account Settings, click on Junk Settings and enable the following options under the Selection section:
- Enable adaptive junk mail controls for this account
- Personal Address Book
- Trust junk mail headers set by and select SpamAssassin from the drop-down list (optional)
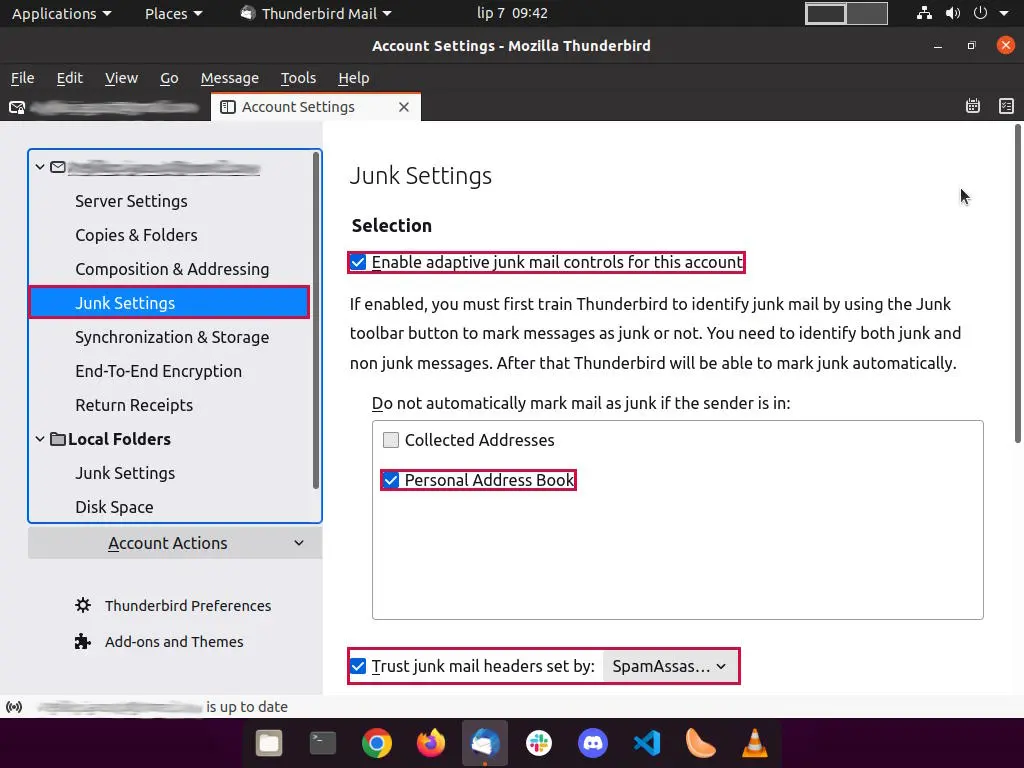
Source: zacks.eu
As for Destination and Retention, it’s up to you whether you will enable moving junk messages to a specific folder or not. I have it set as seen in the picture below:
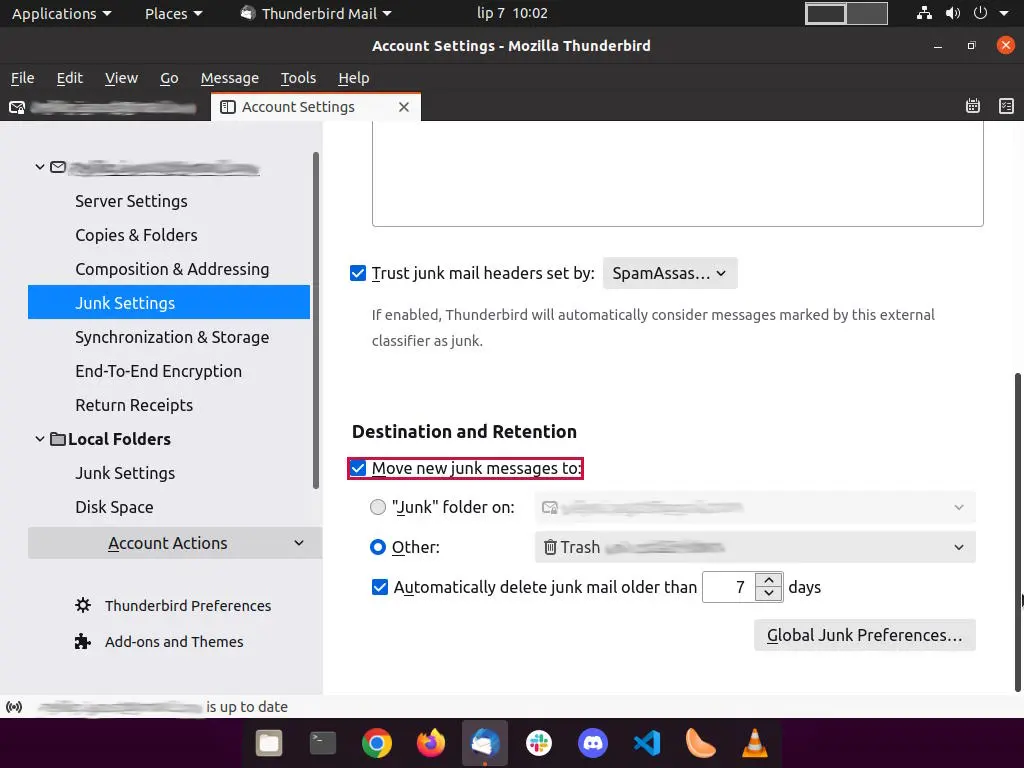
Source: zacks.eu
Under the first option (Enable adaptive junk mail controls for this account), please notice the following text:
If enabled, you must first train Thunderbird to identify junk mail by using the Junk toolbar button to mark messages as junk or not. You need to identify both junk and non junk messages. After that Thunderbird will be able to mark junk automatically.
So yeah, to start, you will have to mark each mail in your inbox you consider spam as spam. As for the Junk toolbar, switch to your inbox tab. Pay attention to your received emails, and you will notice a small flame/fire icon positioned on the left of each email:

Source: zacks.eu
You must click on the flame icon for each mail you consider spam. If you consistently mark a specific type of email as junk, Thunderbird will learn that that type of email should be marked as spam in the future. Given time, the Thunderbird adaptive filter will improve as it watches how you sort your email, and eventually, it will reach nearly 100% classification accuracy. From there, it will start to filter spam automatically.
If Personal Address Book is enabled, when you receive mail from a sender whose email address is in your address book, that mail will never be considered spam.
If Trust junk mail headers is set by option is enabled, it will automatically recognize mail that is marked by a separate junk mail filtering program. For this to work, your ISP/email provider needs to have a filtering program installed, which should support one of the options from the list. You can always check this with your provider.
With all the options enabled and configured and a bit of persistence, you will eliminate the spam problem once and for all.
Filter Email with Thunderbird
Message filters in Thunderbird allow you to organize your emails automatically. Once the filter is set, it will usually move the message to a specific folder, delete it, forward it to another email, and so on. You can set quite a few options for your incoming email, and I will go through a few most common examples in the rest of this guide.
Filter Email per Address
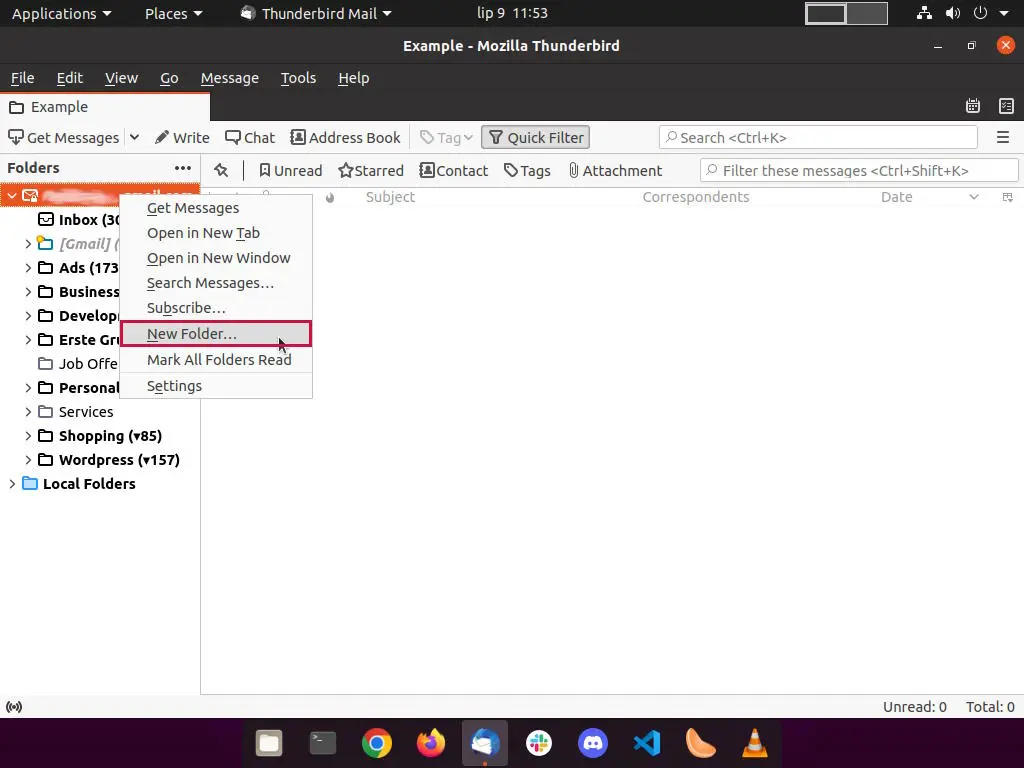
You must know the sender’s email address to filter email per address. For example, I want to move all messages sent by [email protected] to a specific folder. First, I will create a folder inside my mailbox. To do it, I will right-click on my mailbox and select New Folder… from a drop-down menu:
Source: zacks.eu
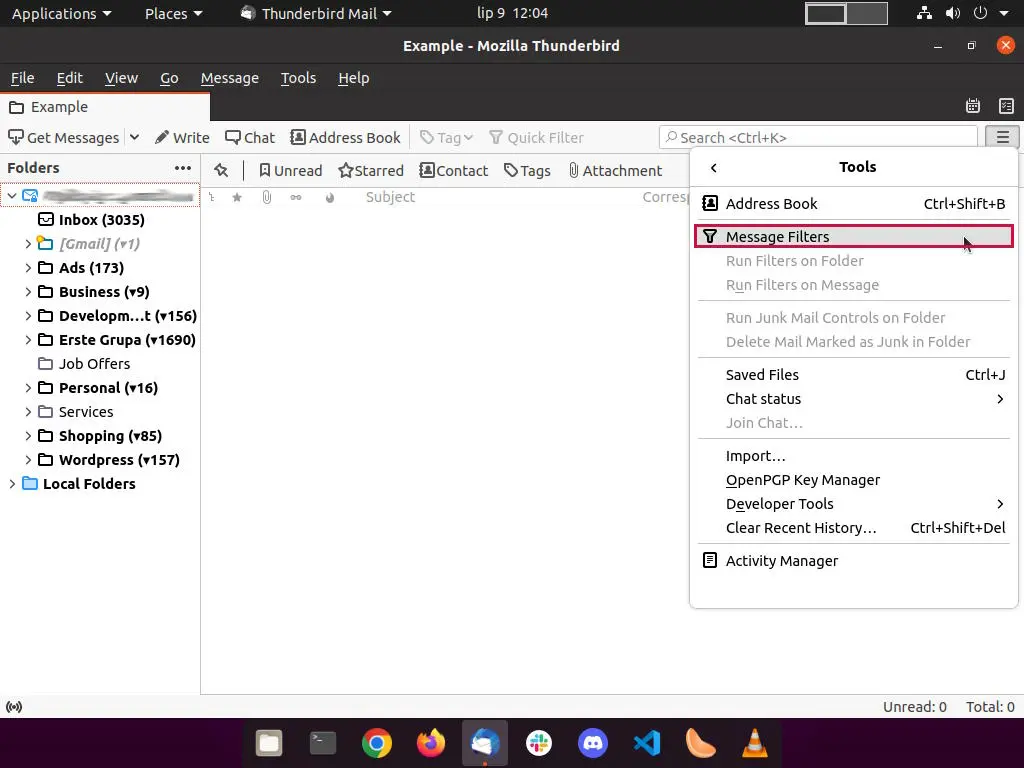
I will name the folder Example. Now, I can create a message filter. To do so, I will click on the main menu in the upper-right corner, and from there on Tools -> Message Filters:
Source: zacks.eu
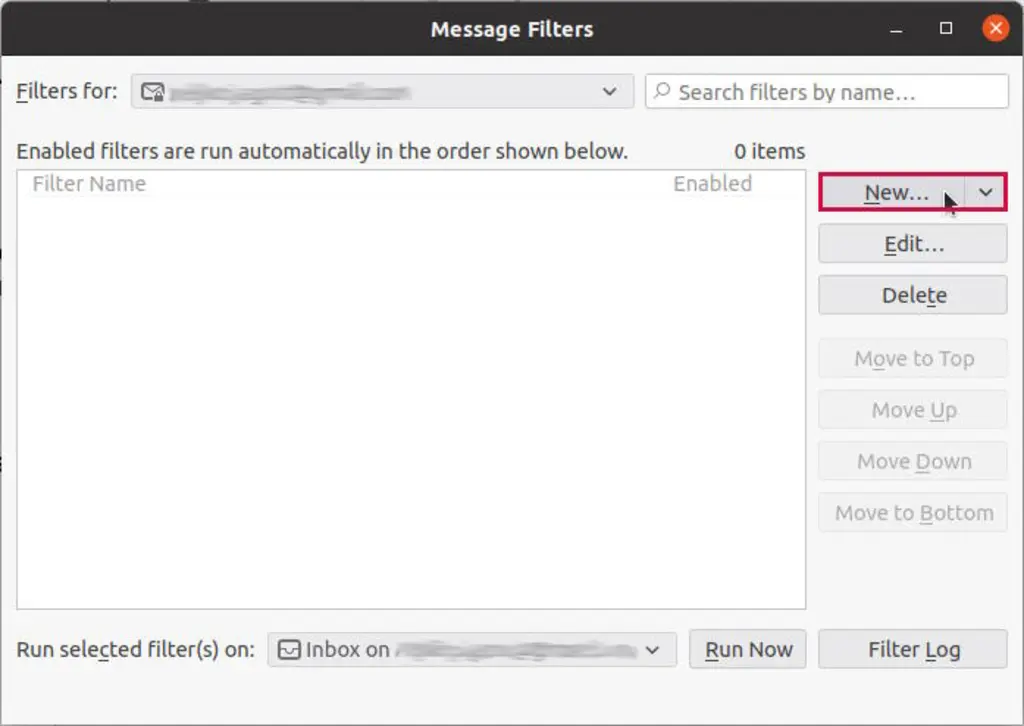
In the message filters window, I will click on New… to create a new filter:
Source: zacks.eu
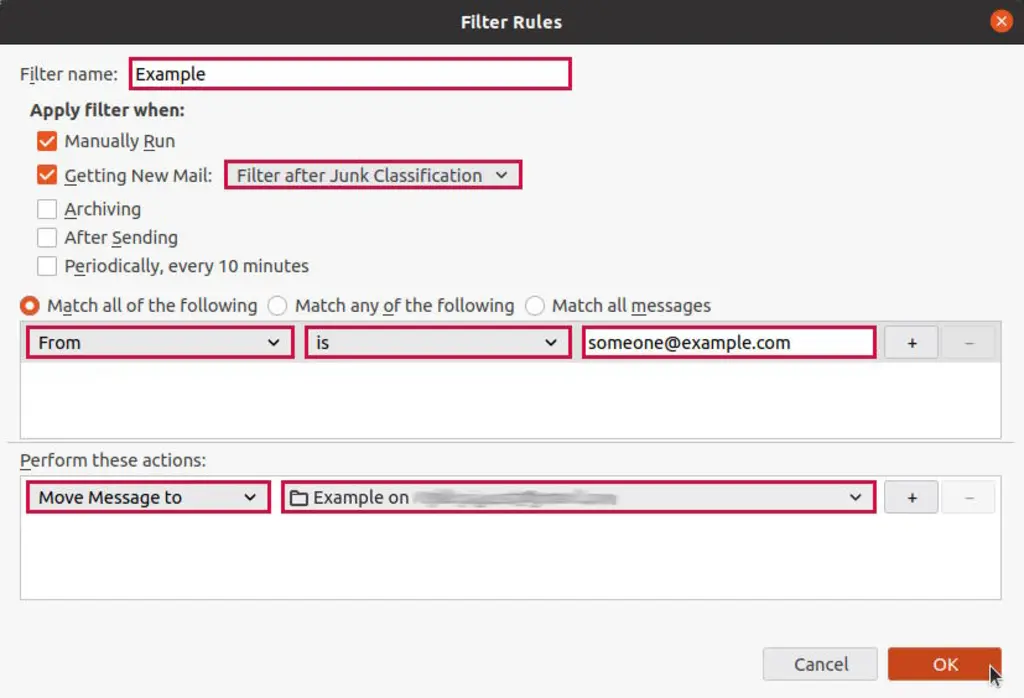
Once the Filter Rules window opens, I will define my rule. I will give the filter a name and set it up to run every time I receive new messages. I will also check Manually Run, which will run the filter on manually triggered runs.

Next, I will set my rule conditions. As you can see in the picture below, I’ve set my filter to move every message coming from [email protected] to the Example folder in my inbox. It’s as simple as that.
Now, I will confirm my filter rule by clicking the OK button. Once the filter rule window closes, I will have the option of executing the filter manually. To do so, I can click on the Run Now button:
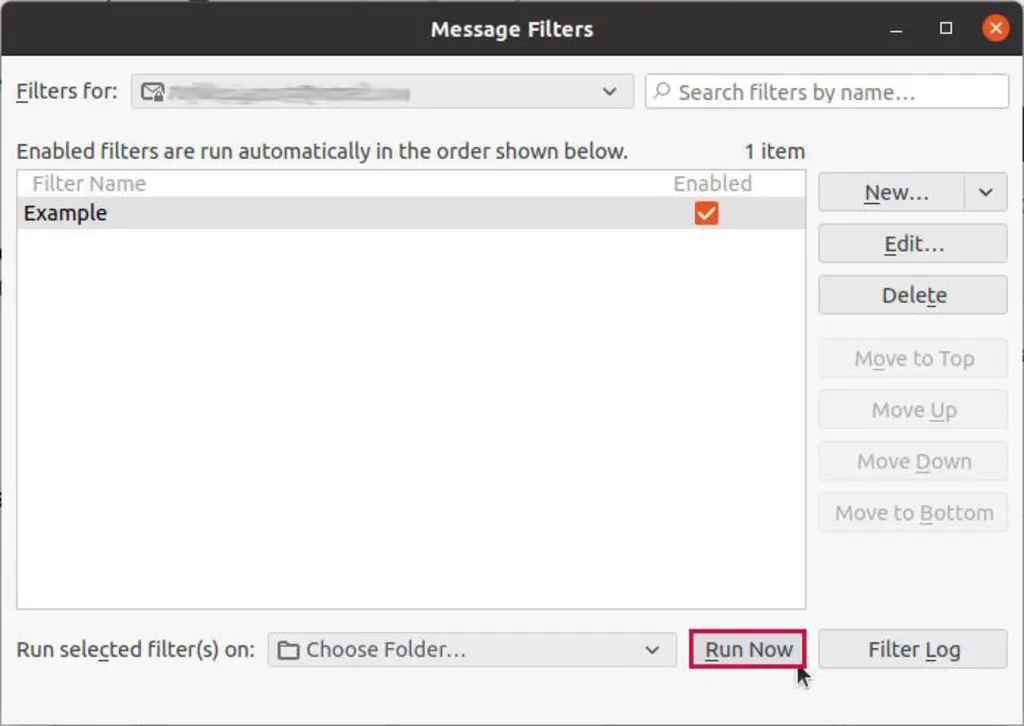
Once I execute the manual run, all the email messages I received from [email protected], currently in my inbox, will be moved to the Example folder. Also, in the future, every email from the same address will be automatically moved to the Example folder once I receive it. The filter will also trigger automatically every time I start the Thunderbird client.
Filter Email per Domain
The domain is part of the email address after the “@” character. So, if you are receiving email from the [email protected] address, example.com is the domain of that email address. To filter such messages, you must create a folder in your inbox where Thunderbird filter will move them after filtering. Once you create a folder, click on the main menu in the upper-right corner, and from there, click on Tools -> Message Filters. Once the message filter window opens, click the New button and create a domain-based rule:
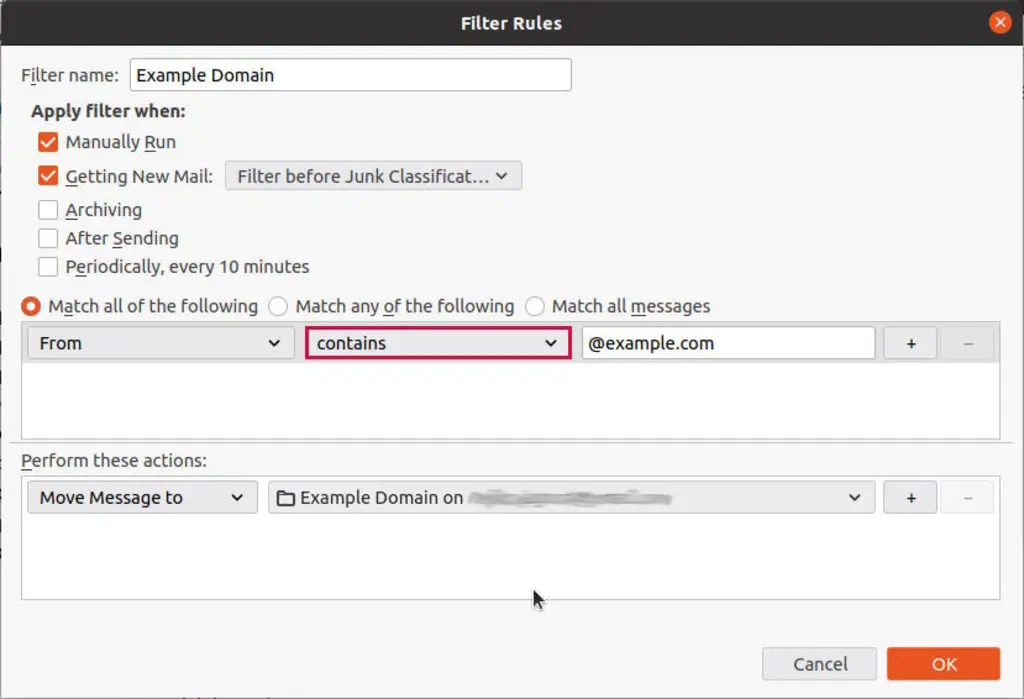
As you may notice in the picture above, the matching rule needs to be changed from “is” to “contains.” In the previous example, where messages were filtered specifically per full address, we matched only the part of the email address (only the domain part) here. This way, our filter will match all messages from anyone on the example.com domain email.
Filter Email per Subject
We can call the email subject the email message’s title. An example where you would filter such messages is if you subscribed to a newsletter on some website you like and now receive weekly or monthly email messages. The subject of such a message would usually be something like “Newsletter from the website – topic” or something similar, and part of it would always be the same, let’s say Newsletter from the website. Now, we can use that part (tag) to create our filter. The procedure of making such a filter is the same as for the previous two examples, with the following filter rule:

As you can see in the picture above, we are matching a Subject that contains a [TAG], where the tag can be “Newsletter from the website –.” By creating such a rule, the filter will move messages containing that tag to a folder you created explicitly for such messages.
Filter Combination
Options for combining the filter rules are virtually limitless in Thunderbird. You can define a combination of rules in a single filter. Below, I will give a simple example where I will combine address and domain rules into a single filter:
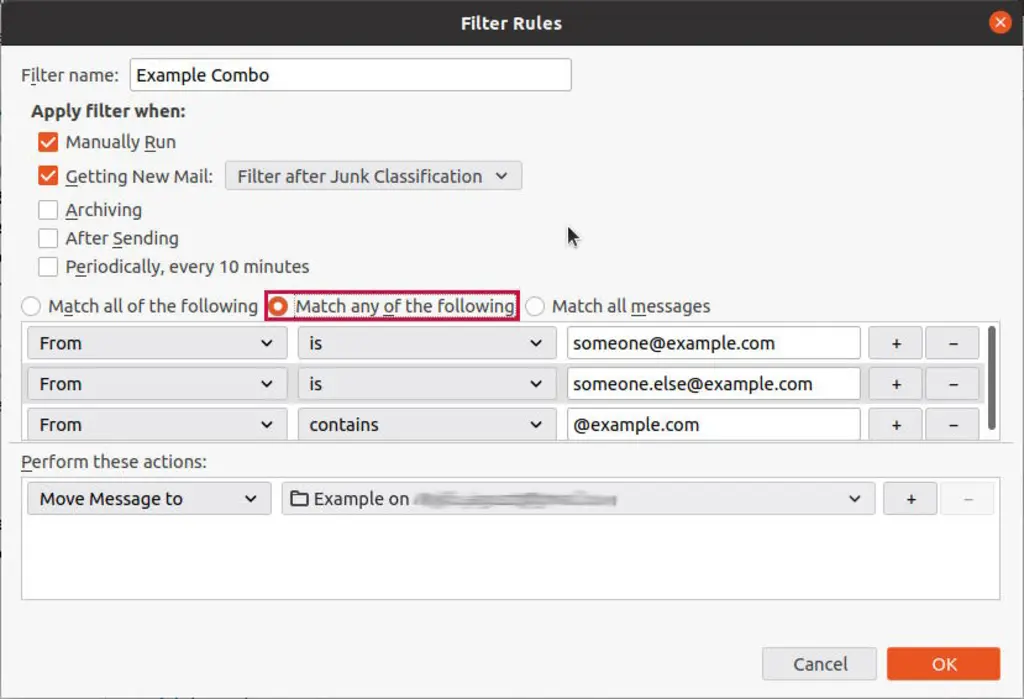
As shown in the picture above, when you have multiple rules, you must tell your filter to match any of the specified rules. To do so, select Match any of the following option.
With some time and common sense, you can get to a point where all your incoming messages are finely filtered, and each message is moved to a specific folder (or deleted, forwarded to another email, etc.). It may take some time and effort on your side, but the benefit of having a well-organized mailbox is something I consider well worth it.
Email Retention (Optional)
Let’s return to our “Newsletter from a website” subject filter example above. Again, let’s presume you’re receiving email messages every week from a website newsletter to which you subscribed. You created a filter for such messages, which will move them to a specific folder once they arrive in your inbox.
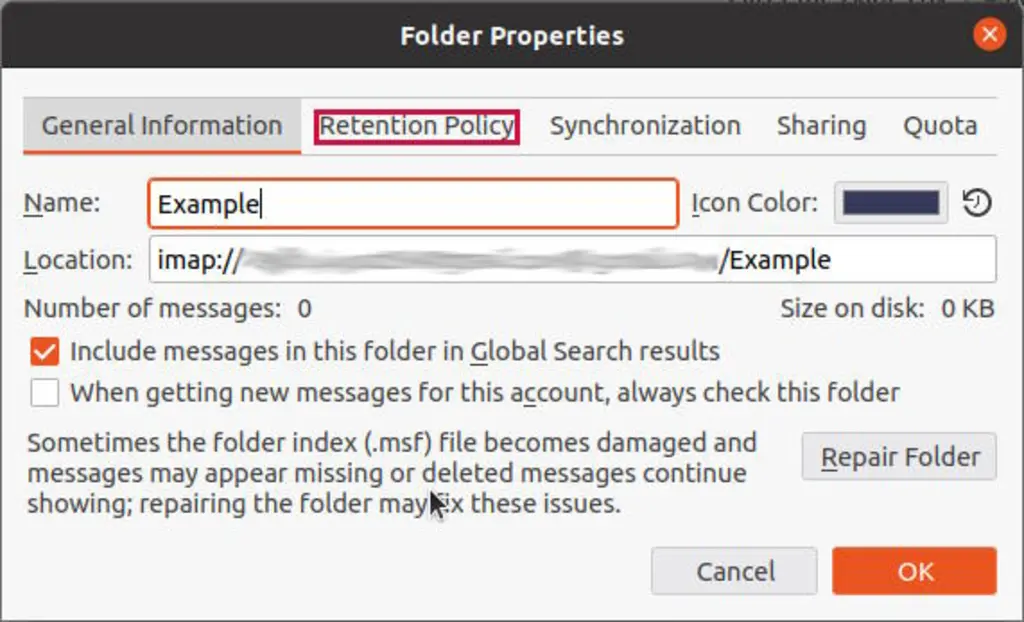
Let’s also presume you don’t need two or more years’ worth of such newsletter messages. You don’t need them because such an old newsletter is probably irrelevant and may be deleted. You can delete those messages manually or define a retention policy on the folder where such messages are stored. To do so, right-click on the folder in question and click on Properties:
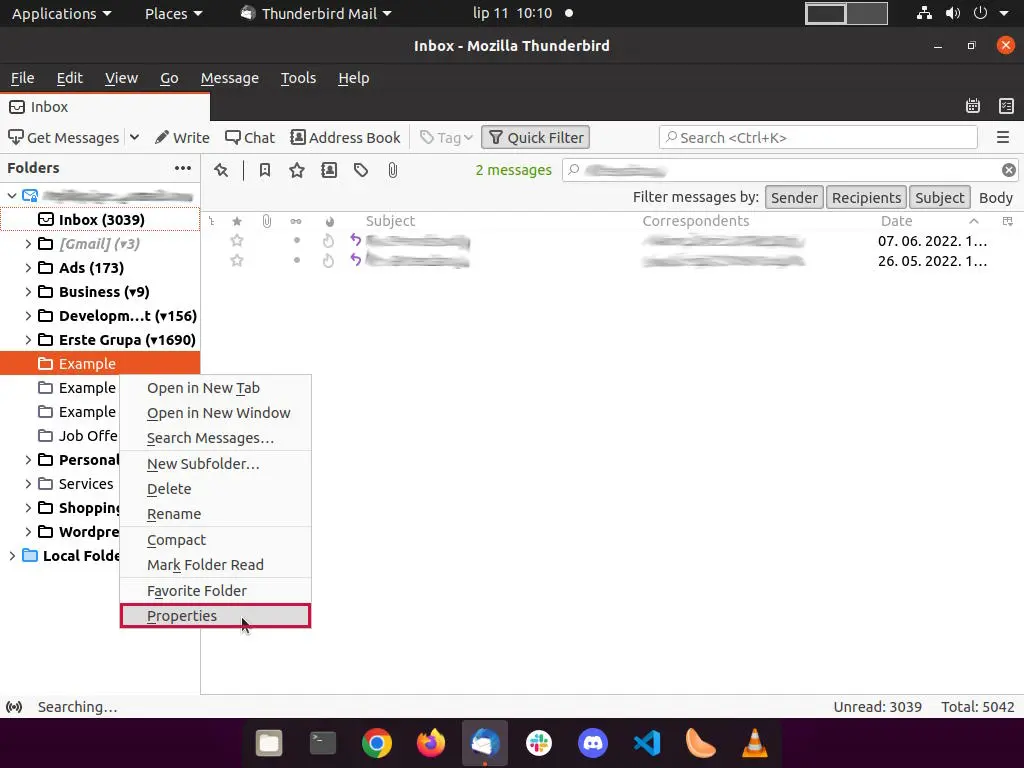
Once the folder properties window opens, click on the Retention Policy tab:
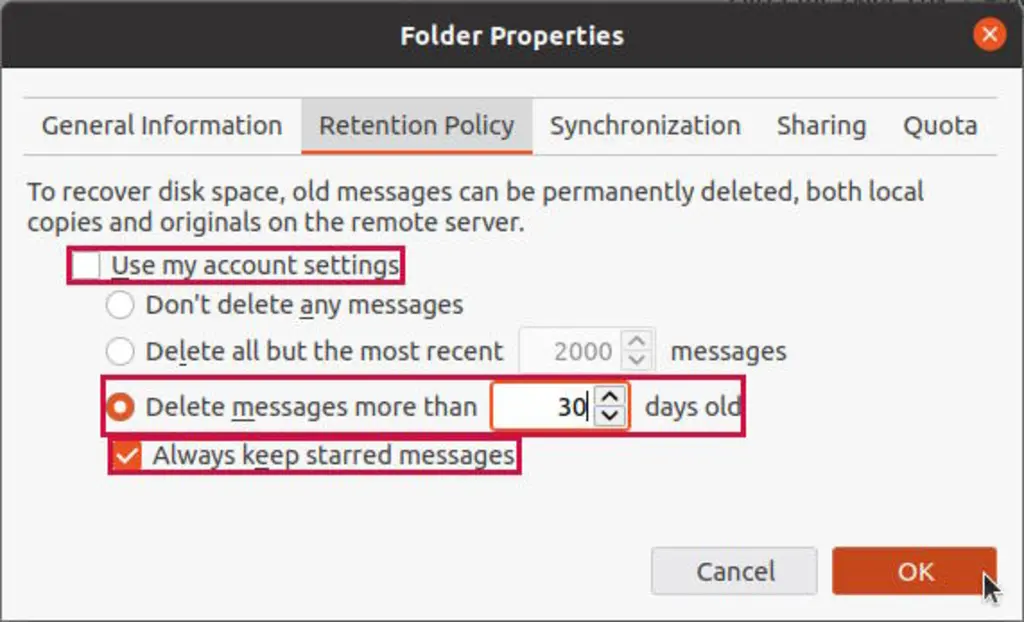
First, uncheck Use my account settings in the retention policy tab so other options become available. Here, you can either specify how many of the most recent messages you want to keep or delete all messages older than the specified time. If you consider specific messages essential and don’t want them deleted, you can select Always keep starred messages. This will prevent the retention policy from being able to delete such messages.
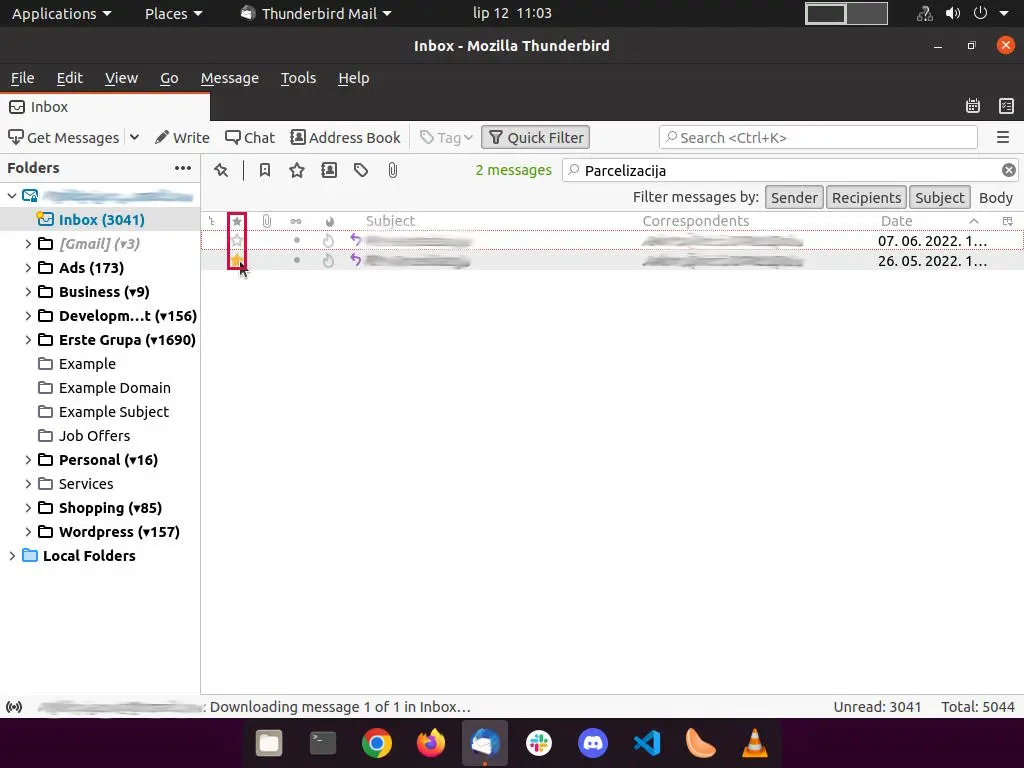
To “star” a message, you need to click on a “star” symbol next to the message in your inbox or folder that contains your messages:
With a well-defined retention policy, you will never have to delete a single email message again, leaving you with only relevant messages in your mailbox.
Sending Emails (Optional)
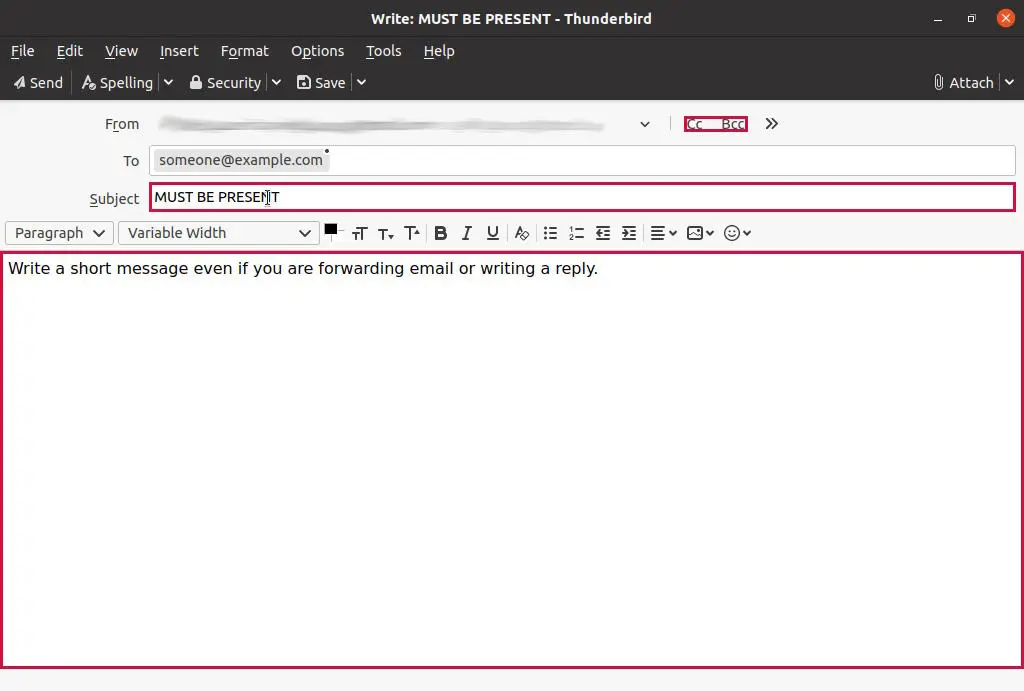
There are specific rules that need to be satisfied when sending emails. For instance, I receive many email messages that don’t have a subject or emails with files attached and no message. Both will end up in my Spam/Junk folder. All the major email services like Gmail, Yahoo, and similar have filters that will classify such messages as spam. If you have a habit of sending such emails, please stop now. Eventually, your email address will be classified as spam, and all messages you send will be classified as spam on the receiving end. To avoid this, please respect the following rules when sending emails:
- Use CC and BCC when sending emails to multiple recipients
- Always specify the subject of the message
- Always write a message, even if you are replying to or forwarding a message.
With all this in place, you should never again have to worry about your emails, and you can focus on more critical tasks. Thank you for reading!