
Author:
Željko Jagušt
Publish Date:
December 5, 2023
Estimated Reading Time:
9 minutes
Welcome to our guide on ClamAV and Maldetect setup on Debian Linux. This guide will show you the essential steps for securing your system against potential threats.
Introduction
In this tutorial, we’ll provide a detailed walkthrough, empowering you to enhance the security of your Linux OS. Our step-by-step instructions will strengthen your defense against malware, ensuring a resilient and protected
We will be using Debian Linux, and you can install ClamAV and Maldetect on both desktop or server environments. Let’s dive into the process and safeguard your Debian operating system effectively.
Prerequisites
As mentioned in the prerequisites, you need a Debian Linux installed on your computer or a server. If you don’t have one, we have a couple of articles that can help you with Debian installation and initial configuration:

Debian 11 Server – Minimal Installation Guide
Follow this guide for a Debian 11 Server minimal installation, providing a solid foundation for any server setup or project you want to build.

Debian 11 Server – Initial Customization Guide
Discover introductory steps to streamline performance, security, and administration in our Debian Server Initial Customization guide.
The guides above will cover the installation and customization of the Debian server environment. If you’re interested in how to install the GNOME desktop environment on top of it, the following articles will help you with that:

Install GNOME Desktop Environment on Debian – Easy Guide
Discover the GNOME Desktop Environment elegance and modern features. Follow our Debian installation guide for a seamless experience.

GNOME Customization on Debian – Complete Guide
Transform your Debian Linux desktop with our GNOME customization guide. Personalize your user experience with ease. Get started now!
Once your Debian is ready, you can start with the Maldetect malware scanner and ClamAV antivirus installation and configuration.
Antivirus Engine – ClamAV
ClamAV is an open-source antivirus engine designed to detect various types of malware, including viruses, trojans, and other malicious software. It is known for its effectiveness in scanning files on Linux-based systems and is widely used in email gateways, web servers, and file servers to protect against malware threats.
In the table below, you can see some key features and aspects of ClamAV, along with some general info about the project itself:
-
KEY FEATURES
-
GENERAL PROJECT INFO
- Open Source
- Cross-Platform Compatibility
- Scalability
- On-Demand and On-Access Scanning
- Signature-Based Detection
- Heuristic Analysis
- Command Line Interface (CLI) and Graphical User Interface (GUI)
- Integration with Mail Servers
- Regular Updates
- Project Website: https://www.clamav.net/
- Project Documentation: https://docs.clamav.net/
- Project Code: https://github.com/Cisco-Talos/clamav
Please follow the sub-sections below to learn how to install ClamAV on your Debian Linux operating system.
ClamAV Installation
ClamAV can be installed with APT on Debian as it is in the official Debian software repositories. To install it, please execute the following command in the Terminal:
apt install -y --no-install-recommends clamav clamav-base clamav-freshclam clamav-daemon clamdscan
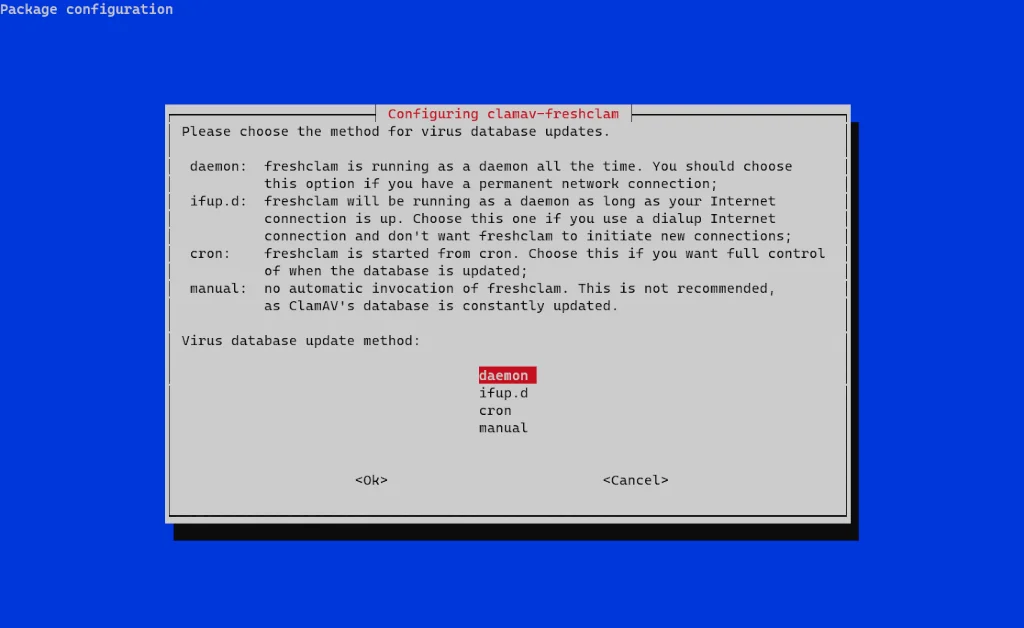
You will be asked a couple of questions during the installation. First, you must select the method for updating the virus database. Daemon is perfectly fine here:
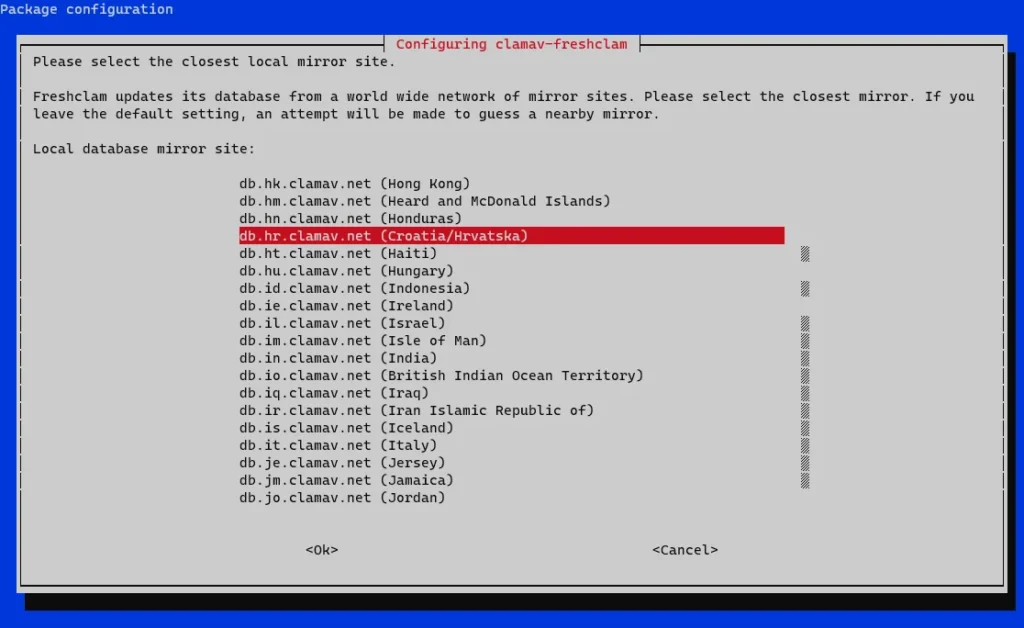
On the next screen, you will be asked to select the closest mirror from which the ClamAV will pull the updates. Please choose the one that is closest to your location:
Accepting the defaults for the rest of the questions the installer will ask is fine, so press Enter on your keyboard to do so.
Installation will set configuration files in the /etc/clamav directory, and database and signature updates will be downloaded in the /var/lib/clamav directory.
ClamAV Configuration
Configurations for ClamAV daemon (clamav-daemon) and updater (freshclam) come with reasonable default options, so they can be left as-is. What I will show you in this section is how to define a custom scan job for a specific location(s) on your file system.
I will show you how to configure a scan job for the path(s) on your system that ClamAV should scan during its run and how to set a cron job (scheduled task) with a definition of when to start the scan.
Usually, it’s best only to scan the locations where most “user-created” files are located. That can be the home directory on your desktop or a folder where website(s) data is located on a public web server.
A list of locations (directories on the filesystem that need to be scanned) can be supplied to ClamAV by simply listing them in a simple text file. For example, if I want ClamAV to scan my home directory, I will open a new file /etc/clamav/clamav-paths.txt and paste in the following content:
/homeWith paths to scan defined, a scan job can now be configured. You can create a small BASH script with all the required scan parameters for that. To do it, open a new file /usr/local/sbin/clamav-scan.sh and paste in the following content:
#!/usr/bin/env bash
set -euo pipefail

## Flush log
echo -n > /etc/clamav//clamav_scan_results.txt

## Scan files
/usr/bin/clamscan -r -z -i --file-list=/etc/clamav/clamav_paths.txt --log=/etc/clamav/clamav_scan_results.txt
Once you save and close the script, make it executable:
chmod 750 /usr/local/sbin/clamav-scan.shThe last thing to do here is to set a corn job for the scan. To do so, you can open a new file /etc/cron.d/clamav-scan and paste in the following content:
# Execute virus scan on home folder
MAILTO=root
0 3 * * * root /usr/local/sbin/clamav-scan.sh
Save and close the file. With all this in place, ClamAV will scan the home folder every morning at 3 o’clock and email the root user if something goes wrong.
Malware Scanner – Maldetect
Linux Malware Detect (LMD) is an open-source malware scanner for Linux-based systems. It is developed by R-fx Networks and is primarily used to detect and remove malicious software on Linux servers. LMD is particularly popular in web hosting environments and server setups where security is a critical concern.
You can see some key features LMD offers, along with some info about the project in general in the table below:
-
KEY FEATURES
-
GENERAL PROJECT INFO
- Signature-Based Detection
- Heuristic Detection
- Inotify Monitoring
- Quarantine and Removal
- Integration with ClamAV
- Email Notifications
- Command Line Interface (CLI)
- Configurability
- Project Website: https://www.rfxn.com/projects/linux-malware-detect
- Project Documentation: https://www.rfxn.com/appdocs/README.maldetect
- Project Code: https://github.com/rfxn/linux-malware-detect
In the following sub-sections, I will show you how to install and configure LMD on your Debian Linux system.
Maldetect Installation
Maldetect installation is straightforward. First, you need to download and extract the latest version of the software:
cd
wget http://www.rfxn.com/downloads/maldetect-current.tar.gz
tar xzf maldetect-current.tar.gz
rm -rf maldetect-current.tar.gz
The Maldetect package will be extracted into a folder whose name contains the latest version (at the moment of writing, the latest version was 1.6.5). To satisfy all, I will set a variable here that will help me to continue the installation regardless of the version number in the folder name:
MALDET_VERSION=$(ls | grep maldetect)I will use that variable now to access the extracted folder containing Maldetect installation files and install the Maldedect on the system:
cd $MALDET_VERSION
./install.sh
The installation will install Maldetect in /usr/local/maldetect directory. It will set a main configuration file, executable binary, and daily cron job. It will also check the initial signatures and download new malware signatures if an update is required.
Maldetect Configuration
To start with Maldet, I like to modify its main configuration a bit. Maldetect’s main configuration file is located at /usr/local/maldetect/conf.maldet. Please open the file and make sure the following options are set:
email_alert="1"
email_addr="root"
scan_clamscan="1"
scan_find_timeout="14400"
scan_export_filelist="1"
quarantine_hits="1"
quarantine_clean="1"
#default_monitor_mode="users"
default_monitor_mode="/usr/local/maldetect/monitor_paths"
Now, a file with a list of locations Maldetect will scan can be set. For example, I also want Maldetect to scan my home directory. To do so, open a new file /usr/local/maldetect/monitor_paths and paste in the following content:
/homeAs a last step, a log rotation configuration for the event and inotify logs can be set so they don’t grow indefinitely. To do so, open a new file /etc/logrotate.d/maldetect and paste in the following content:
/usr/local/maldetect/logs/event_log {
    missingok
    weekly
    compress
    notifempty
    size 1M
    rotate 4
    su root root
    create 0644 root root
}
/usr/local/maldetect/logs/inotify_log {
    missingok
    weekly
    compress
    create 0644 root root
    notifempty
    size 1M
    rotate 4
    su root root
    postrotate
        /bin/systemctl condrestart maldet.service > /dev/null 2>/dev/null || true
    endscript
}
Save and close the file and restart the Maldetect service to make this all work:
systemctl restart maldet.serviceIt’s important to note that while LMD and ClamAV are valuable tools for enhancing the security of Linux servers, no single security solution can provide complete protection. Regular system updates, proper configuration, and a combination of security tools are typically recommended for a robust defense against malware and other security threats. Additionally, LMD and ClamAV are just single components of a comprehensive security strategy, and they should be used in conjunction with other security measures such as firewalls, intrusion detection systems, and regular security audits.
With that said, I will conclude this guide. Please share it if you like, and thank you very much for reading.