
Author:
Željko Jagušt
Publish Date:
January 27, 2024
Estimated Reading Time:
11 minutes
Welcome to the ultimate guide to installing Pi-hole on Debian Linux! This comprehensive tutorial will walk you through the step-by-step process of setting up Pi-hole, a powerful ad-blocking solution, on your Debian Linux server. Pi-hole allows you to block ads at the network level, providing a seamless browsing experience across all devices on your network.
Introduction
Pi-hole was initially developed for a Raspberry Pi single-board system. The idea was to use it as a low-power-use yet full-featured network privacy and security appliance. Of course, Raspberry Pi is not mandatory, and you can install Pi-hole on any spare computer you have lying around. If you don’t have a spare computer, you can install Pi-hole in a virtual machine (VirtualBox) or as a containerized app (Docker).
Pi-hole offers several advantages over traditional ad blockers. Firstly, it operates at the network level, meaning that all devices on your network will benefit from ad blocking without needing individual ad blocker installations. This makes it ideal for households or small offices with multiple devices.
Secondly, Pi-hole is highly customizable. You have complete control over which blocklists to use, allowing you to tailor the ad-blocking experience to your preferences. You can also allow specific domains or devices to ensure that essential services are not blocked. In this guide, I will show you how to install a standalone Pi-hole instance. Let’s see how.
Prerequisites
As a bare minimum, you will need a computer to install Pi-hole. In this scenario, Pi-hole can be installed directly on your computer running Debian Linux (or any other Linux distribution). For MS Windows and macOS, you will need either a virtualization (VirtualBox) or container (Docker) sub-system.
For this guide, I will utilize a slightly more “advanced” setup. I will introduce a “middleware” machine acting as my home (or small office) server and install a Pi-hole on that. Let’s observe the environment for more details.
Environment
I have a setup where my ISP router is connected to my home server. A secondary network interface on my server is connected to a switch to which all other devices on my network are connected:
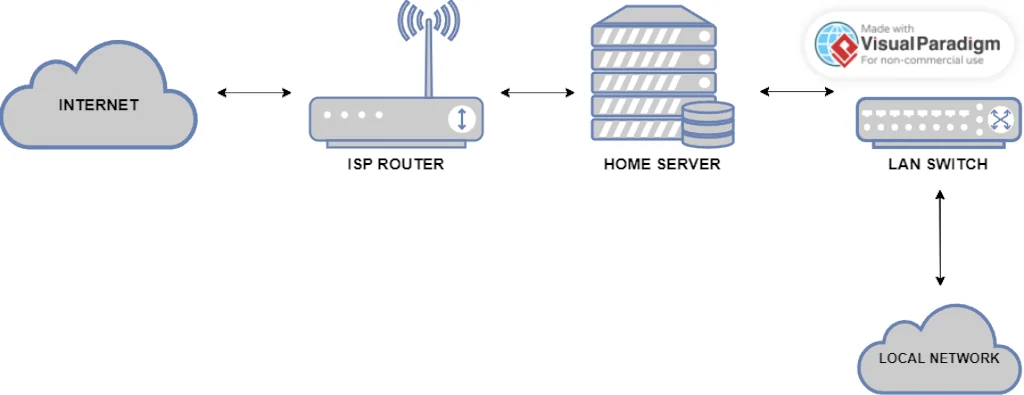
Below, you can observe the relevant IP addresses which I will use in this guide:
- ISP ROUTER
- Primary Interface IP: 172.17.0.1
- HOME SERVER
- Primary Interface IP (connected to ISP Router): 172.17.0.2
- Secondary Interface IP (connected to a Switch): 192.168.100.1
- LOCAL NETWORK
- Network Subnet: 192.168.100.0/24
I have turned off both DNS and DHCP services on the IPS Router, as Pi-hole on my server will be in charge of those. Once you have everything connected, let’s see how to install the Pi-hole first.
Pi-hole Installation
Pi-hole is not available in the official Debian software repositories (nor the third-party ones), but it is still straightforward to install. You must download the installation script from Pi-hole’s website and execute it in Terminal. Download the script first by executing the following command:
wget -O basic-install.sh https://install.pi-hole.netNow, you can start with the installation by executing the following command:
bash basic-install.shThe installation script will perform a few basic checks to see if your system is compatible, and then you will be greeted with an automated installer screen:

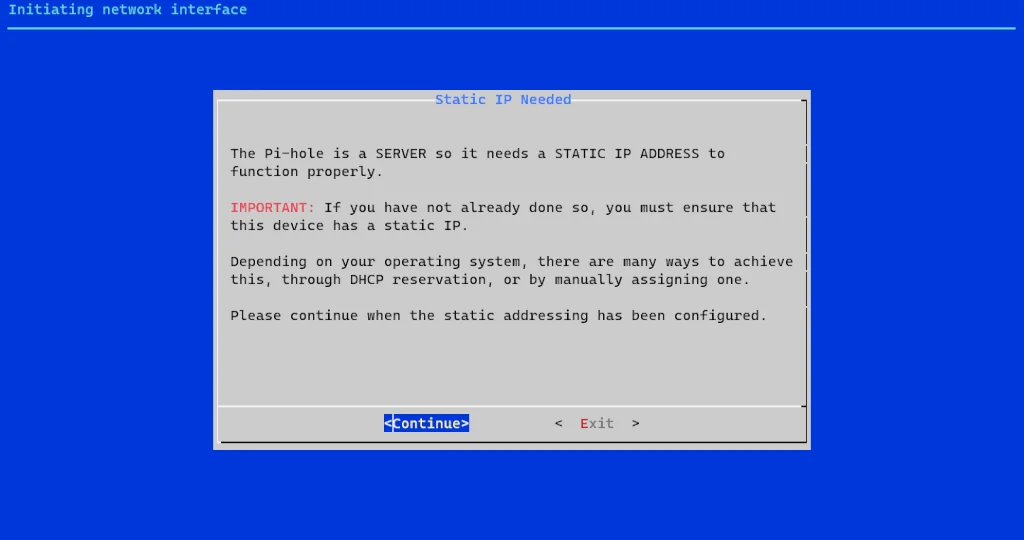
Press Enter on your keyboard to continue on this and the following screen. This will bring you to the “Initiate network interface” screen. Under the assumption you have assigned a static IP address to your server’s primary interface, select Continue and press Enter on your keyboard:
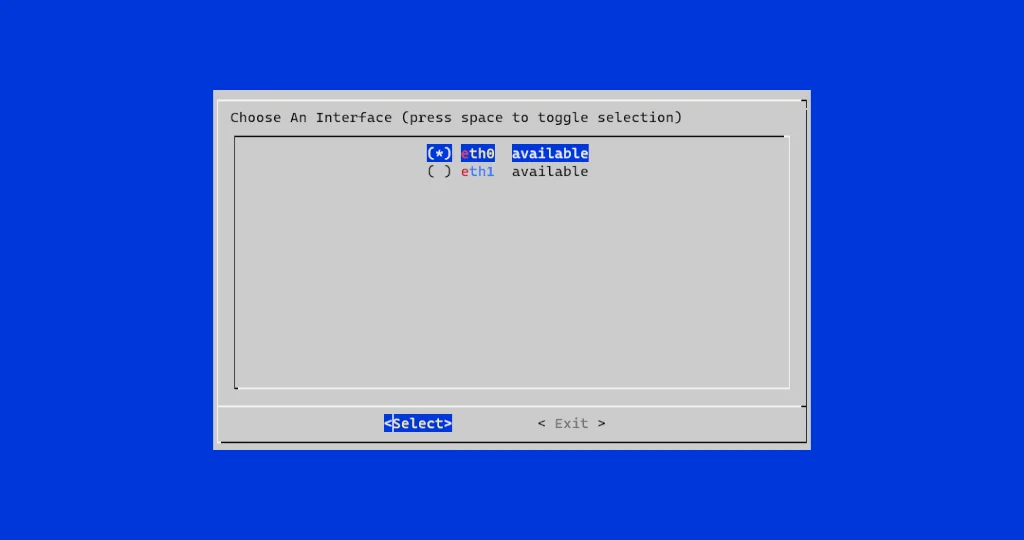
On the next screen, select your primary interface (eth0):
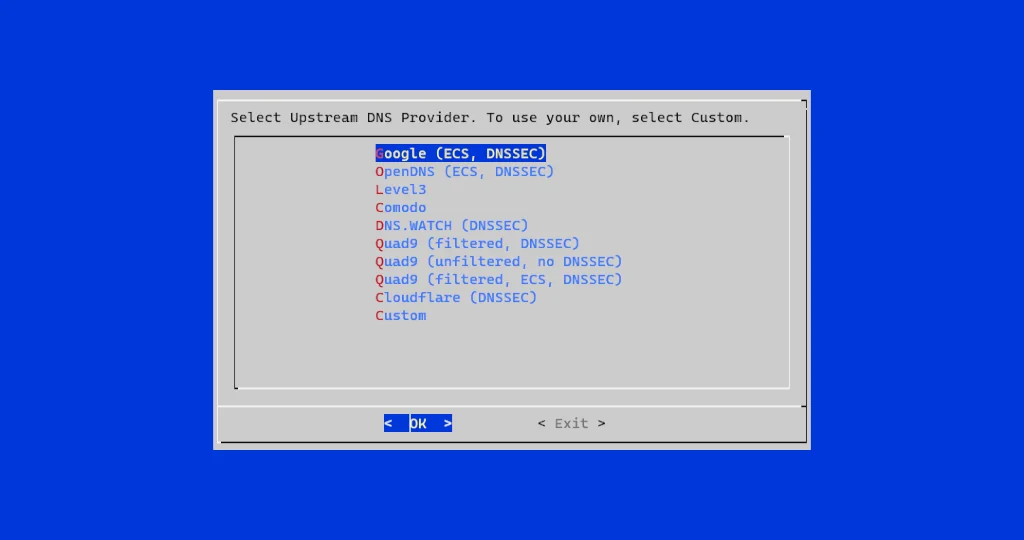
Here, you need to choose upstream DNS servers. Let me explain this a bit. Pi-hole by itself is unable to resolve addresses on the Internet. To do so, it needs to ask another DNS server, a so-called “upstream DNS server,” to do that. You have several options here, and for the purpose of this guide, I will continue with Google:
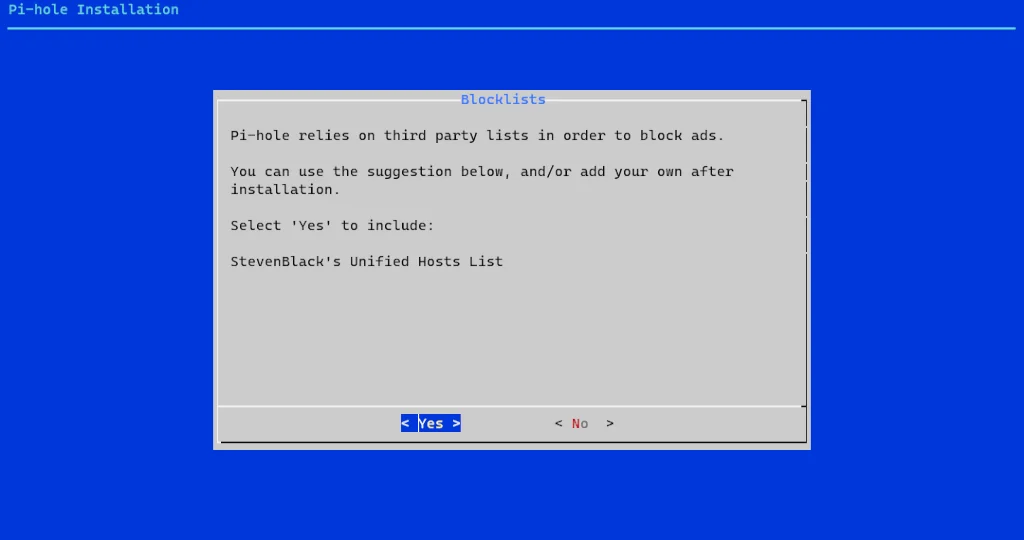
Pi-hole must be supplied with a list of known ad suppliers to block ads. I strongly suggest you resume with a default list. Otherwise, you will need to “compose” the list yourself after you install Pi-hole:
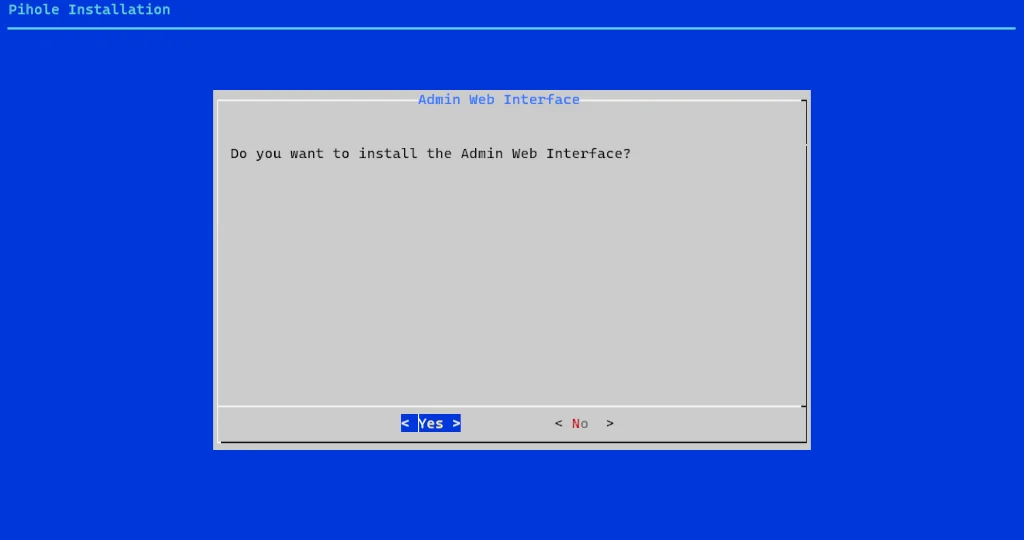
While it is not mandatory to install the admin interface, I suggest you do so. If you opt to do so, the script will install a couple of PHP modules and a Lighttpd web server, and it will set a virtual host for a web-based Pi-hole admin interface:
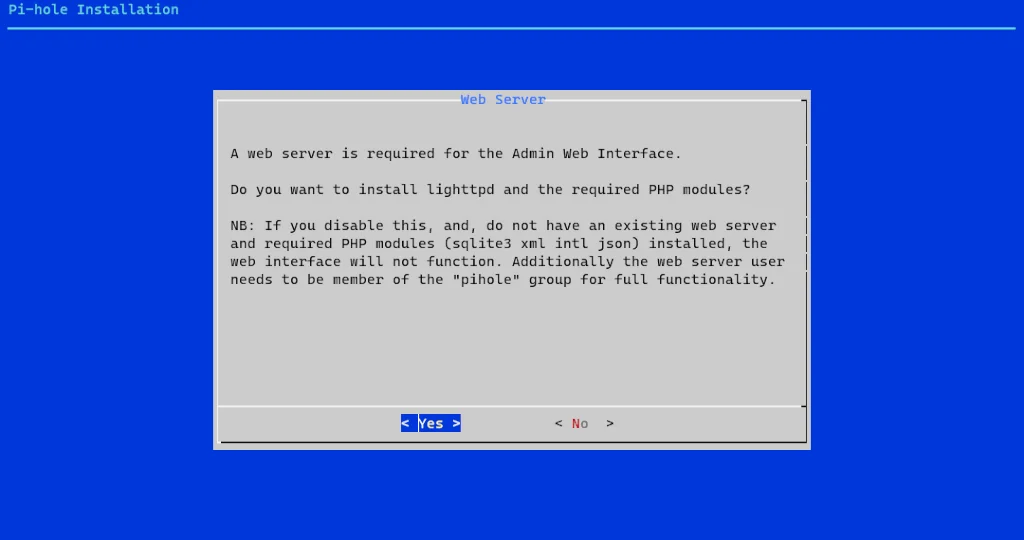
On the following screen, you will see an overview of the components required to install the admin interface. You can continue with that:
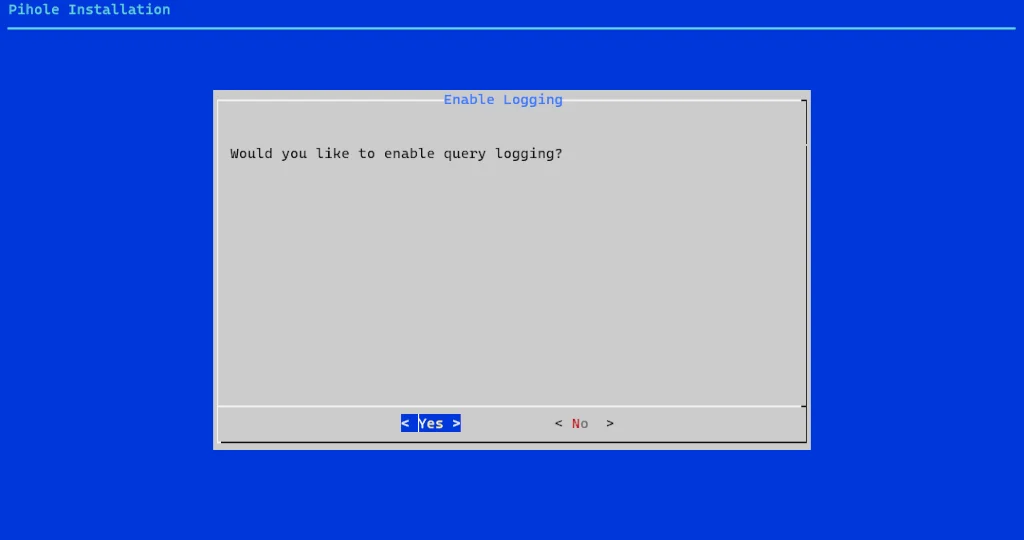
Query logging is also not mandatory for Pi-hole to do its work, but I suggest you enable it:
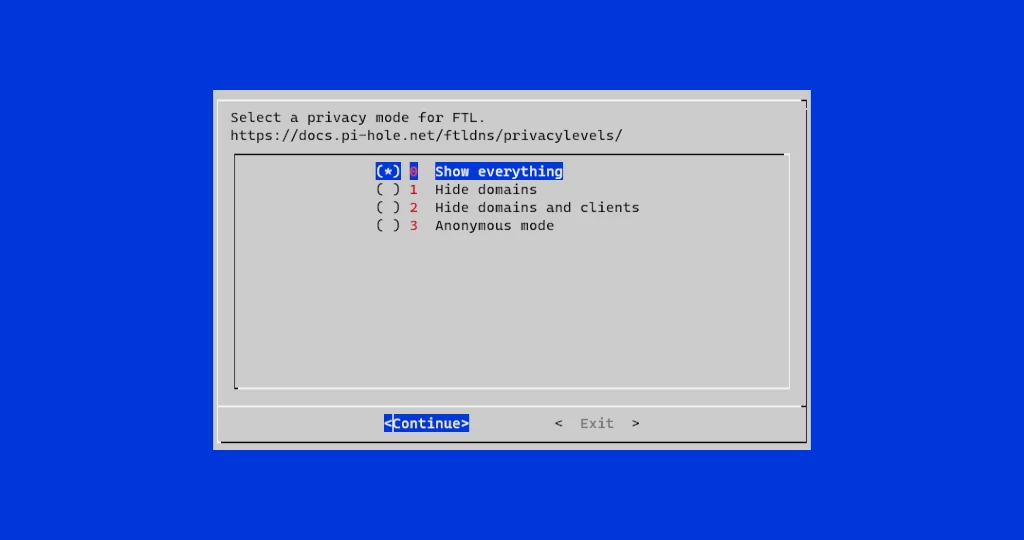
You will be asked to select the privacy mode for logs on the next screen. If you are running Pi-hole on a home network, choosing “Show everything” is fine. In case you are running Pi-hole on company infrastructure, you must comply with privacy laws based on your location. For instance, if you are in the EU, you must comply with GDPR. In cases like that, you will have to select one of the three “anonymous” options offered that best adhere to the privacy laws:
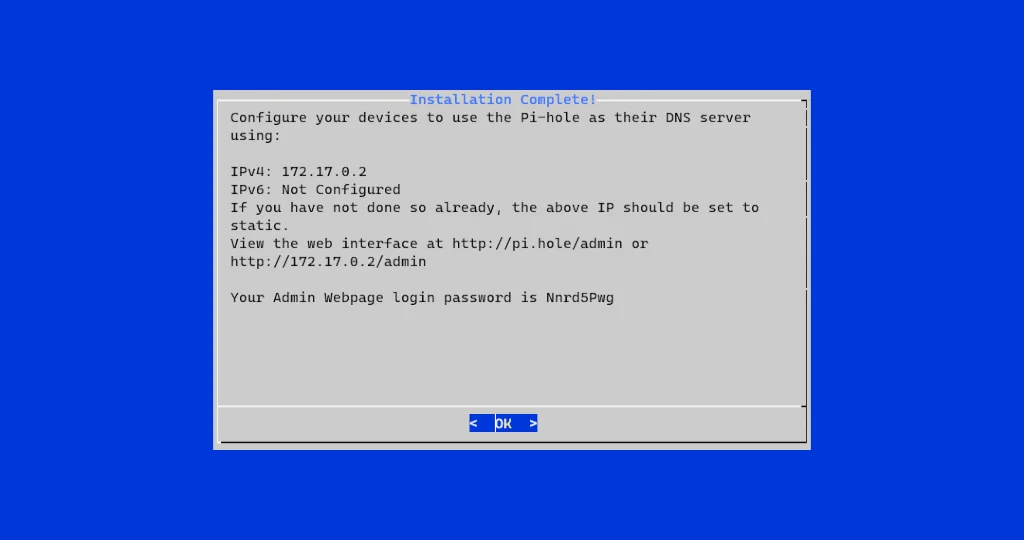
At this point, the installer will complete the setup, and the “Installation Complete!” screen will be displayed. You can press Enter here to exit the installer:
Based on the environment described above in this guide, Pi-hole cannot be used yet, and additional configuration is required. In the following section, I will show you how to do that. Let’s get to it!
Pi-hole Configuration
In this section, I will show you how to configure the server and the Pi-hole so that everything is compliant with the environment from the beginning of this guide. We must configure the server to act as a “router” for our local network. To do that, we need to configure a secondary network interface, add a few extra options to the Pi-hole configuration, and set a couple of basic firewall rules. Let’s do that.
Server Setup
We have two interfaces on the server; one is connected to the ISP router, and the other is connected to the switch (local network). First, we need to enable IPv4 forwarding so that traffic from our local network (secondary interface) towards the Internet can be “forwarded” to the primary server interface. To do so, please open file /etc/sysctl.conf and uncomment (remove #) or add the following line:
net.ipv4.ip_forward=1Save and close the file and execute the following command to apply the settings:
sysctl -pNow, a secondary interface must be activated. Open a new file /etc/network/interfaces.d/if-eth1 and paste in the following content:
# Local network interface
 auto eth1
 iface eth1 inet static
    address 192.168.100.1/24
    broadcast 192.168.100.255
    dns-search home.lan
    dns-nameservers 192.168.100.1
The networking service needs to be restarted now to activate the secondary interface:
systemctl restart networking.serviceThis completes all required server modifications. In the next sub-section, we will add a couple of additional options to the Pi-hole configuration.
Pi-hole Additional Options
If you activate the Pi-hole now, ad blocking and resolving towards the Internet will work, but they will work only on the server. Some additional options are required to enable Pi-hole to work for the rest of the local network.
Currently, all devices cannot receive the IP address from the local network subnet. We need to enable DHCP on Pi-hole to allow them to acquire local subnet IP addresses. To do so, open the main Pi-hole configuration file at /etc/pihole/setupVars.conf and paste in the following content:
PIHOLE_INTERFACE=eth0
PIHOLE_DNS_1=8.8.8.8
PIHOLE_DNS_2=8.8.4.4
QUERY_LOGGING=true
INSTALL_WEB_SERVER=true
INSTALL_WEB_INTERFACE=true
LIGHTTPD_ENABLED=true
CACHE_SIZE=10000
DNS_FQDN_REQUIRED=true
DNS_BOGUS_PRIV=true
DNSMASQ_LISTENING=local
WEBPASSWORD=b9d7e82a4446be48636f4f54fdac112c641145b822f86c302c387137692429c7
BLOCKING_ENABLED=true
DHCP_ACTIVE=true
DHCP_START=192.168.100.20
DHCP_END=192.168.100.254
DHCP_ROUTER=192.168.100.1
DHCP_LEASETIME=24
PIHOLE_DOMAIN=home.lan
DHCP_IPv6=false
DHCP_rapid_commit=false
Let’s observe what we did here. Once the Pi-hole service is started, DHCP on Pi-hole will be enabled (DHCP_ACTIVE=true). A DHCP range from which the local network devices will receive their IP addresses is set (192.168.100.20 – 192.168.100.254), and DHCP_ROUTER and PIHOLE_DOMAIN options are placed to match the ones in the server’s secondary interface configuration (dns-nameservers 192.168.100.1, dns-search home.lan).
Firewall Rules
At this point, devices on the local network will receive IP addresses from the local network subnet, but they will still be unable to communicate with the Internet. To enable that, first, we need to instruct the server to allow traffic forwarding between the primary and secondary interfaces. To do so, the following two firewall rules must be set:
iptables -A FORWARD -i eth0 -o eth1 -m state --state RELATED,ESTABLISHED -m comment --comment "Forward to Local LAN" -j ACCEPT
iptables -A FORWARD -i eth1 -o eth0 -m comment --comment "Forward from Local LAN" -j ACCEPT
All the communication with the Internet will happen on the primary interface. That means that all devices on the local network will communicate with the Internet with the IP address of the server’s primary interface. To achieve that, we must add one additional firewall rule that will allow devices on the private network to use the server’s primary interface IP address for Internet communication. We will set a masquerade network address translation (NAT) rule that will allow that type of traffic:
iptables -t nat -A POSTROUTING -o eth0 -m comment --comment "Masquarade Local Traffic" -j MASQUERADEAt this point, you can restart the Pi-hole service, and everything should start working. Let’s see what happens.
Summary
With everything above completed, you can restart the Pi-hole service, and ad blocking should be active for all devices on your local network:
systemctl restart pihole-FTL.serviceOnce you connect your first computer to a local network with Pi-hole activated, ensure it receives its IP address via DHCP. To test everything out, you can start any web browser and go to any website that displays ads. An excellent example of an “ad-heavy” website is MSN, which I used for my test. Below, you can first observe the screenshot of the MSN front page I did without an active Pi-hole service:

As you can see, it is cluttered with ads. In the next example, once I activated the Pi-hole service, you can see that most of the ads are gone:

To check what is blocked, you can log in to the Pi-hole admin dashboard (http://172.17.0.2/admin) and first click on the red Queries Blocked box near the top:
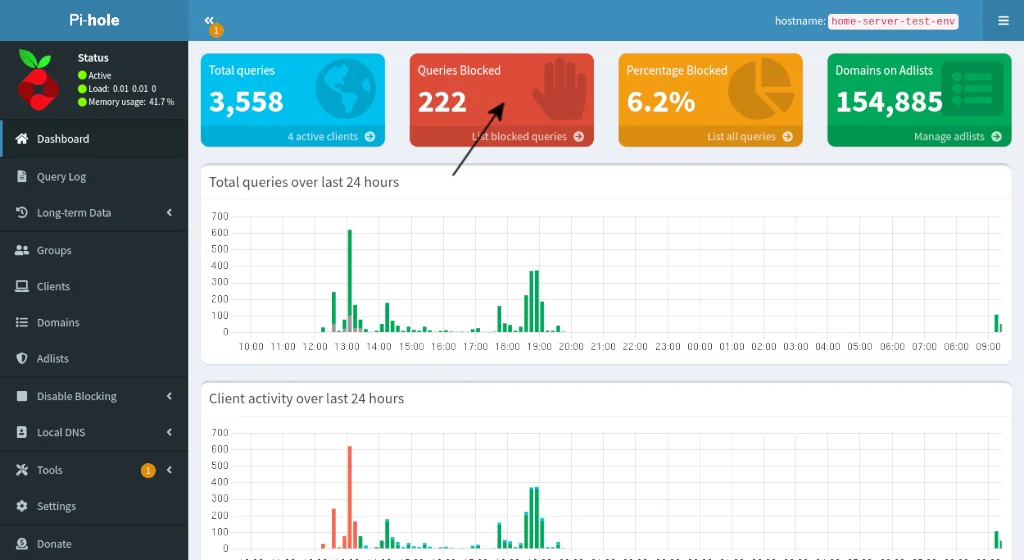
A list of blocked domains will be displayed. As you can notice, there are quite a lot of them for only one website:

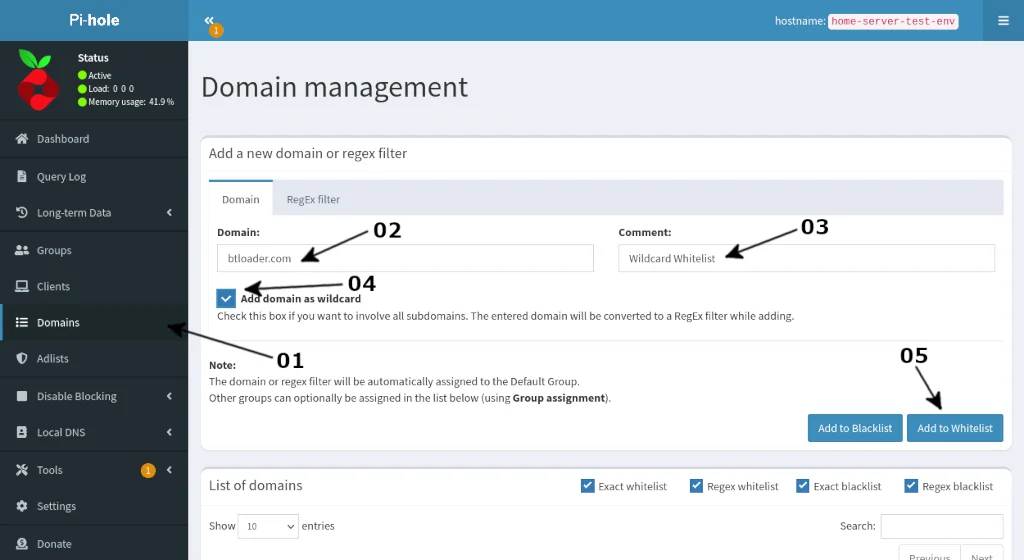
Once you check the list and decide that some domains should not be blocked, you can whitelist them. To do so, click the Domains button (01) in the main menu. There, you can type in the domain name (02) you wish to whitelist and add the comment (02) in their respective fields. You can also check Add domain as a wildcard (04) to whitelist all subdomains. Finally, click the Add to Whitelist button (05) to whitelist the domain:
That’s it. You have successfully installed and configured the Pi-hole on your local network. Please feel free to check other options in the administrative dashboard and happy ads-free browsing. Thank you for reading, and please share this article if you like it. Comments are also welcome.