Author:
Željko Jagušt
Publish Date:
January 29, 2022
Estimated Reading Time:
13 minutes
If you are a first-time Ubuntu user, the default Gnome 3 user interface may be perfect. And that is just fine. But if you like the featured image of this article, then please read the rest of this guide and learn how you can customize Ubuntu 20.04. And make it a bit more simple and a bit more old-school 🙂
Customize Ubuntu – Prerequisites

The only prerequisite here is Ubuntu Desktop 20.04, and you need to have it installed. If you have it, you can continue and customize Ubuntu by reading the rest of this article. In case you don’t have it, please feel free to read our article on how to install Ubuntu Desktop:

Ubuntu Desktop 20.04 – Installation Guide
Always wanted to try Linux? Why not start with the rock-solid 20.04 latest stable release of the Ubuntu Desktop operating system.
Customize Ubuntu – Getting Started
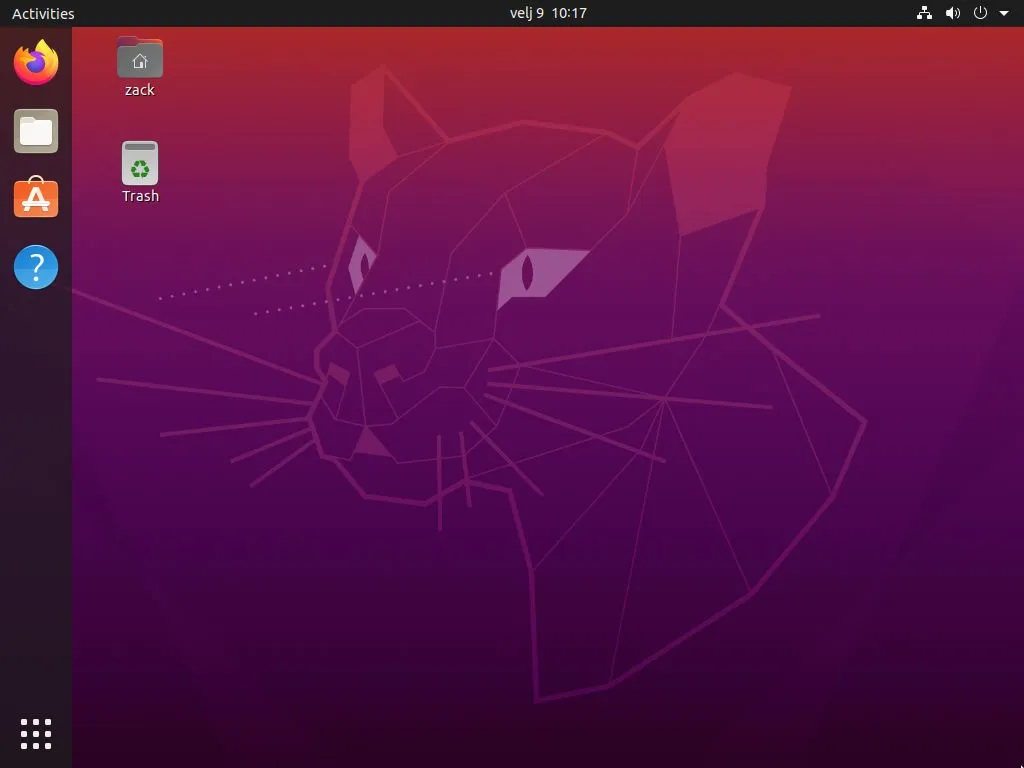
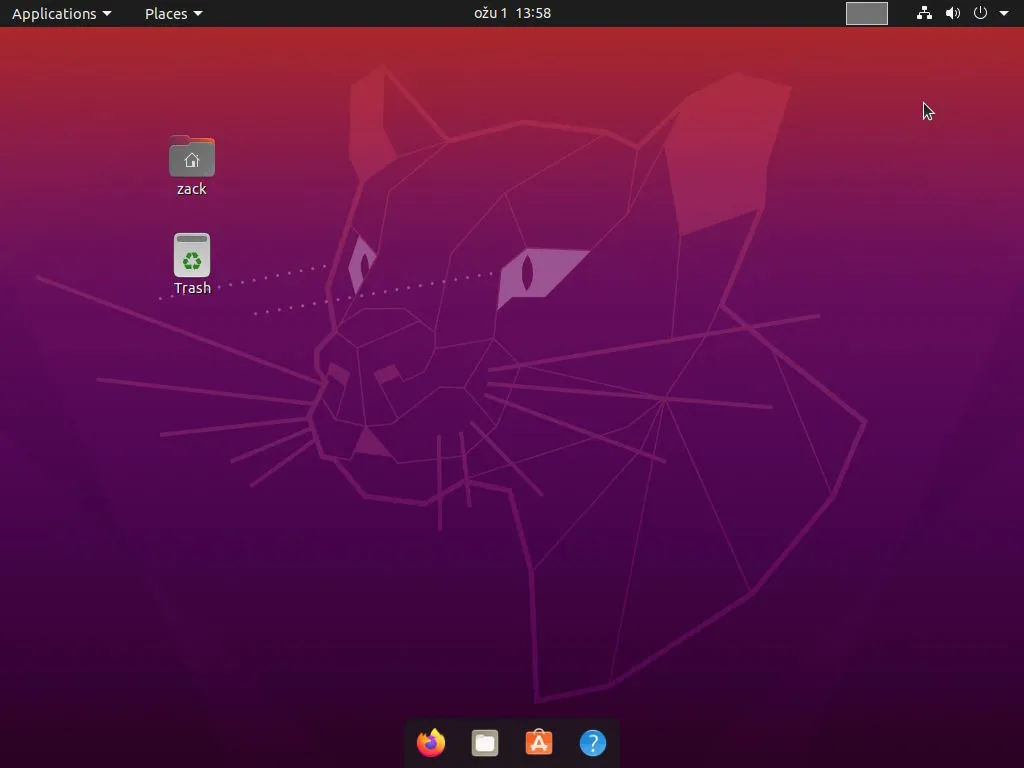
So, if you have the Ubuntu Desktop installed on your computer, then, by all means, start it up. Once you log in, a default Gnome 3 user interface will be displayed:
Source: zacks.eu
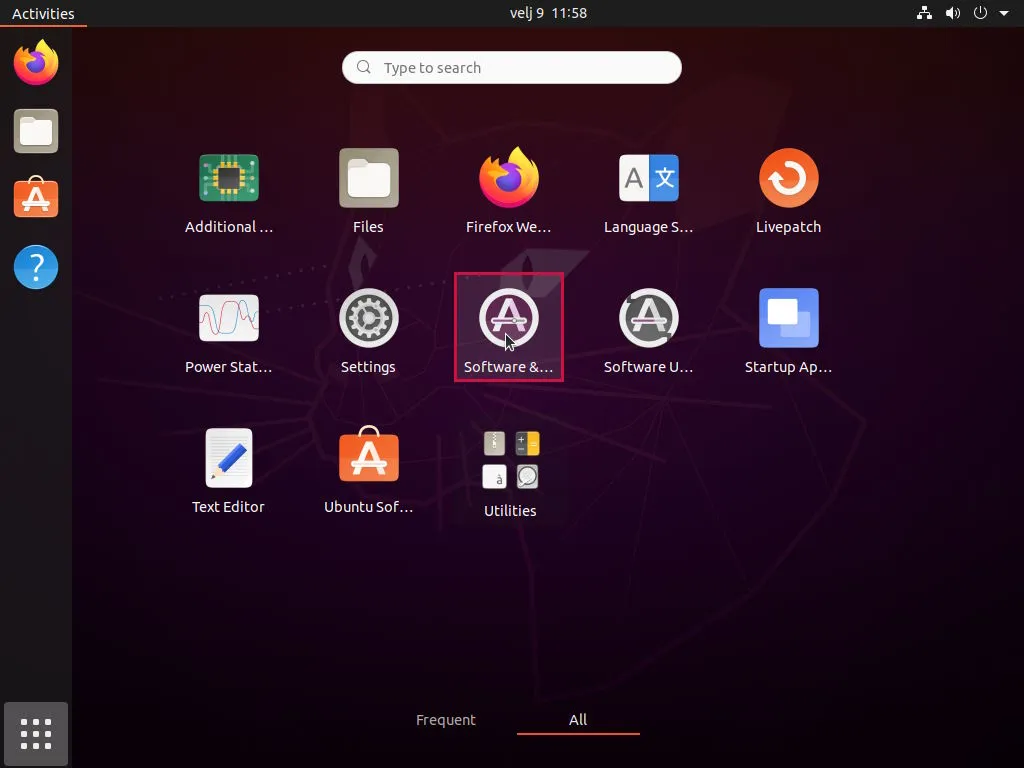
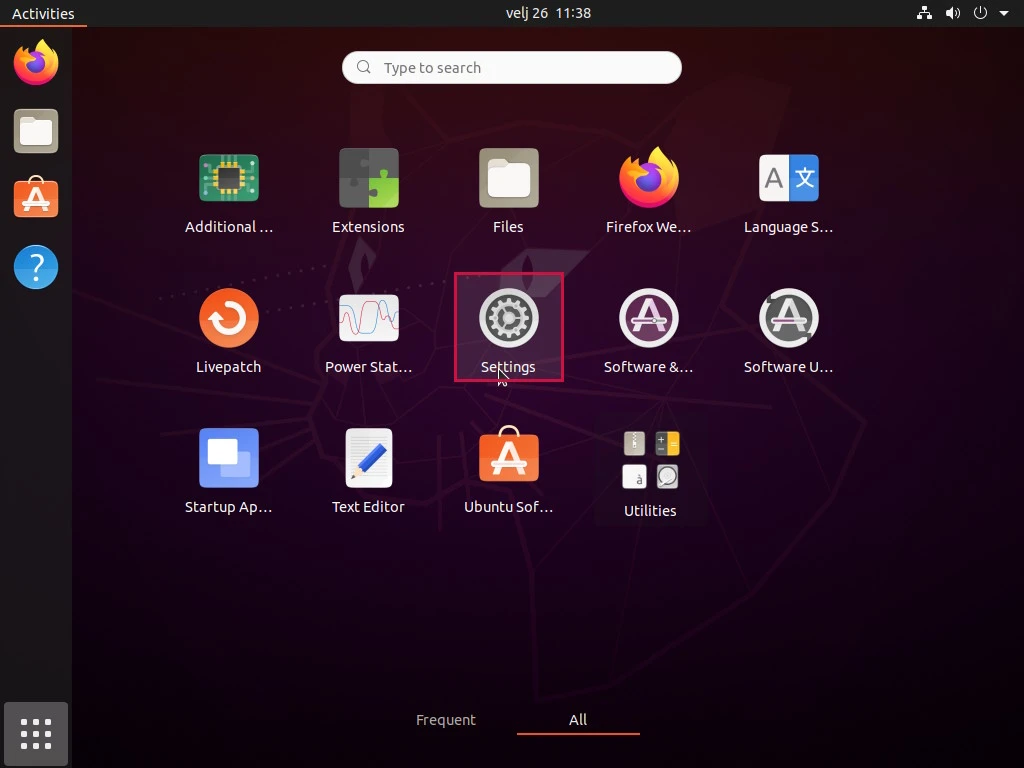
If you’ve followed our Ubuntu Desktop installation guide, you should also have a minimal set of applications installed. You can check this by clicking on the “Show Applications” button in the lower-left corner of the screen:

Source: zacks.eu
We can start with a few steps required before the customization itself. Specifically, we will set software sources (repositories) and install one application—the Gnome Tweak Tool — to help us with the customization.
Software Repositories
Installing software on major Linux distributions is usually done from so-called software repositories. Software is usually not used as a term; packages are a more common expression. A software repository is a location on the Internet that holds those packages. You can download and install them with a specific application.
To configure access to repositories on our Ubuntu, please start Software & Updates from the application view screen:
Source: zacks.eu
The first tab displayed will be “Ubuntu Software.” Right under Downloadable from the internet heading, you will notice four checkboxes. Make sure all four are checked:

Source: zacks.eu
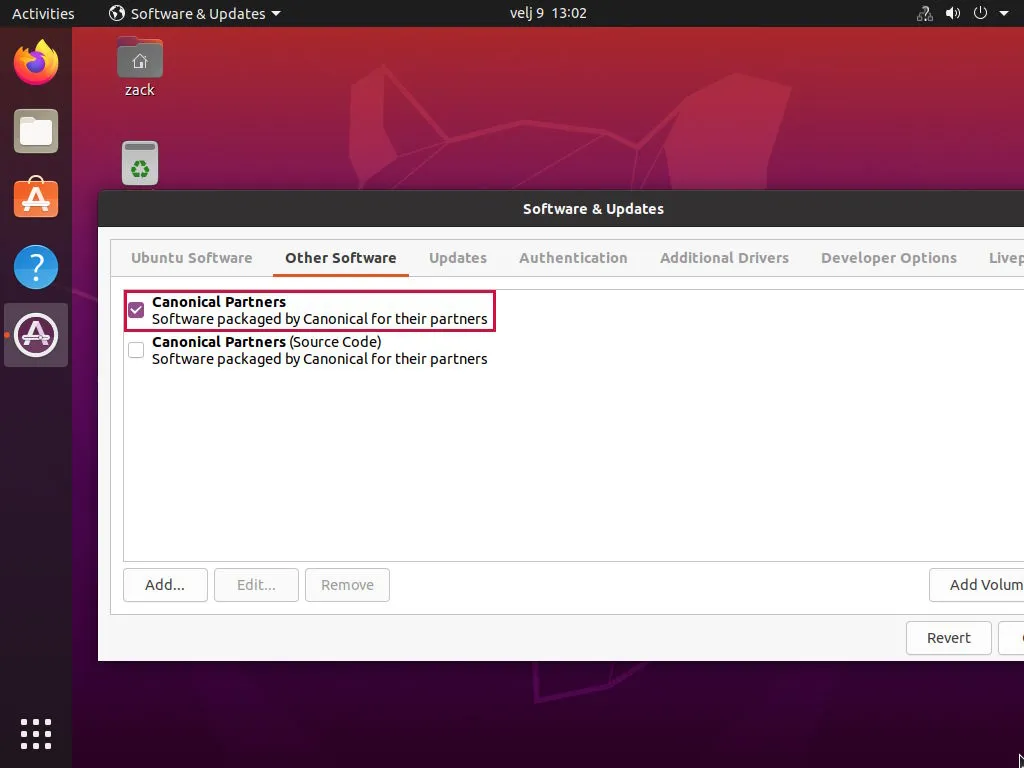
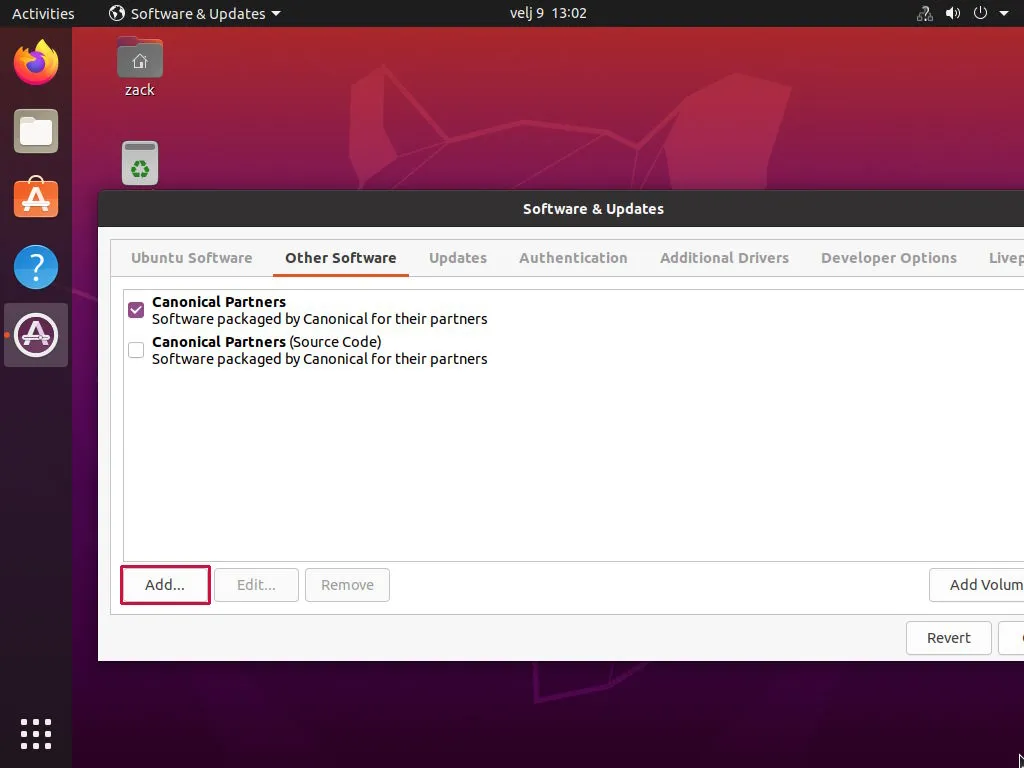
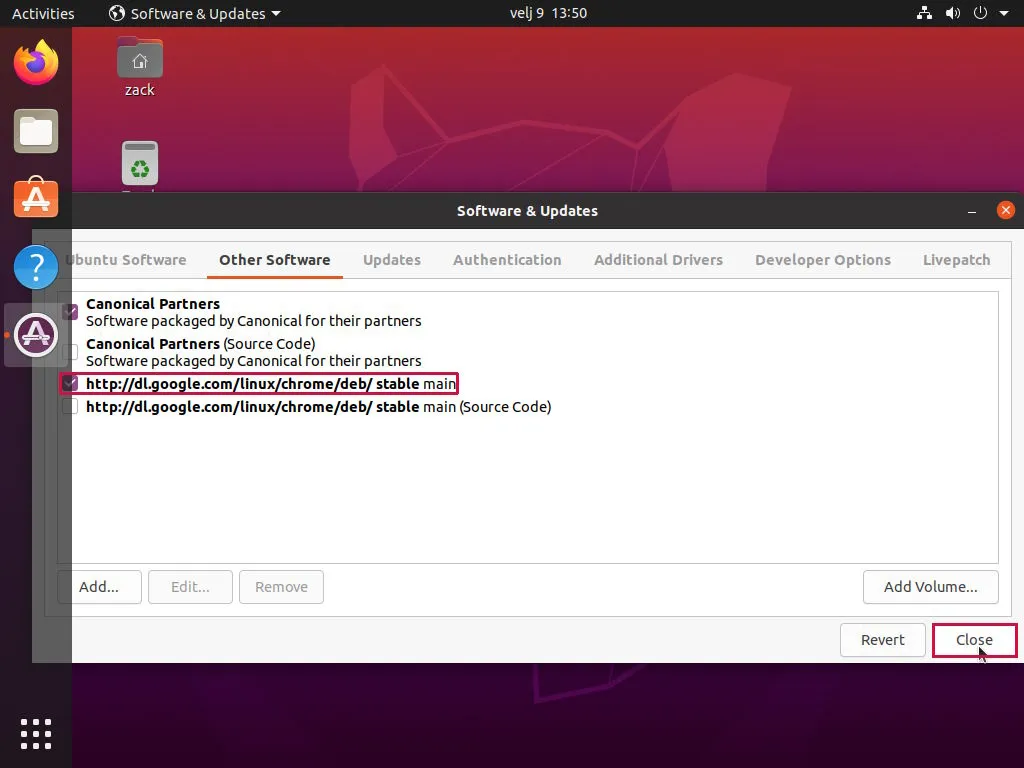
While still in “Software & Updates,” click on the Other Software tab and enable the “Canonical Partners” repository:
Source: zacks.eu
Optional – Google Chrome repository
If you don’t use the Google Chrome browser, you can skip this section. If you do, let me tell you why this step is required. Ubuntu does not offer a Google Chrome browser by default. In Ubuntu’s official repositories (enabled in the previous step), you will find a browser called Chromium. Google also develops Chromium, and the main difference is it is open-source, while Chrome is not. Also, Chrome has an automatic update feature and can track browser data, while Chromium lacks those features.
First, we will continue where we left off in the previous step. While still in “Software & Updates,” click on the Add… button in the lower-left corner:
Source: zacks.eu
A new dialog box will open where you must enter the correct web address of the Google Chrome repository. Please enter the following line:
deb [arch=amd64] http://dl.google.com/linux/chrome/deb/ stable main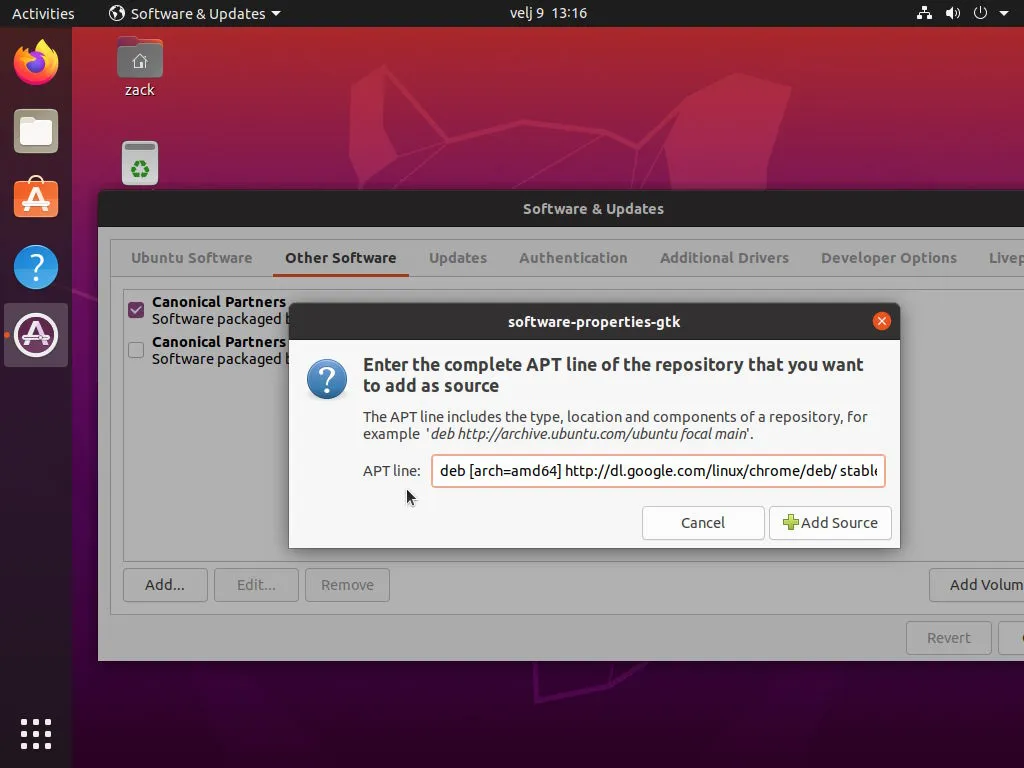
Source: zacks.eu
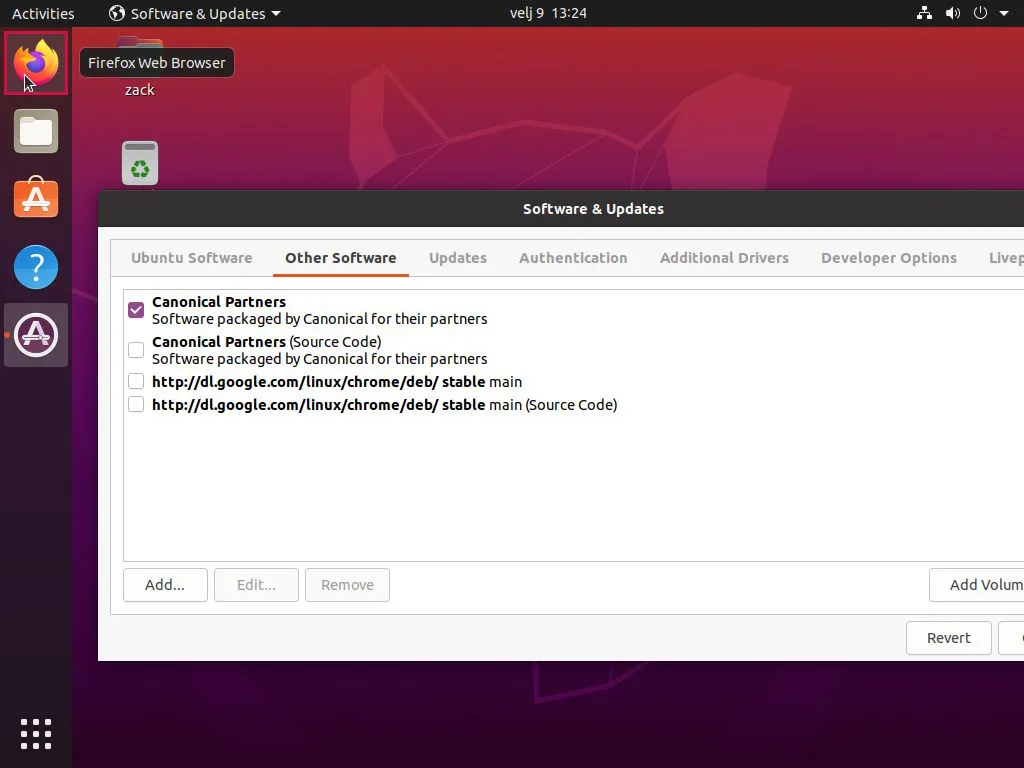
Once you have entered the correct address, click on the +Add Source button. You will notice the repository is automatically enabled. I want you to disable it temporarily:

Source: zacks.eu
We need a repository signing key before we can use the repository and eventually install the Google Chrome browser. A signing key is needed to verify the authenticity of the package/software we want to install. In layman’s terms, we need to convince our operating system (package manager) that the package we want to install is that package and not something else under the same name.
So, first, we need to download the signing key. To do so, please start the Firefox web browser by clicking on the icon in the top left corner:
Source: zacks.eu
Once the Firefox opens, please insert the following URL to the address bar:
https://dl.google.com/linux/linux_signing_key.pub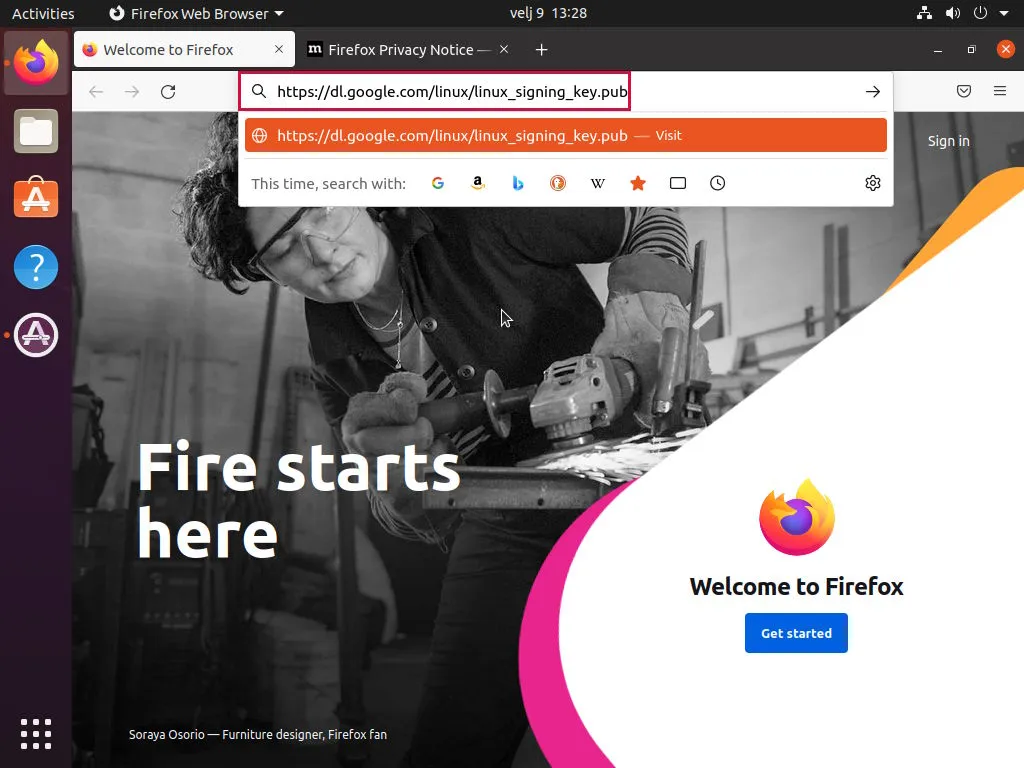
Source: zacks.eu
Press Enter on your keyboard, and a save file dialog box will pop up. Just save the file to a default location (Downloads directory):
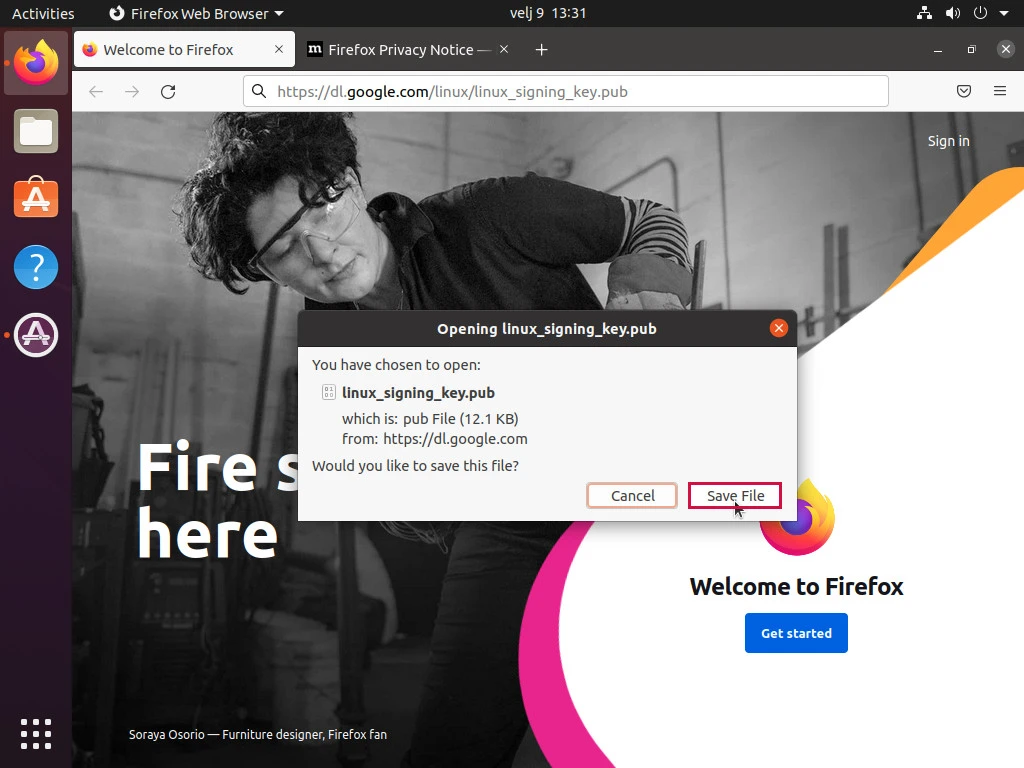
Source: zacks.eu
You can close the Firefox browser and return to “Software & Updates.” From there, click on the Authentication tab and then on the Import Key File… button in the lower-left corner:
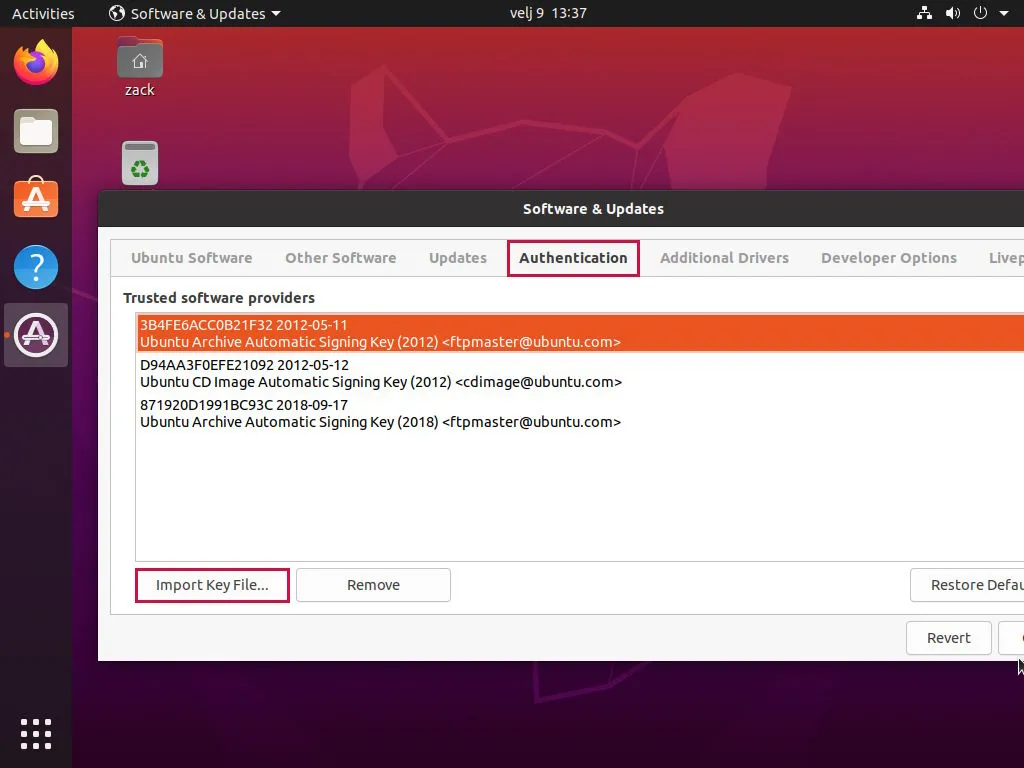
Source: zacks.eu
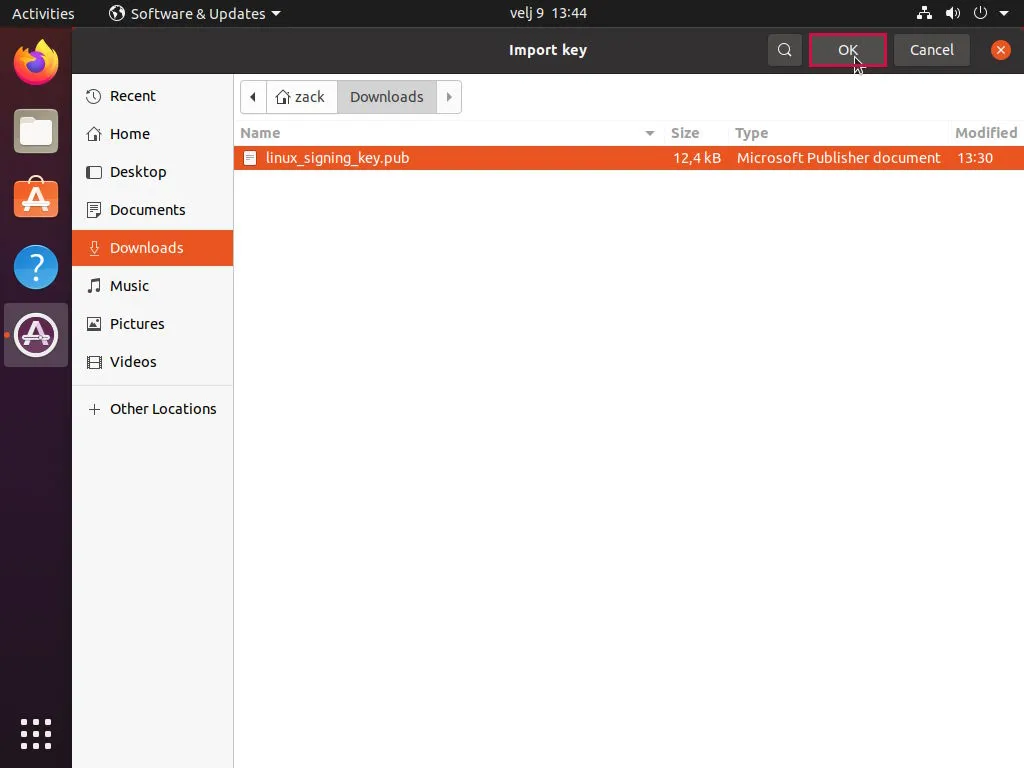
This action will open the “Import Key” dialog box. Once opened, double-click on the Downloads directory:

Source: zacks.eu
From here, click on the signing key you just downloaded and confirm the selection by clicking on the OK button in the upper-right corner:
Source: zacks.eu
With the key successfully imported, click on the Other Software tab:
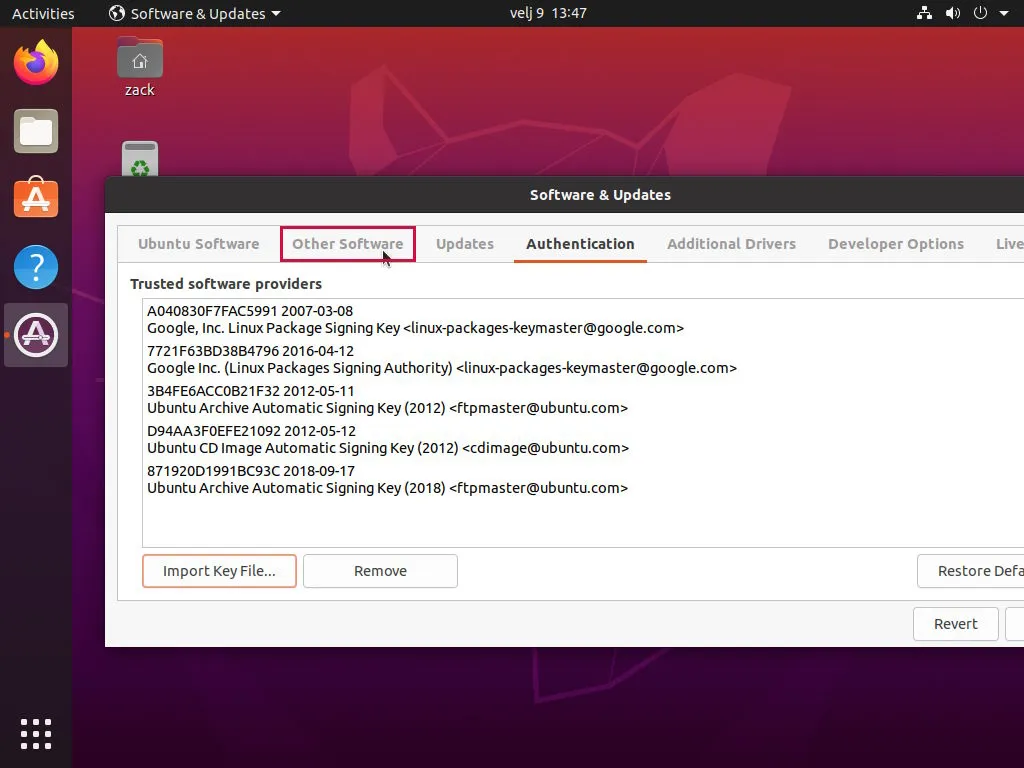
Source: zacks.eu
Now, we can enable the Google Chrome repository, so please click on the activation checkbox to mark it active. Once you do, you can close “Software & Updates” by clicking on the Close button in the lower-right corner:
Source: zacks.eu
Upon closing “Software & Updates,” and due to activation of new repositories, a software catalog will require an update. A dialog to refresh the software catalog will pop up right after you close “Software & Updates,” so please click on the Reload button to do so:
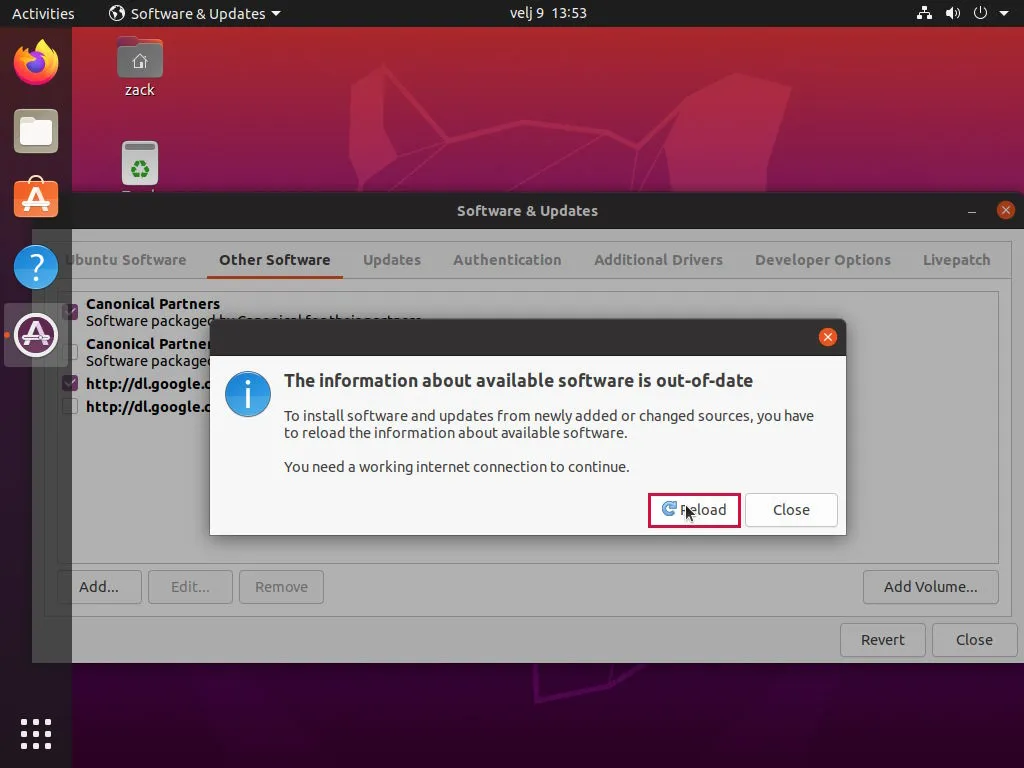
Source: zacks.eu
Catalog reload may take some time, during which you can relax a bit and celebrate. The getting started part of this Ubuntu customization guide is almost done.
Optional – System Update
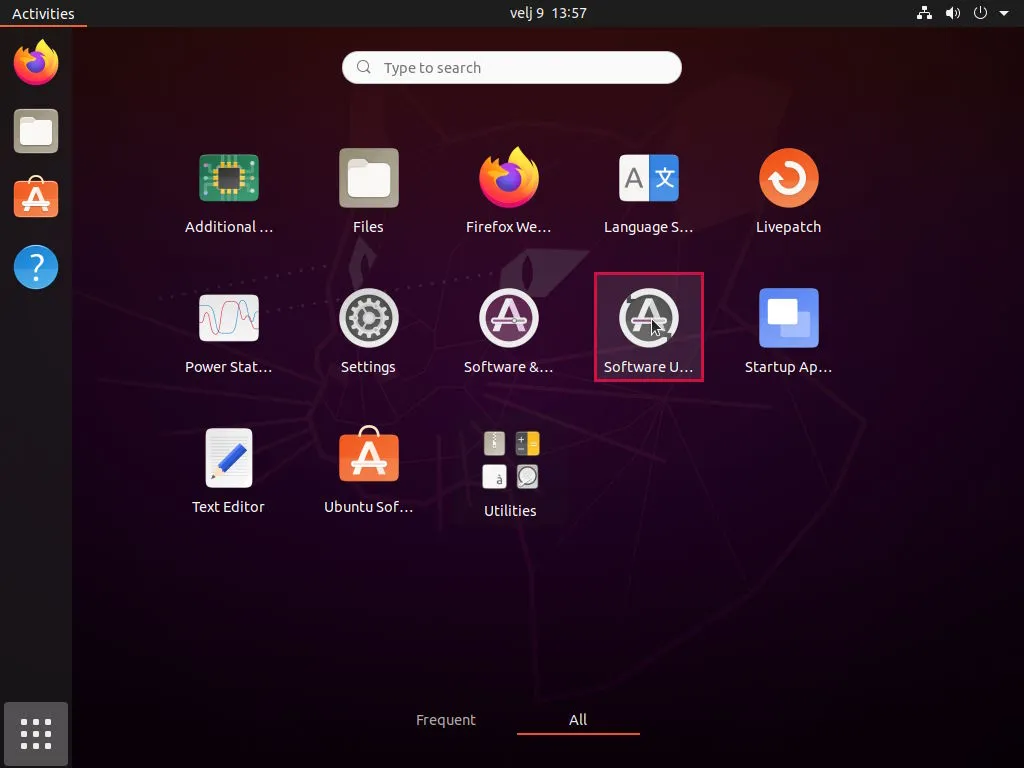
With new repositories active, you can now check if there are any new updates for your system. To do so, please click on the “Show Applications” button in the lower-left corner of the screen and then click on “Software Updates:”
Source: zacks.eu
There may or may not be any updates to your system. If there are, you will see the Software Updater dialog box, just like in the picture below, informing you of any available updates. Just click on the Install Now button, and updates will install:

Source: zacks.eu
Once the updates are installed, a notification will pop up. Click on the OK button to confirm and close the update dialog box:

Source: zacks.eu
Gnome Tweaks Installation
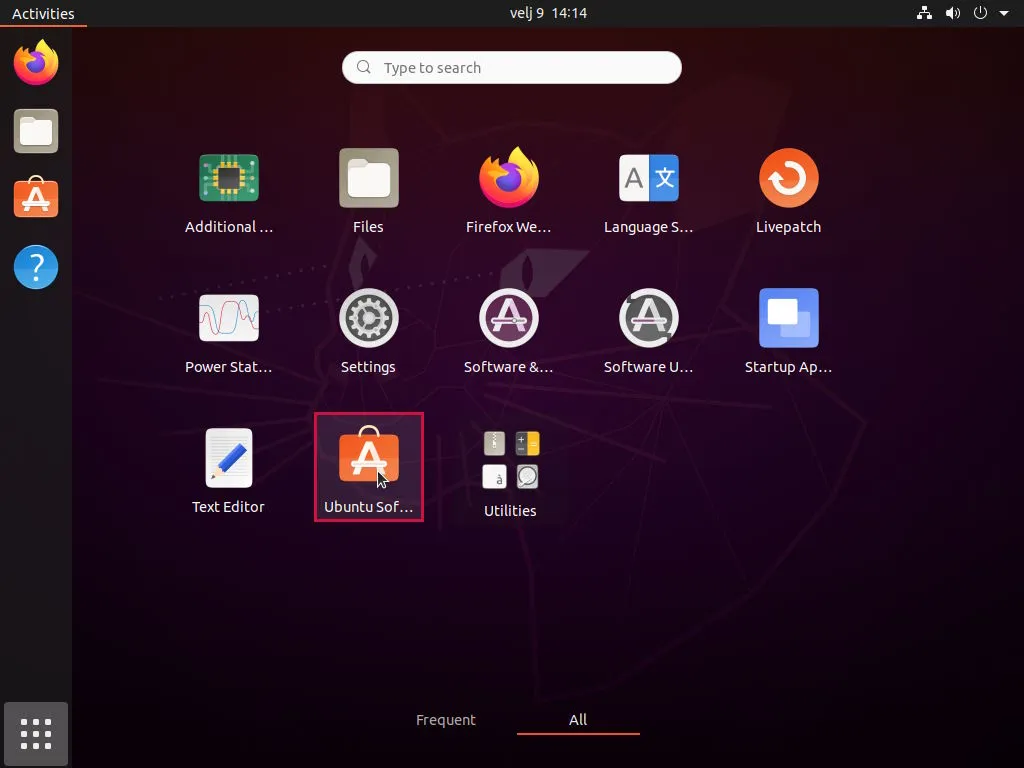
This will be the final step in this getting started section, and here, we will install a tool that will allow us to do most of the customizations – Gnome Tweaks. To install it, please click on the Show Applications button in the lower-left corner of your screen. Once opened, please click on the Ubuntu Software icon:
Source: zacks.eu
Once the Ubuntu Software app opens, please click on the search icon in the upper-left corner. You will notice a search bar appears. Click on it and type “GNOME Tweaks.” The search will start automatically as you type. Once the GNOME Tweaks app is found, please click on it to open:
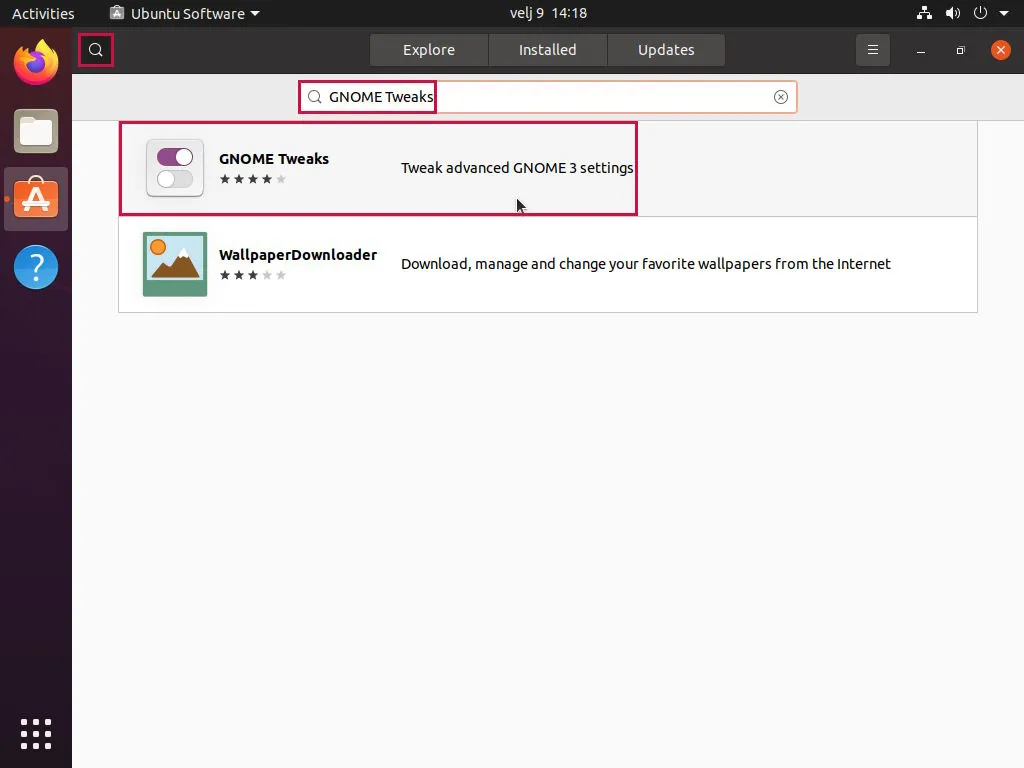
Source: zacks.eu
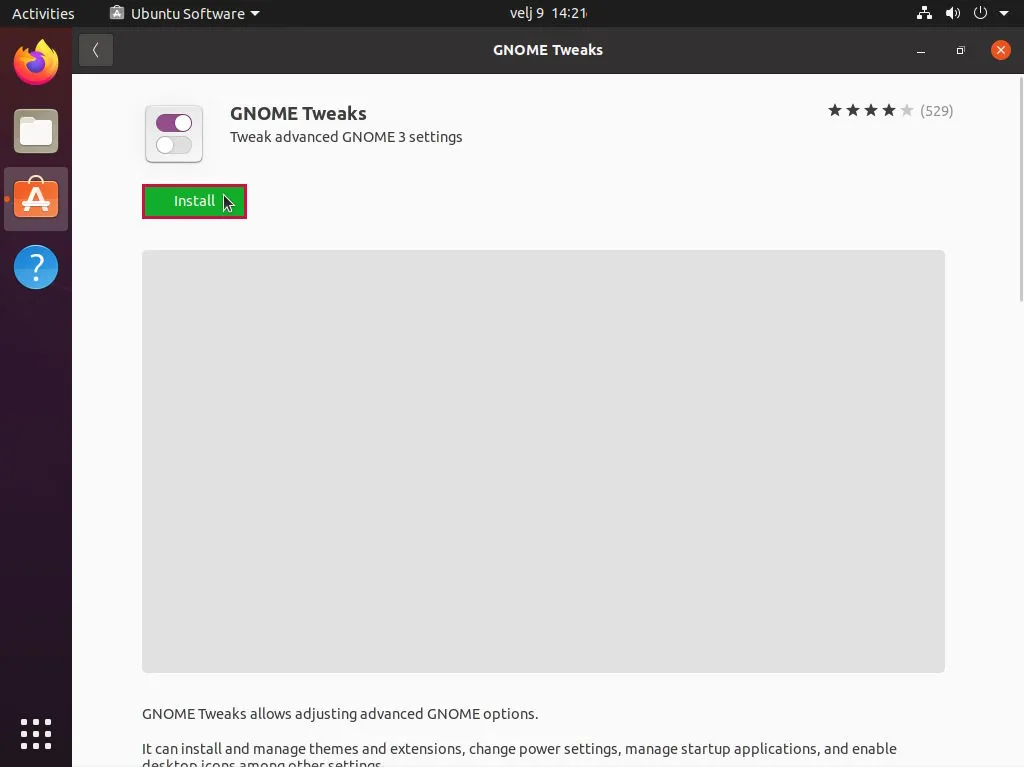
On the following screen, please click on the green Install button to start the installation of GNOME Tweaks:
Source: zacks.eu
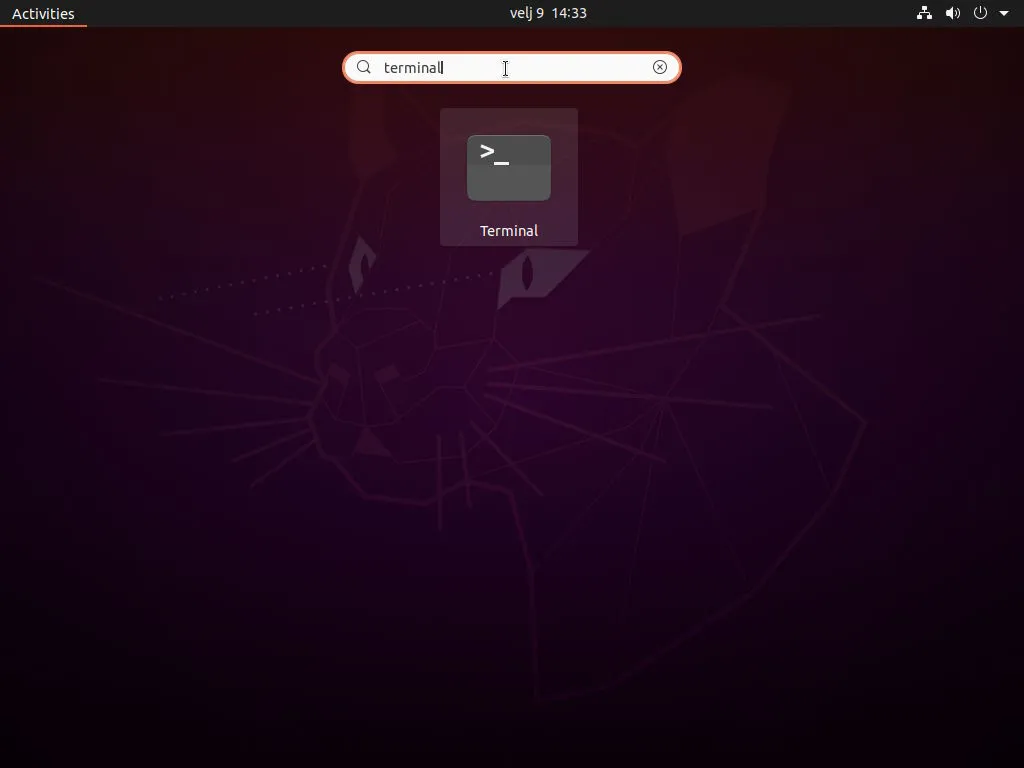
GNOME Tweaks by itself has only a few customization options. To extend those options, we will install the GNOME Shell Extensions package. To do so, you can close the Ubuntu Software app first. Then again, click the “Show Applications” button in the lower-left corner of your screen. Once opened, type “Terminal” in the search bar located at the top. The terminal application icon will be displayed, so please click on it to open the app:
Source: zacks.eu
With the terminal open, please enter the following line to install the extensions (confirm with Enter):
sudo apt install gnome-shell-extensions gnome-shell-extensions-hide-activities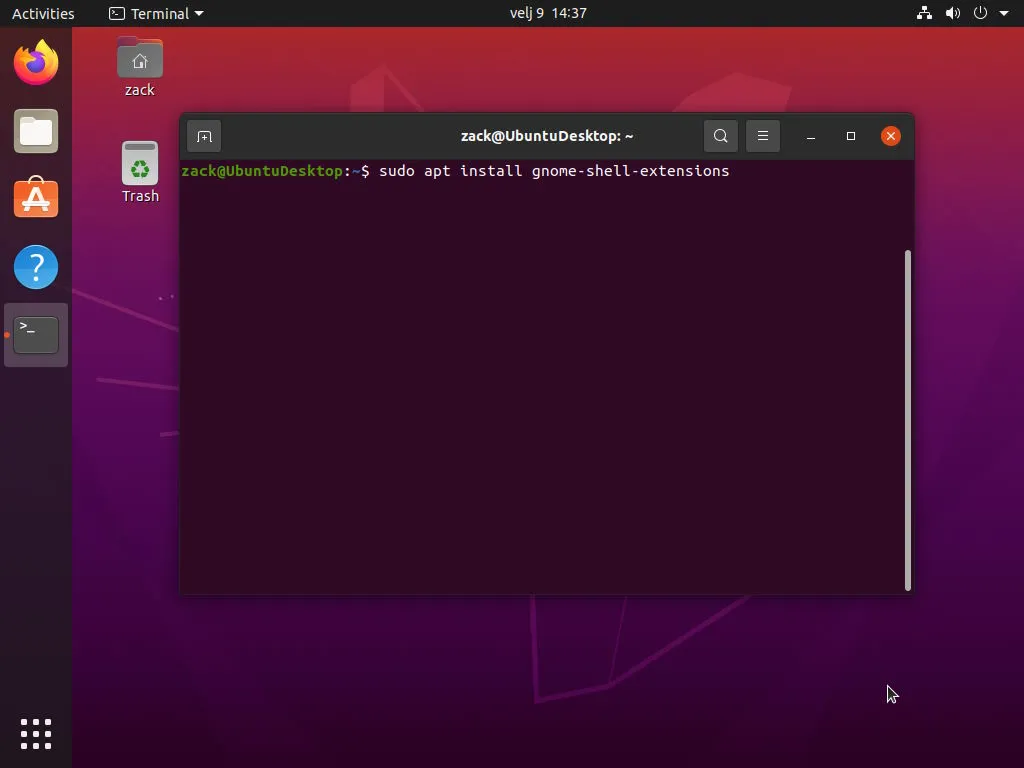
Source: zacks.eu
You will be asked to enter your password, so please do. Once extensions are installed, you can close the terminal application. And that’s it; we’re done with the getting started part of this guide. You can take a break now, have a glass of water, and go for a stroll. You’ve earned it!
Customize Ubuntu – Settings
At this point, we can start with customizing the Ubuntu Desktop user interface. First, we will modify some general settings. To do it, please click on the Show Applications button in the lower-left corner of your screen and then click on the Settings icon:
Source: zacks.eu
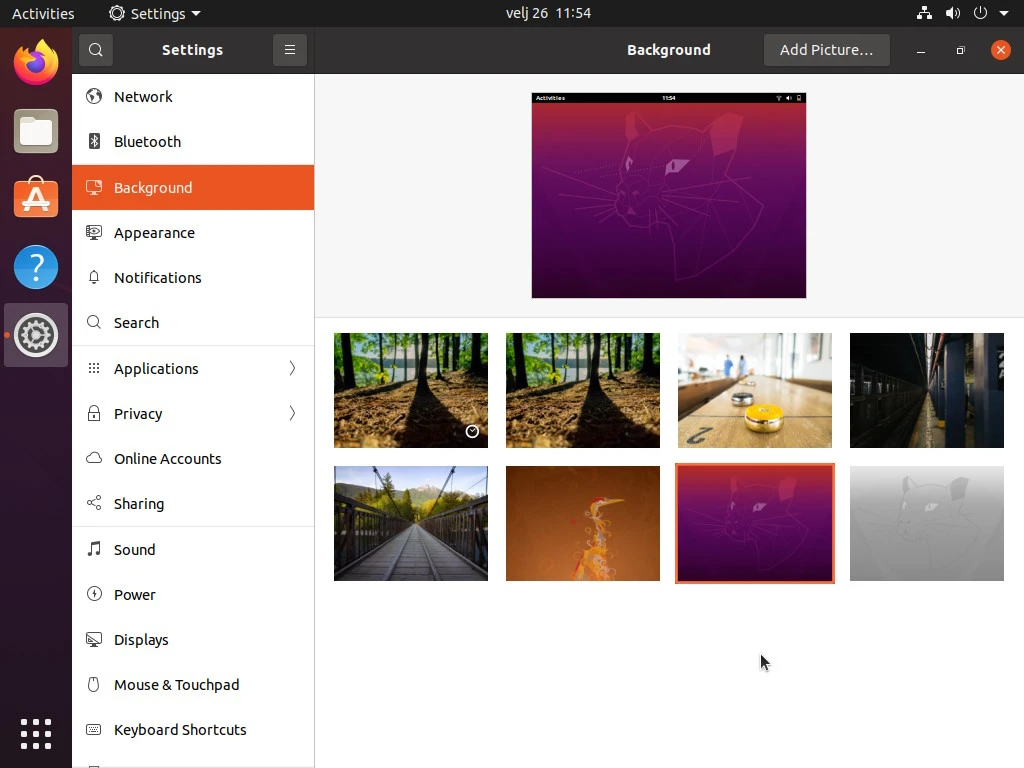
With settings open, click on the “Background” option on the menu on the left. Here, you can change your wallpaper. You can choose between the ones offered by Ubuntu, or you can set your picture by clicking on the Add Picture… button in the upper-right corner of your screen:
Source: zacks.eu
With wallpaper set, please click on the “Appearance” option on the menu on the left. Here, I like to leave “Window colors” on Standard, reduce the icon size in the dock, and position the dock at the bottom of my screen. Of course, you are free to adjust the appearance to your liking:

Source: zacks.eu
And this is it regarding settings. We will modify everything else with the Gnome Tweaks application and its extensions. You will see how in the sections that follow.
Customize Ubuntu – Gnome Tweaks
Finally, we reached the part of the guide where everything fell into place. So hang on just a bit longer. At this point, we can turn on all the nice Gnome shell extensions we installed in one of the previous steps. Once turned on, we can switch to our Gnome Tweaks tool and perform final adjustments to our user interface. Let’s get started.
Gnome Shell Extensions
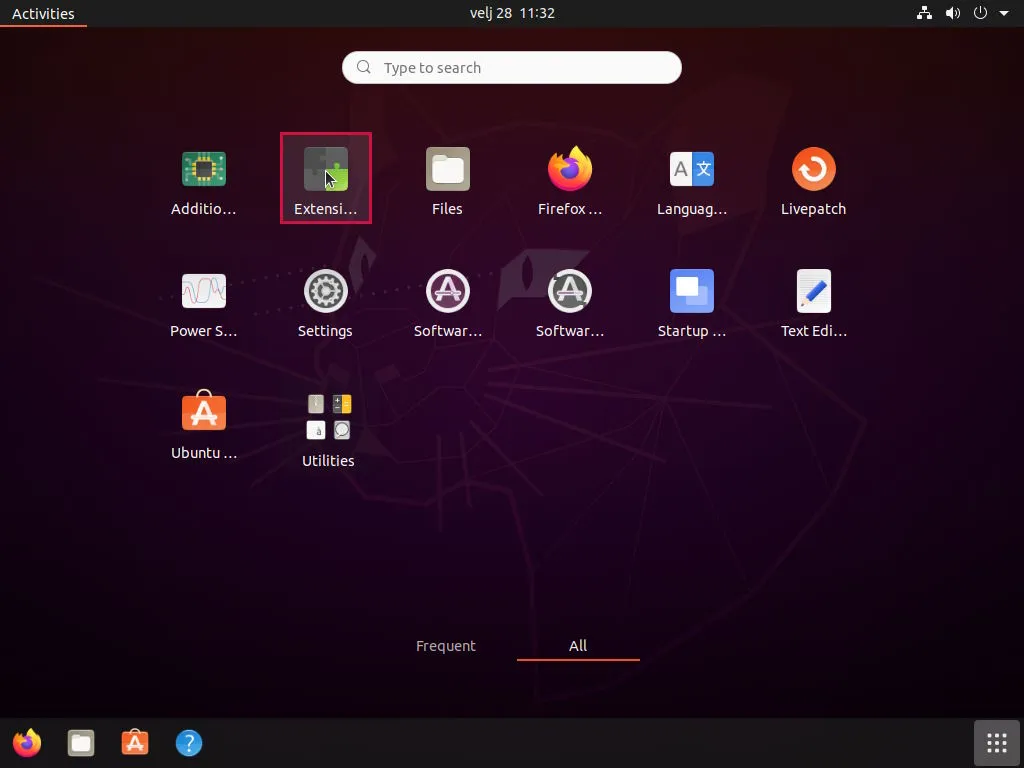
First, we need to enable the required shell extensions. To do so, please click on the “Show Applications” button (now in the lower-right corner) and then click on the Extensions icon:
Source: zacks.eu
Once the Extensions window opens, you will notice some of them are already enabled:

Source: zacks.eu
At this point, we can enable the rest of the required extensions. Please enable the following extensions: Applications Menu, Hide Activities Button, Horizontal Workspaces, Places Status Indicator, and Workspace Indicator.
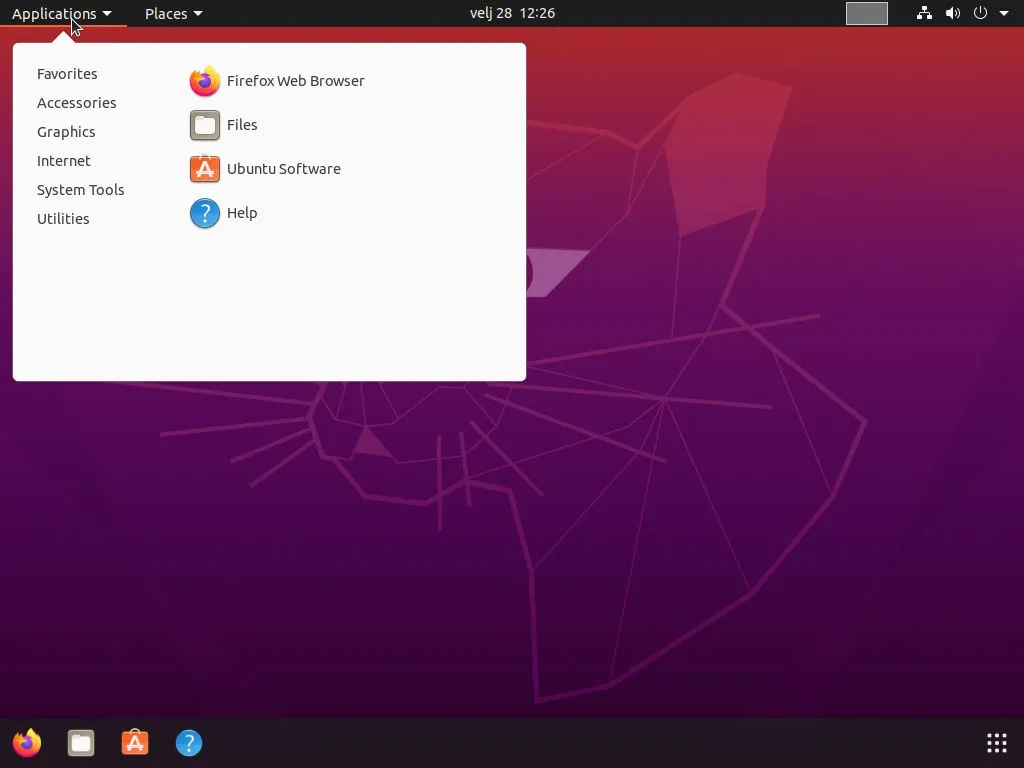
Once you enable those extensions, you will notice the “Activities” menu button in the upper-left corner is replaced by two new menu buttons; Applications and Places. You will also see the Workspaces indicator in the upper-right corner of your screen. If you click on either Applications or Places, you will see a classic drop-down menu. Something common to a classic behavior on the majority of operating systems and something most of us are used to:
Source: zacks.eu
Gnome Tweaks
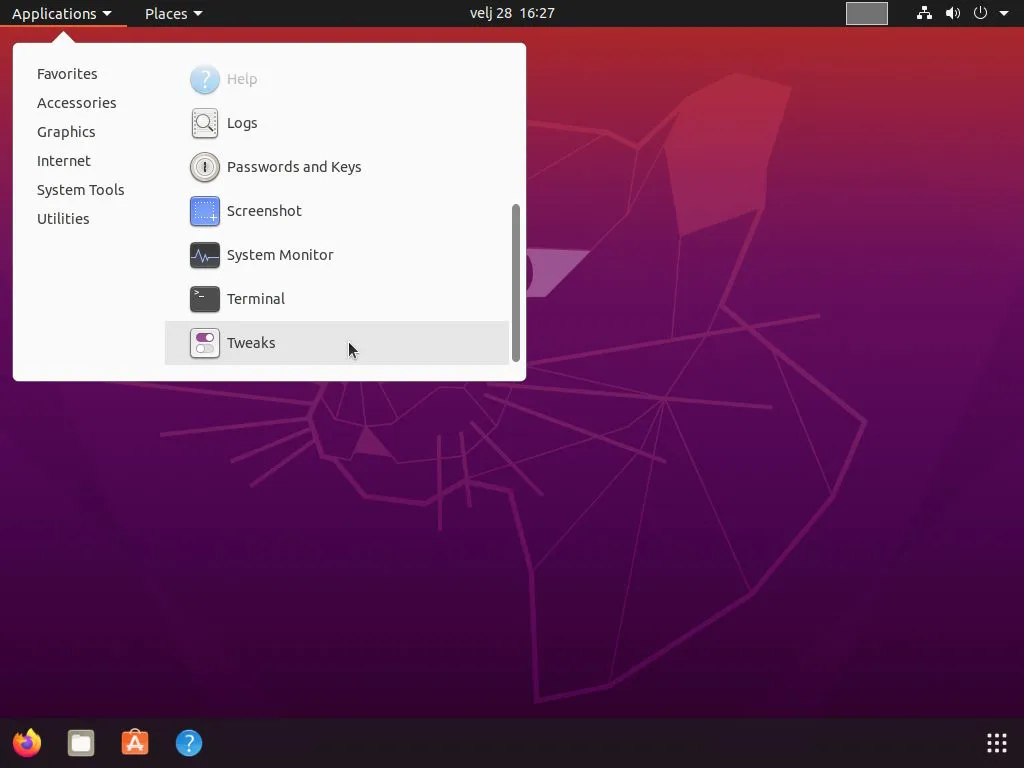
You can change so much with Gnome Tweaks, but I will go through several settings to keep this guide simple. To start it, now you can click on the “Applications” menu button in the upper-left corner of your screen. From there, click on Utilities and then on Tweaks:
Source: zacks.eu
Once Gnome Tweaks open, please click on Fonts. From there, reduce the size of the “Monospace Text” font size. This font is used primarily in the Terminal application. The resolution on my notebook is 1920x1200px, so size 12 is just perfect. If your display has a smaller resolution, you can try even smaller values for Monospace Text font size:
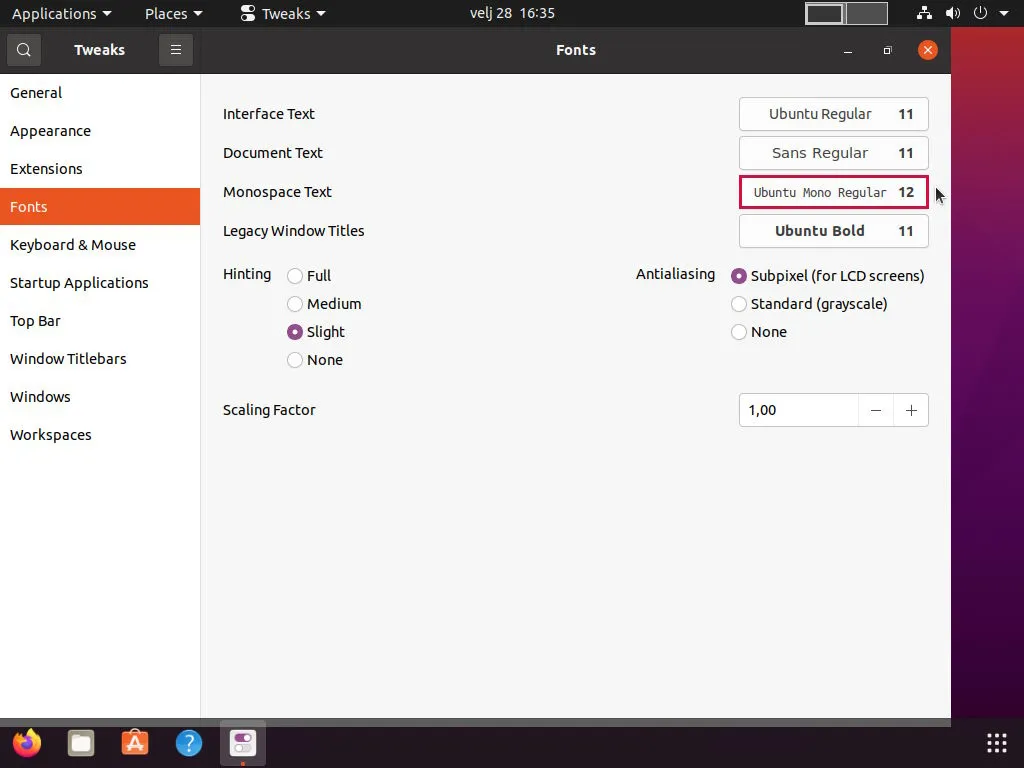
Source: zacks.eu
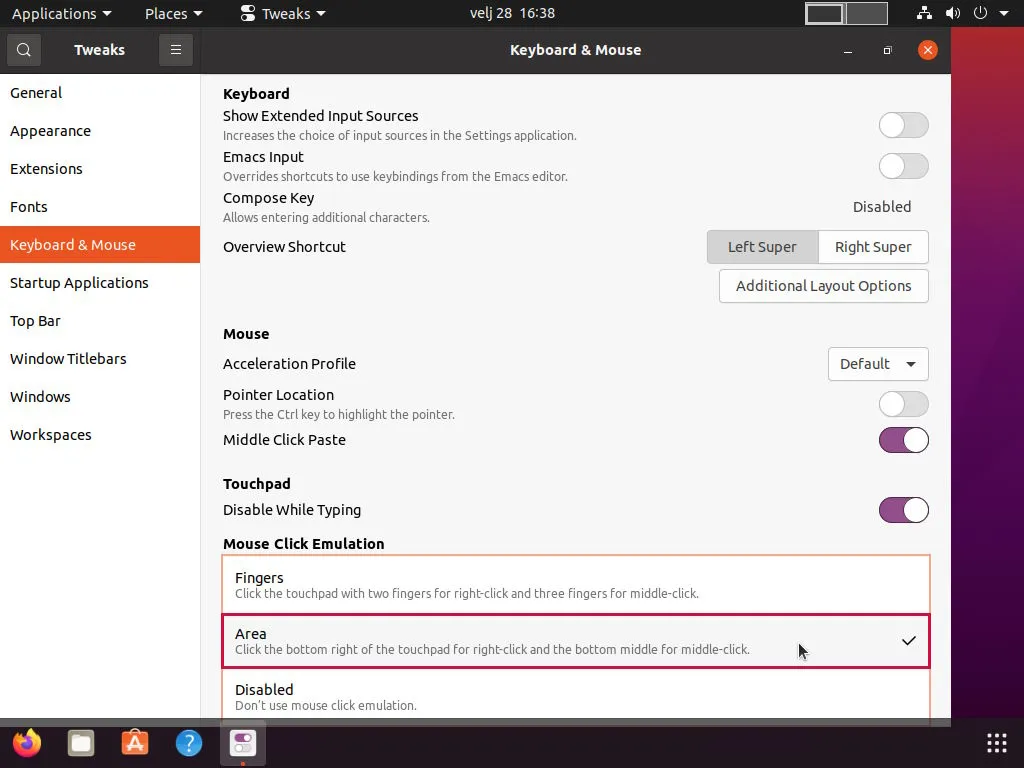
With font size reduced, please click on the “Keyboard & Mouse” menu option. Under “Mouse Click Emulation,” please click on either the Fingers or Area option (whatever suits you best). Of course, this is only viable if you have a notebook computer:
Source: zacks.eu
As for everything else, I urge you to review all Gnome Tweaks options and adjust whatever you think is relevant. Every choice is explained, and if you don’t like something, you can quickly revert.
Ubuntu Dock
Ubuntu is based on Debian Linux. Where Debian uses the default dock for Gnome Shell, Ubuntu enforces its own modified dock. Debian has an additional shell extension called dash-to-dock, and if it is installed, you can adjust the additional dock settings through the Gnome Tweaks application. As you can see in one of the previous steps, the only option to customize it is to change its location (left, right, or bottom).
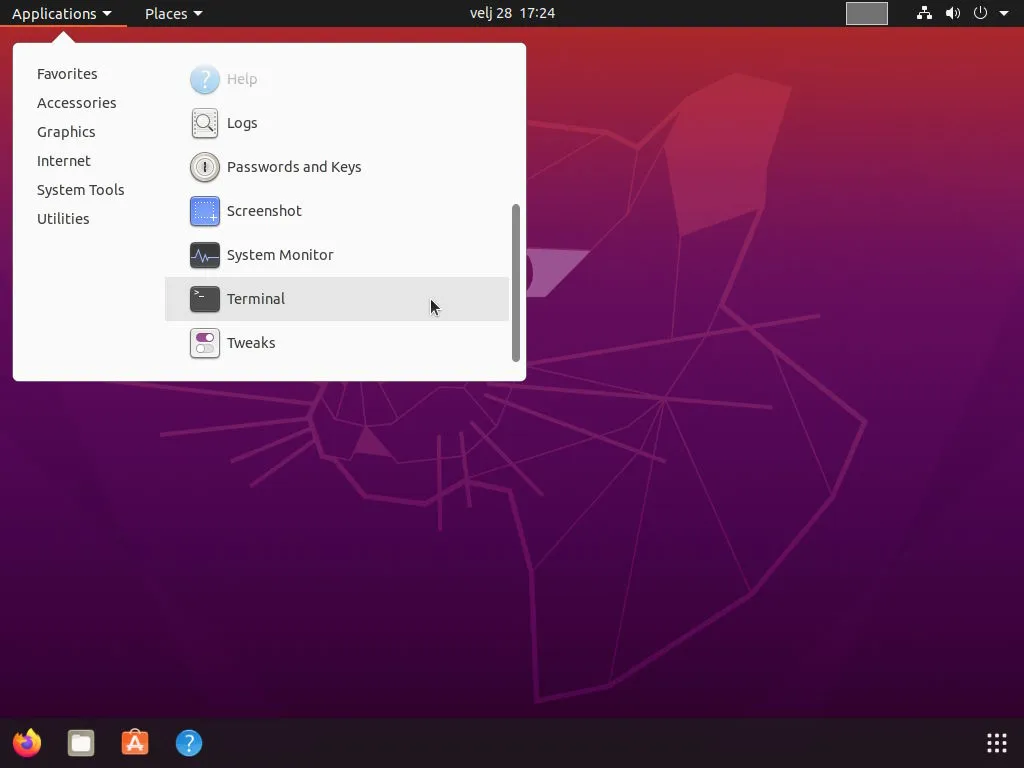
You can do the same on Ubuntu, but it’s more complicated. To access additional dock settings, you will need Dconf Editor. To install it, please click on the “Applications” menu button in the upper-left corner of your screen, and from there, click on Utilities and then on Terminal:
Source: zacks.eu
Once the Terminal opens, you can install Dconf Editor by executing the following command:
sudo apt install dconf-editor
Source: zacks.eu
With Dconf installed, you can close the Terminal. To start Dconf Editor, please click on the “Applications” menu button in the upper-left corner of your screen, and from there, click on System Tools and then on dconf Editor:

Source: zacks.eu
In dconf Editor, please click on the following options: org → gnome → shell → extensions → dash-to-dock:

Source: zacks.eu
With dash-to-dock open, please modify the following options: disable extended-hight, disable show-running, and disable the show-show-apps-button.
As you can notice, your dock now only has applications pinned explicitly to it. Looks a bit like a dock on macOS, right. And this is the last thing we are going to do here. You can enjoy your new desktop now:
Source: zacks.eu
If you want to know more about installing additional applications and pinning some of them to your dock, please read out the Ubuntu recommended applications guide below.
Add link once article is transferred.