Author:
Željko Jagušt
Publish Date:
December 8, 2022
Estimated Reading Time:
17 minutes
Ubuntu 22.04 was released in April 2022 and is the latest stable LTS (long-term support) version of their operating system. This step-by-step installation guide will show you how to install it on your computer or as a VirtualBox virtual machine.
Ubuntu Desktop 22.04 – Prerequisites
You will need a suitable computer or a VirtualBox to install Ubuntu Desktop 22.04. Once you opt for which one you want, you can download the installation ISO. Click on the button below this text to download the ISO image:
If you want to try Ubuntu Desktop 22.04 inside a virtual machine, you don’t have to create an installation media; the ISO image is enough to create your virtual machine and start with the installation. We will show you how to do it in VirtualBox later in this article.
If you opt for installation on your computer, you must create an installation media first. A USB stick of at least 8GB is recommended; you will need software to make it. If you are creating it on Microsoft Windows, I recommend Rufus, and you can download the latest version of it by clicking on the button below this text:
You can use the dd CLI command to create installation media for any Linux operating system. This article will show you how to do it further below.
Create Installation Media – Microsoft Windows
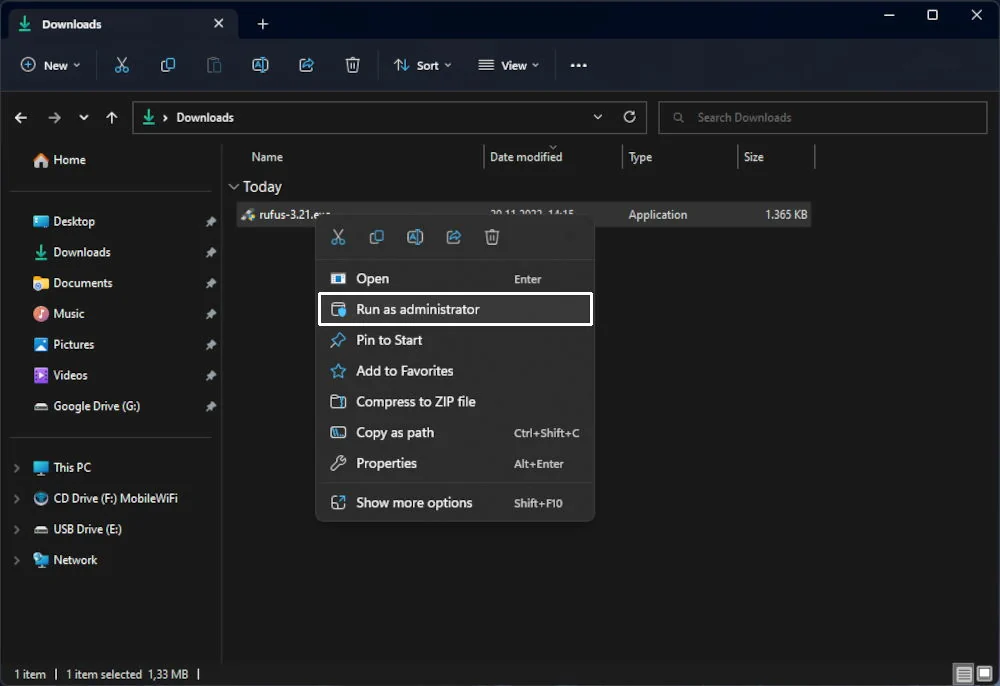
Go to a location where you downloaded Rufus and right-click on the file. From the drop-down menu, click on Run As Administrator:
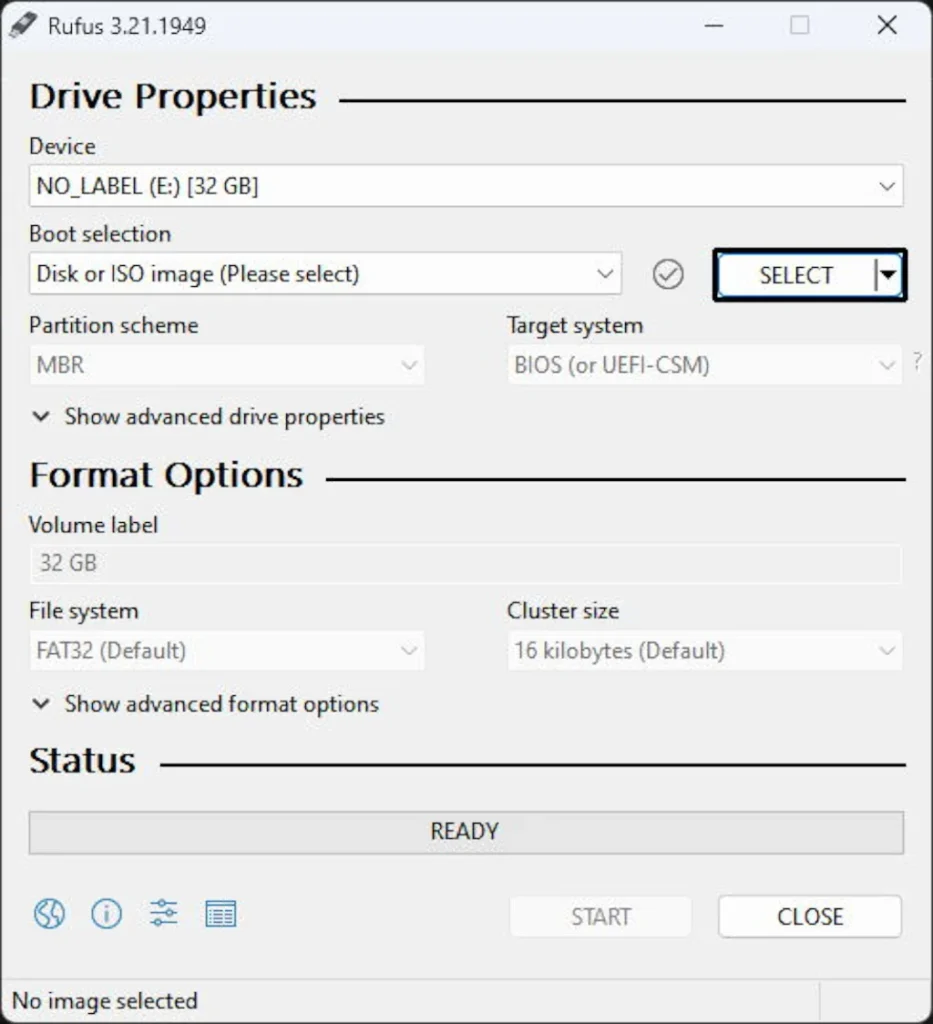
Now, you need to select Ubuntu Desktop 22.04 ISO image. To do so, click on the SELECT button:
Once you click on the SELECT button, a new window will open. It will allow you to select the Ubuntu installation image. Go to a location where you saved the image, select it, and click Open:

With the image selected, click the drop-down menu below the Partition scheme and choose GPT. Once done, you can click on the START button to create a bootable USB:


If all goes well, Rufus will inform you that everything is good by highlighting the READY bar in green. The operation will take several minutes to complete. To finish, click the CLOSE button, safely eject the USB drive, and plug it into the computer where you wish to install Ubuntu.
Create Installation Media – Linux Systems
On Linux systems, you don’t need a special GUI tool to create a bootable USB drive. While such tools exist, I will make a bootable USB drive with a CLI (command-line interface) command called dd in this example.
Once you insert a USB stick into the computer, the system will probably initialize it immediately. To check if that is so, start the Terminal and execute the following command:
df -h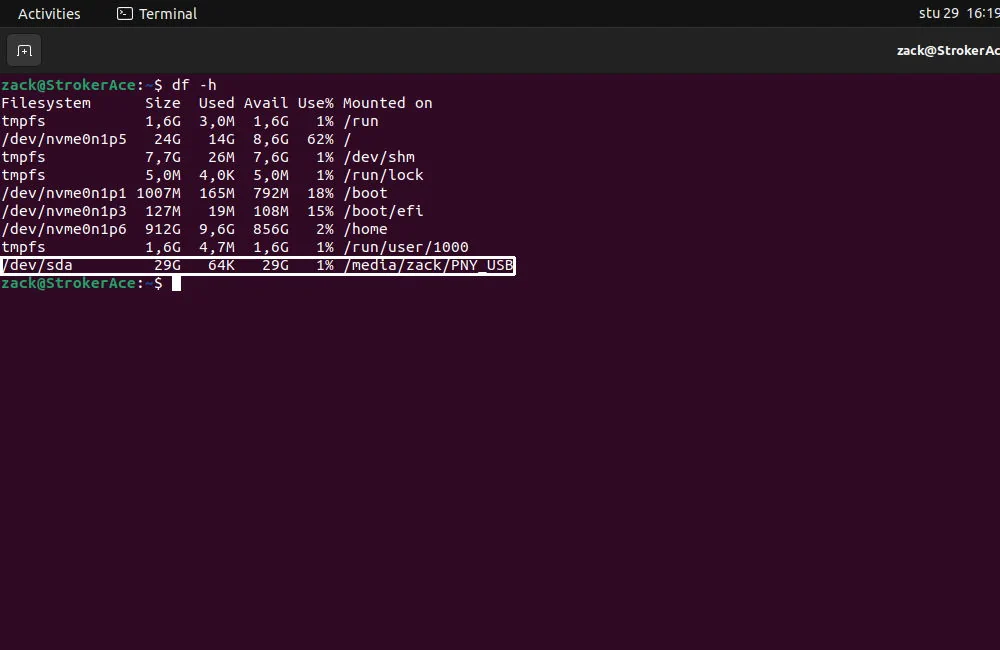
As you can see in the example above, my PNY_USB is mounted at /home/zack/PNY_USB. To continue, I need to unmount it first. I will do so by executing the umount command. You can do the same. Just pay attention to where the USB is mounted (in my case, it is /home/zack/PNY_USB):
sudo umount /home/zack/PNY_USBYou can check if the umount was successful by executing the lsblk command with the following parameters:
lsblk | grep -v loop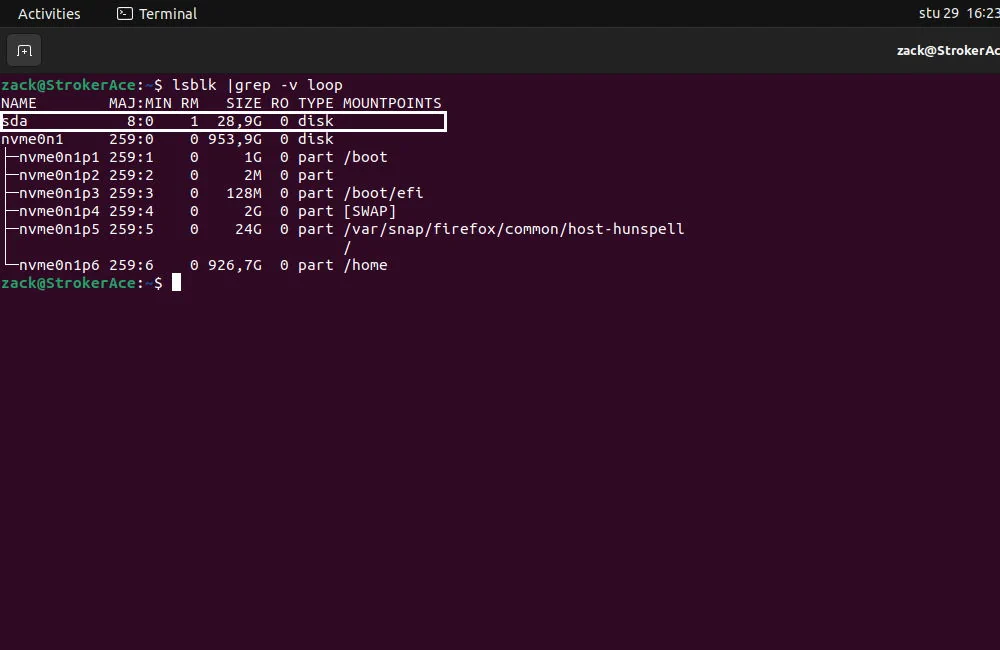
In the example above, please notice the MOUNTPOINTS column. Nothing is present for my sda drive, which is my USB stick. With that confirmed, I can now execute the dd command, which will “burn” the Ubuntu Desktop 22.04 ISO image to my USB stick. Make sure to modify the path to your Ubuntu ISO image (if= parameter) and the path to your USB drive (of= parameter) before you execute the command:
sudo dd if=/home/zack/Downloads/ubuntu-22.04.1-desktop-amd64.iso of=/dev/sda bs=8M status=progress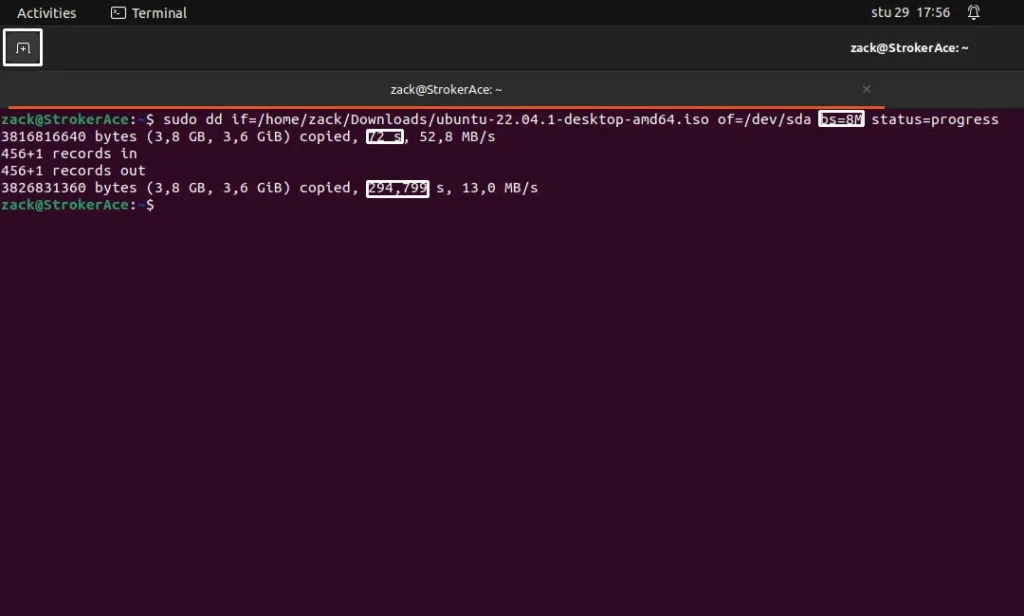
You may notice that the whole operation freezes, and it looks like nothing is happening. Looking at the image above, you may notice it took dd 72 seconds to write the image, yet the whole operation took 295 seconds. You may also notice I used a bs parameter (BYTES) of 8M. So, what is going on here?
It’s like this: dd reads and writes ISO images in blocks of 8MB, but it does not write the image directly on the USB drive. It sends it to a “temporary IO buffer,” from which it is eventually written on a USB drive. So, it took 72 seconds for a dd to “transfer” an image to a temporary buffer, and then an additional 223 seconds (295-72) were required for the image to be written on the USB drive. You can find an in-depth explanation of this on the following link:
You can actually “see” all of that. To do so, open another terminal window and execute the following command:
watch -n1 cat /proc/meminfo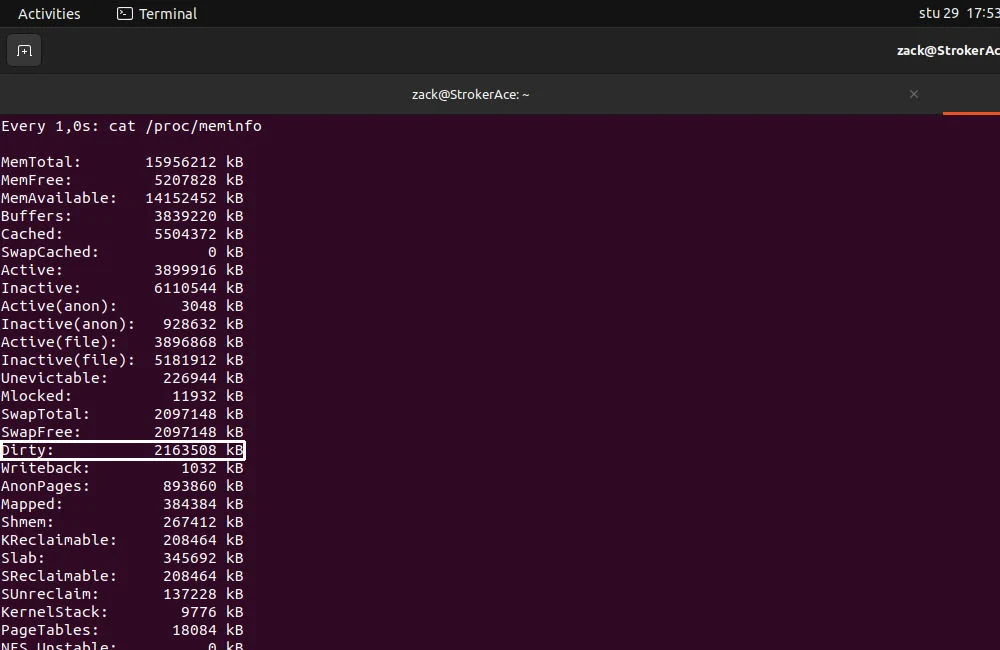
After you execute the watch command, please pay attention to the Dirty value; with time, it will slowly decrease, and when it hits a couple of kilobytes, your dd operation will finish. Now, how cool is that? Linux lets you see everything 🙂
After the operation is complete, your Ubuntu Desktop 22.04 bootable USB is done. You can safely remove it and plug it into the computer where you want Ubuntu installed.
Ubuntu Desktop 22.04 – Installation
I will cover both installations on a physical computer and a VirtualBox virtual machine. The installation procedure is identical, with the only difference being that you will need installation media created for a physical computer, which we covered in the previous section of this article.
For a virtual machine, you must install a VirtualBox on your computer and an ISO image of Ubuntu Desktop 22.04. We have an article on how to install VirtualBox both on Ubuntu Linux and Windows:

VirtualBox – Installation & Configuration Guide
VirtualBox is type-2 hypervisor. Find out more about it in our detailed VirtualBox installation and configuration guide.
VirtualBox Machine Setup
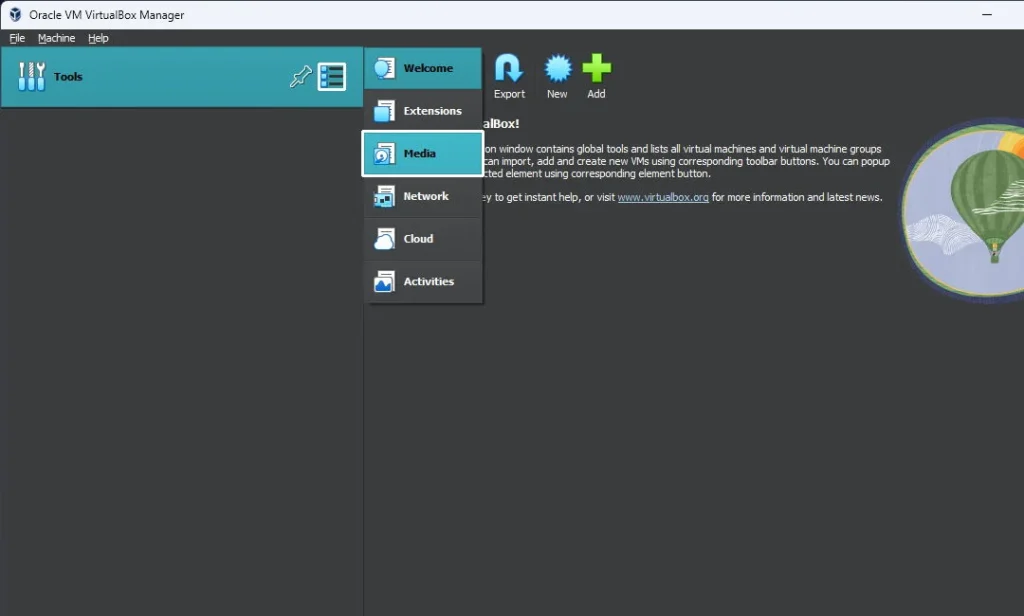
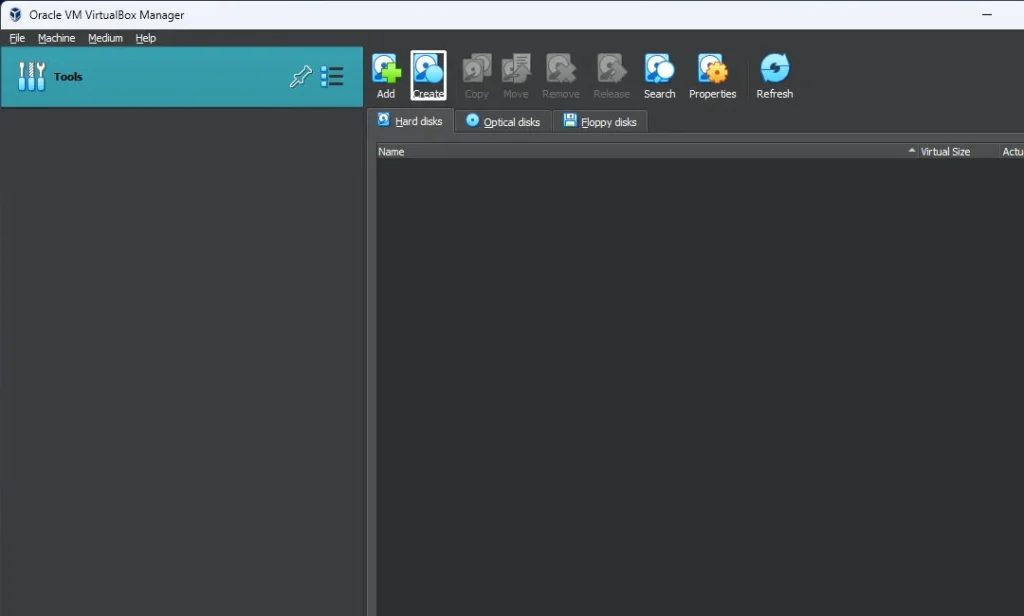
As soon as you start VirtualBox, from the Welcome screen, click on the Tools menu button and then on Media:
A Hard disks tab will be first selected, and from there, click on the Create button to add a hard disk for the virtual machine:
Once the Create Virtual Hard Disk window is open, please click on the Expert Mode button:

Here, you need to configure a hard disk for your virtual machine. Please set the size (1 – I recommend setting 40GB or more here), choose a type (2), set it to be pre-allocated (3), give it a name, and define where it’s going to be saved (4). Once you have done it all, please click the Finish button to complete adding a disk:

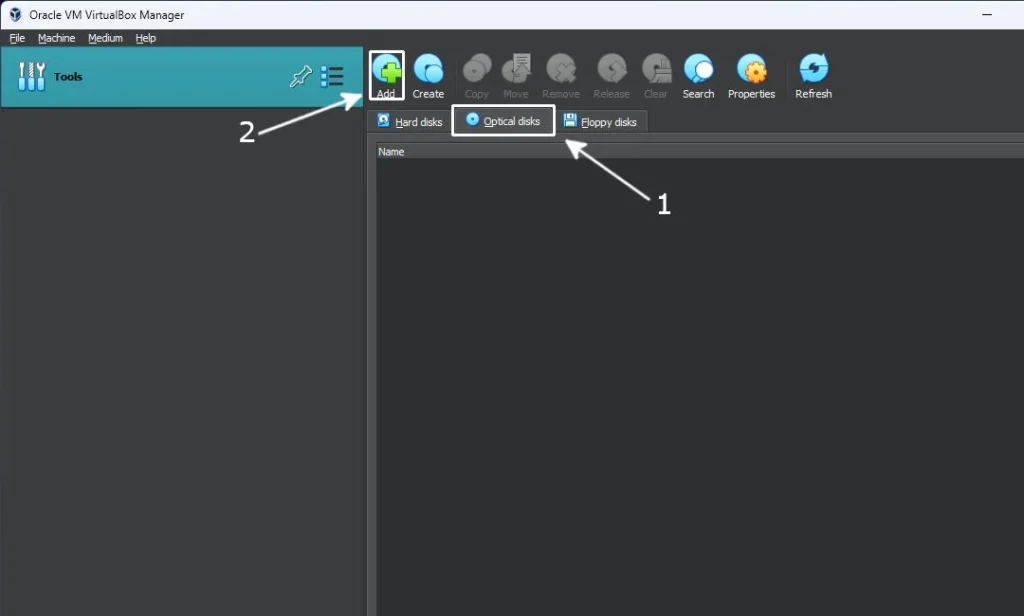
With the hard disk created, switch to the Optical disks tab (1) and click on Add button (2):
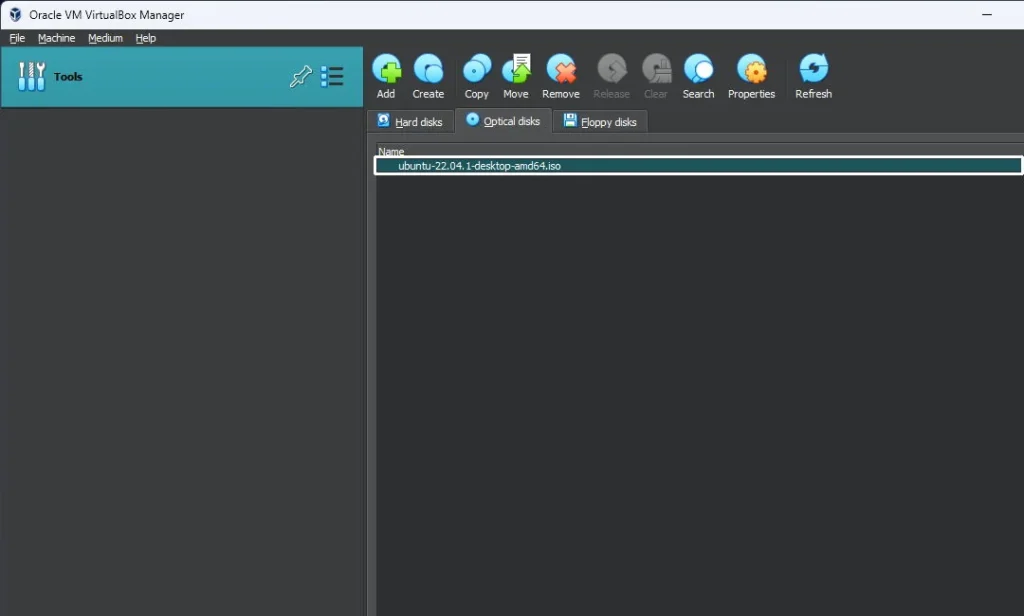
Browse to where you downloaded the Ubuntu Desktop 22.04 ISO image and add it to Optical disks.
With hard disk and ISO added, you can go back to the Welcome screen and click the New button to add a virtual machine for Ubuntu Desktop 22.04:

Create Virtual Machine window will pop up. Please first click on the Expert Mode button near the bottom edge of the window. With expert mode active, you need to give your virtual machine a name (1), select the correct ISO image (2), and uncheck the Skip Unattended Installation option (3):

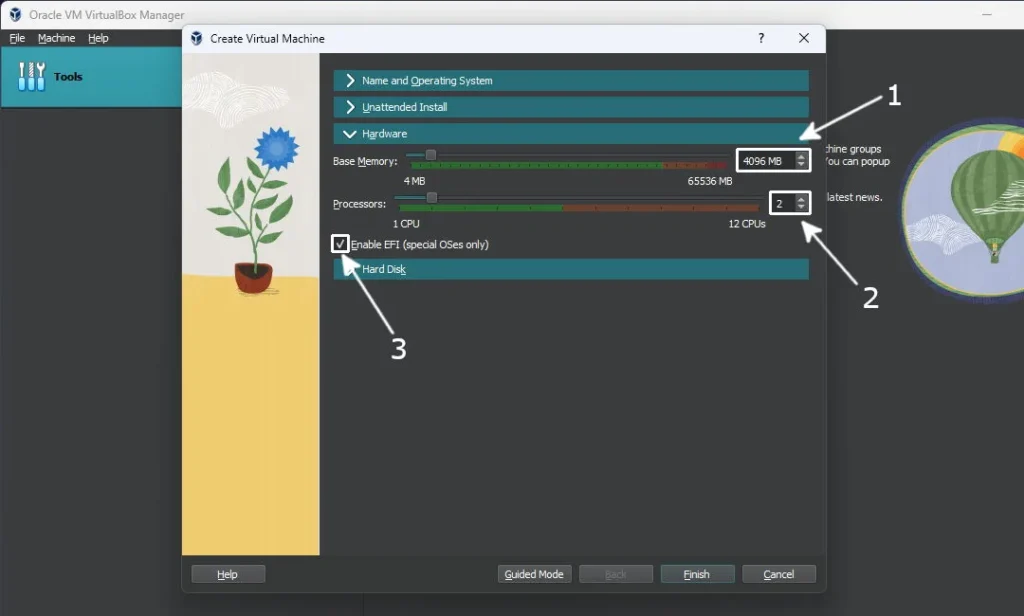
Now click on the Hardware section. You must define the amount of RAM (1) and CPU cores (2) you want to assign to a virtual machine. When talking about virtualization, let’s call it “an industry standard” to assign 2GB of RAM (2048MB) per 1 CPU core, but this is not mandatory. Also, check Enable EFI option (3) here:
Last, click on the Hard Disk section. Here, click on Use an Existing Virtual Hard Disk File (1), and select the one you created a few steps back (2):

Please click on the Finish button to complete setting up your virtual machine.
VirtualBox Machine Additional Settings
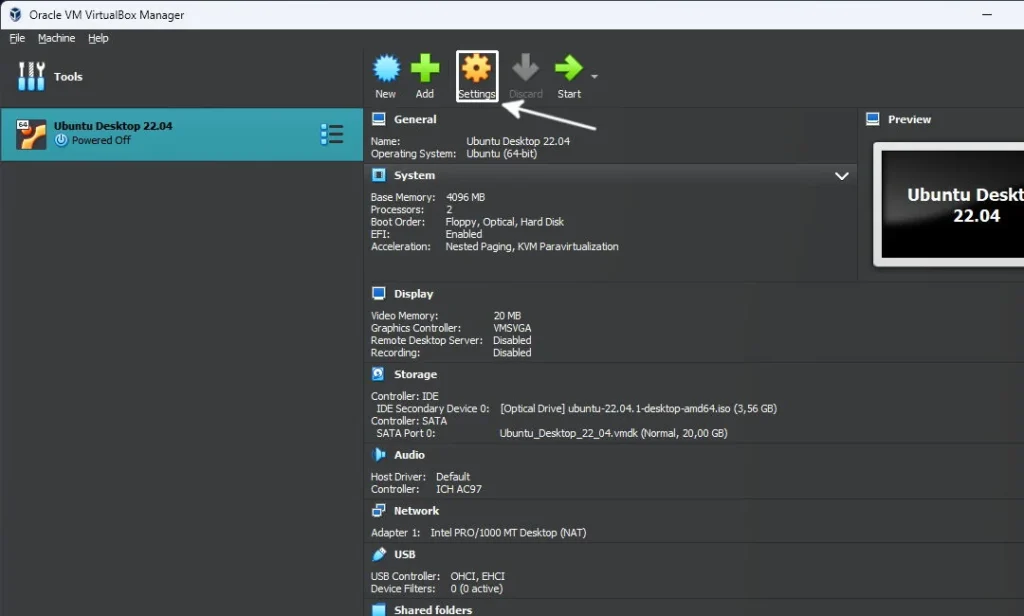
At this point, you can start the virtual machine and start with the installation of Ubuntu Desktop 22.04. But I strongly advise you to review the following settings as they will significantly improve your virtual machine performance. To do so, please click on the Settings button:
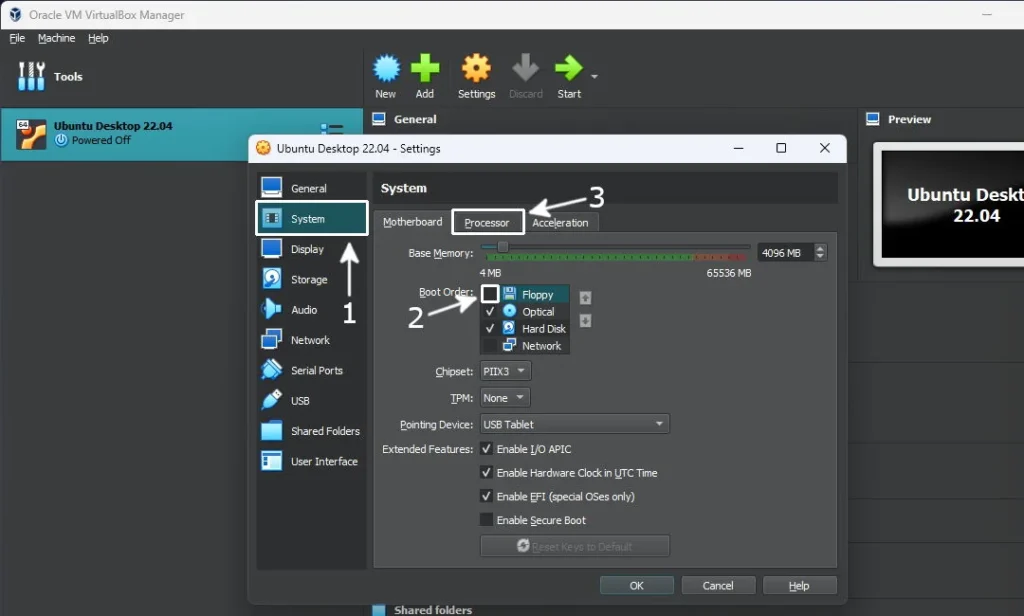
Once the Settings window pops up, please click on the System section (1) and uncheck Floppy under Boot Order (2), as it will not be required. Once done, click on the Processor tab (3):
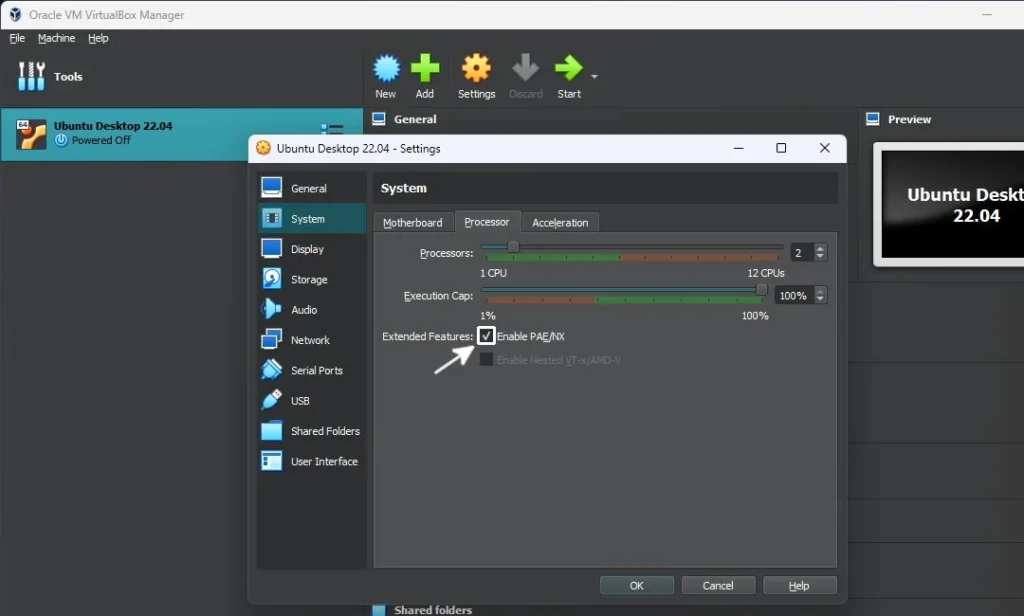
On the Processor tab, please check the Enable PAE/NX option. If you have an AMD CPU and you enabled virtualization in the BIOS, the Enable Nested VT-x/AMD-V option will also be available so that you can check that one. Unfortunately, Oracle is still unclear as to why that option is not available for Intel CPUs.
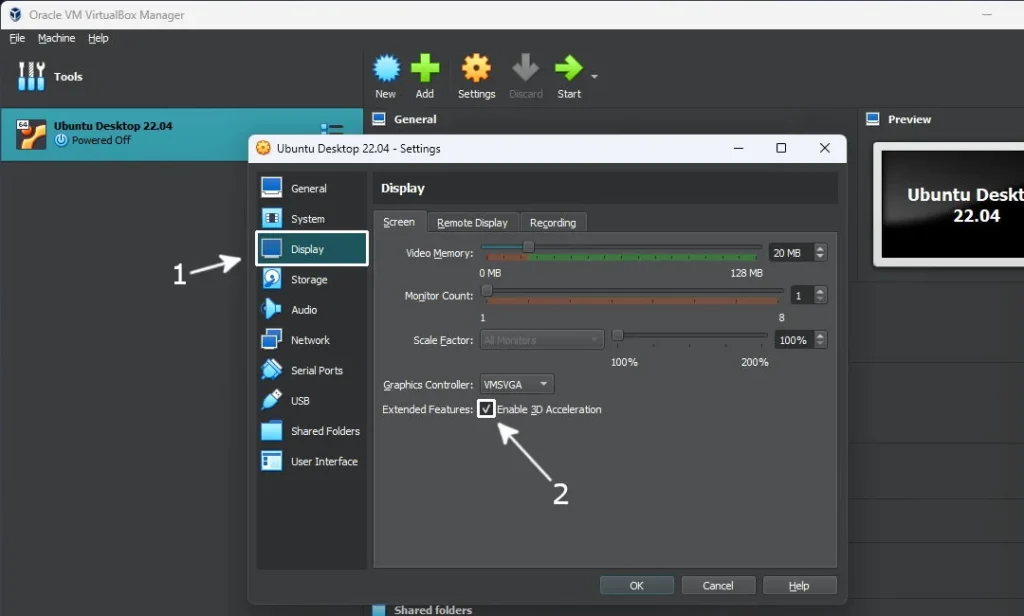
Next, click on the Display section (1) and check the Enable 3D Acceleration option (2):
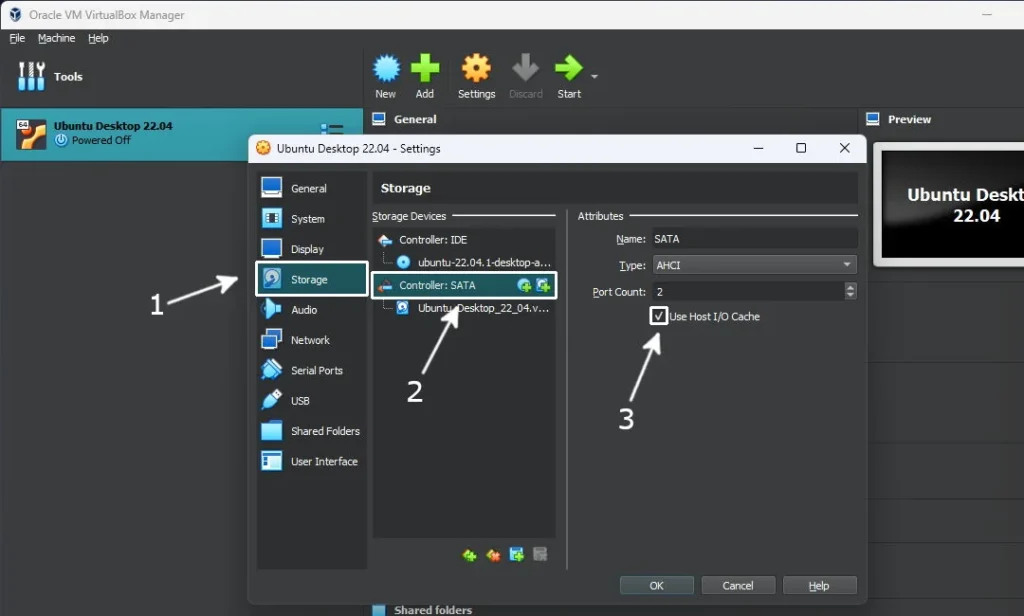
Now click on the Storage section (1). There, click on Controller: SATA (2) and check the Use Host I/O Cache option (3):
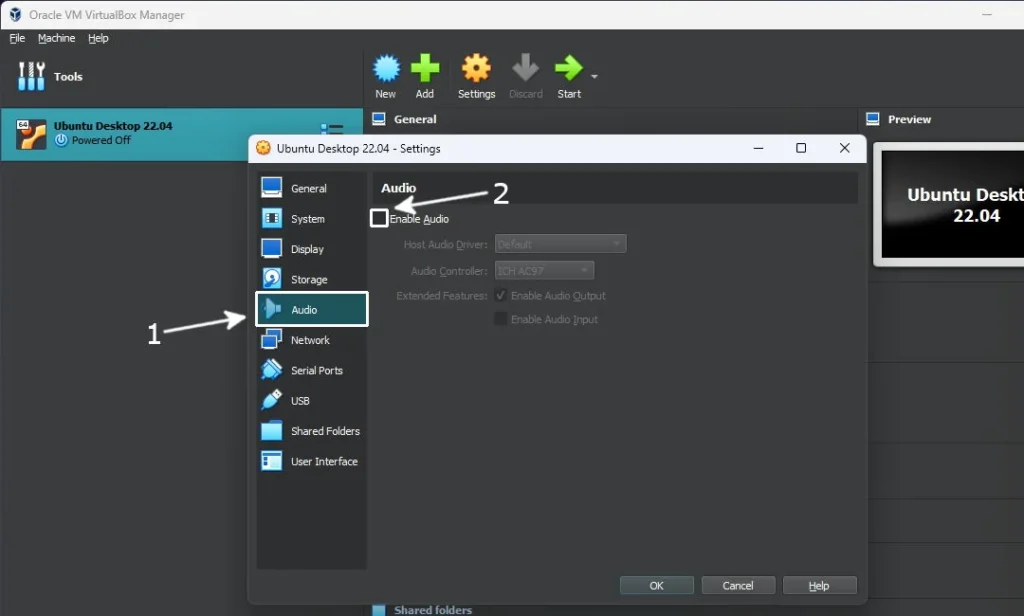
On the Audio section (1), you can altogether disable audio by unchecking the Enable Audio option (2), as it is not required:
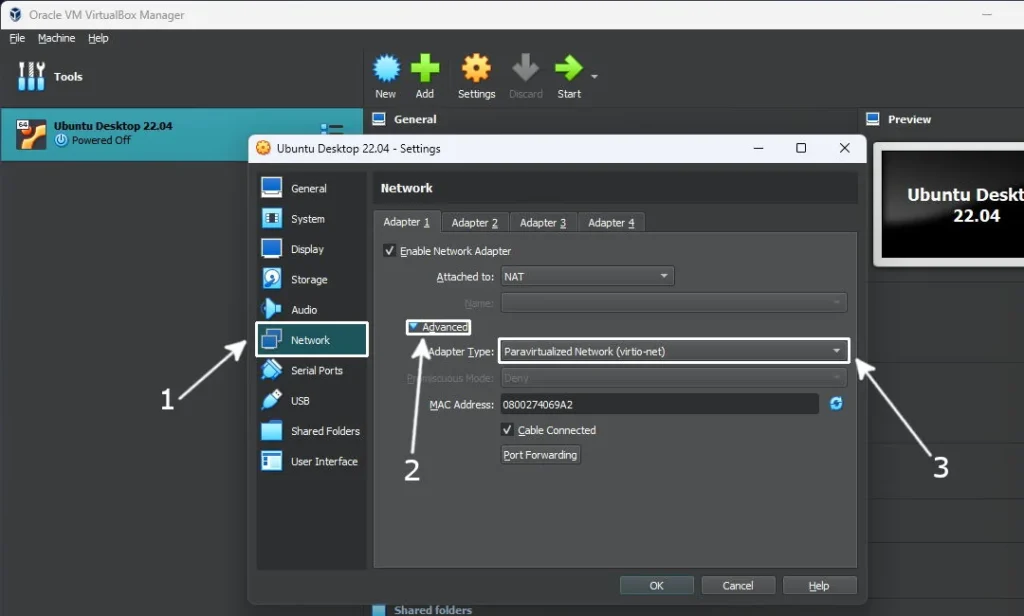
Last, switch to the Network section (1), expand the Advanced options (2), and select Paravirtualized Network (virtio-net) option (3) in the drop-down menu:
This should cover all the required settings, so please click the OK button to close the virtual machine Settings window. Now, you can start the virtual machine and install Ubuntu Desktop 22.04.
Installation Procedure
From this point on, everything is the same, whether you choose to install Ubuntu Desktop 22.04 on a virtual machine or a physical computer. Plug the USB into the computer where you wish to install Ubuntu and start it (or power up the virtual machine). Once the installer loads, please select Try or Install Ubuntu:

On the Welcome screen, please select the language for your installation (1) and click on the Install Ubuntu button (2):

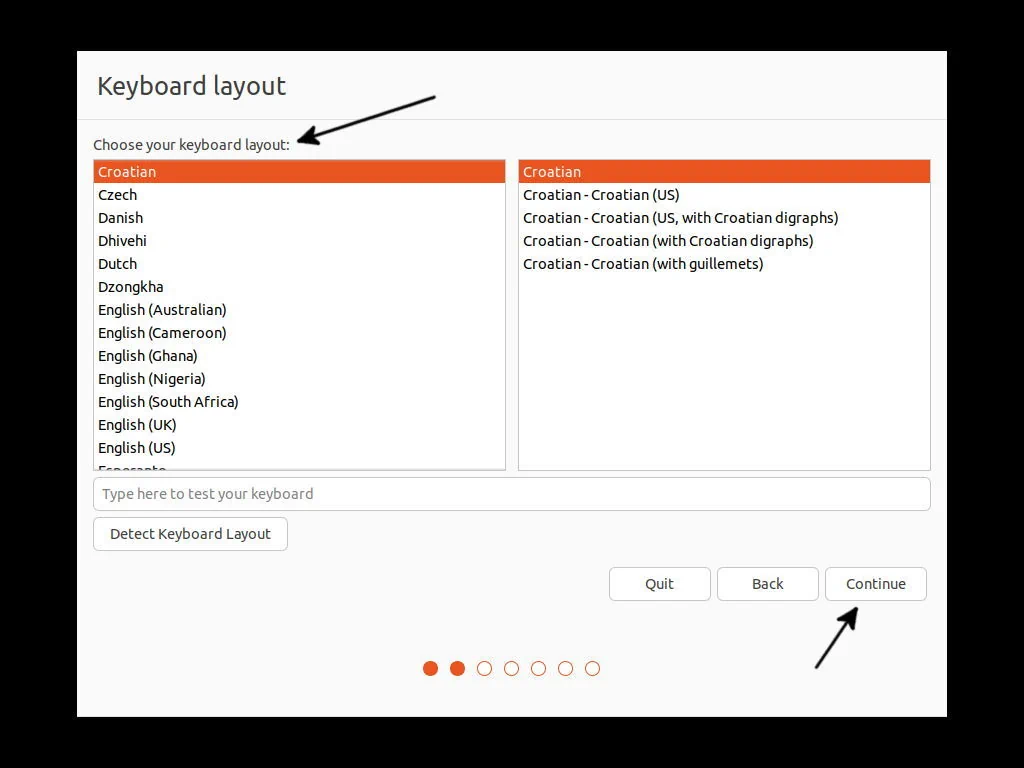
Select a keyboard layout best suited for you and click on the Continue button:
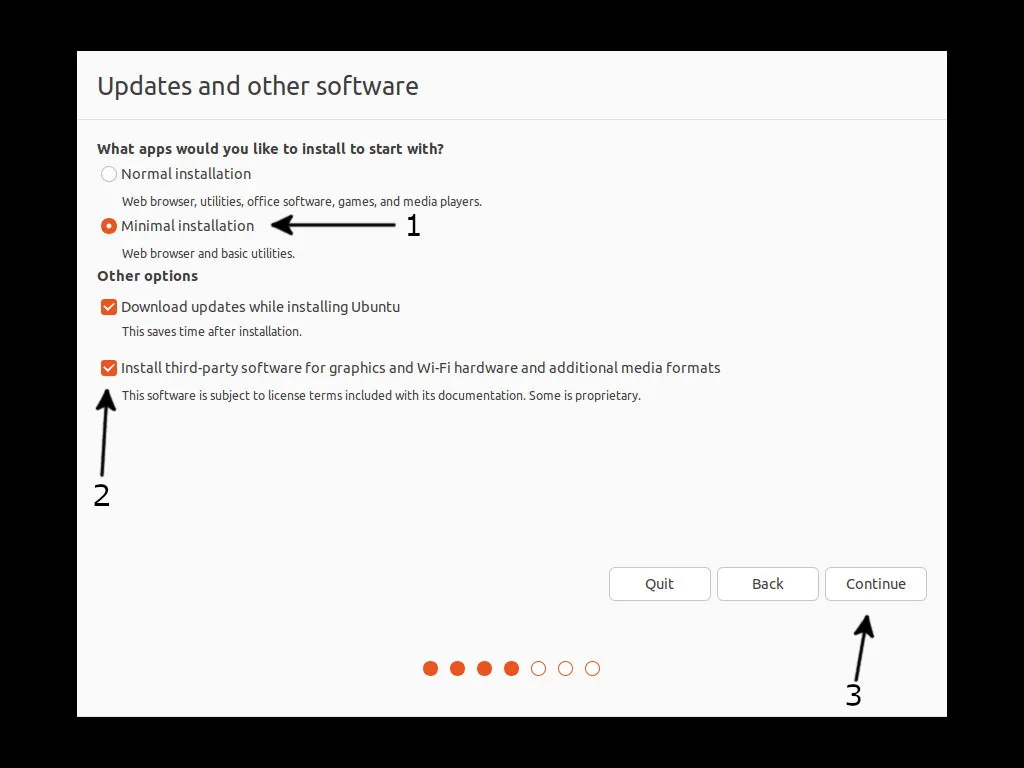
On the following screen, you need to choose the type of installation. Selecting a Normal Installation here is fine, but be warned that some software you don’t want or do not intend to use may be installed once the installation is complete.
On the other hand, Minimal Installation will install Mozilla Firefox and a few basic utils, leaving you the choice of installing all other software. I always select this, so please feel free to do it (1). Installing third-party software (2) is optional, but I usually choose it. Once done, please click the Continue button (3):
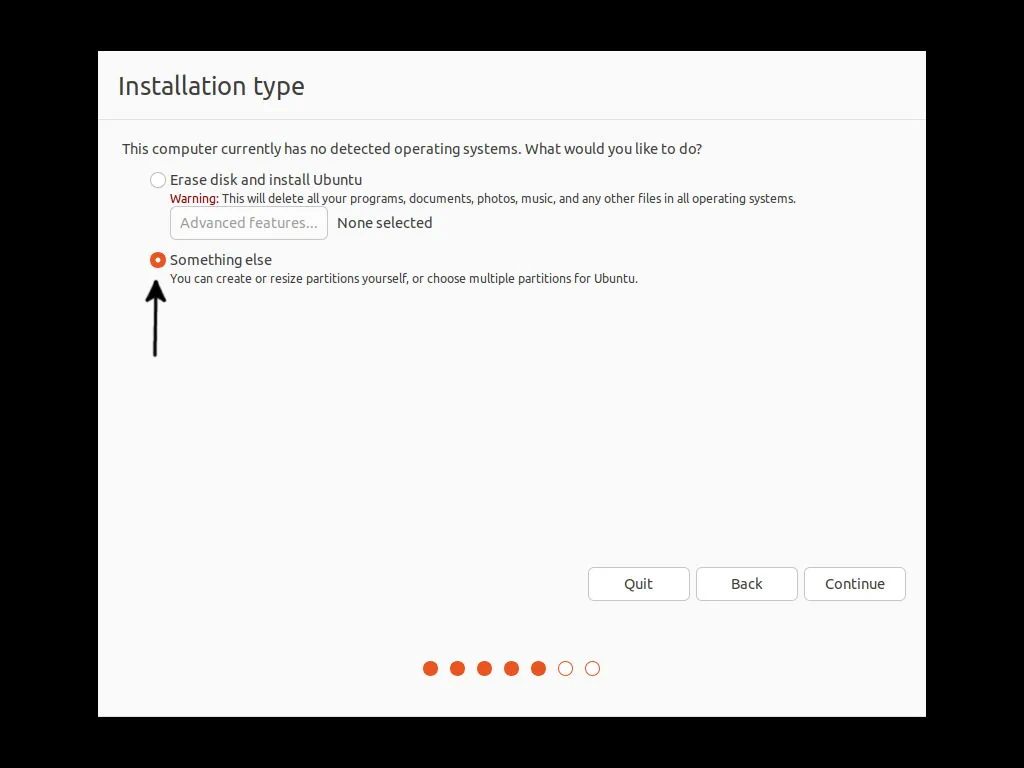
Selecting Erase disk and installing Ubuntu on the Installation type screen is perfectly fine. But I would like you to consider creating the partitions by selecting Something else. I suggest the following partitioning scheme:
- Boot partition, size 1GB, ext2 file system (journaling not required)
- GRUB partition, size 2MB, no file system (unformatted)
- EFI partition, size 128MB, no file system (unformatted)
- Swap partition, size 1GB, no file system (unformatted)
- Root partition, size 16-32GB. ext4 or xfs file system
- Home partition, rest of the disk, ext4 or xfs file system
So, if you opt for manual partitioning, please select Something else, but don’t click on the Continue button once you do. Instead, press the Crtl and F2 keys on your keyboard simultaneously to switch to the console. In the next step, I will show you how to do the partitioning there by using parted.
Once you drop into the console, you will be asked to enter a username. A default username here is ubuntu, so please use that one (no password is required). Once you log in, root privileges are required to create partitions. To “log in” as root, please execute the following command:
sudo su -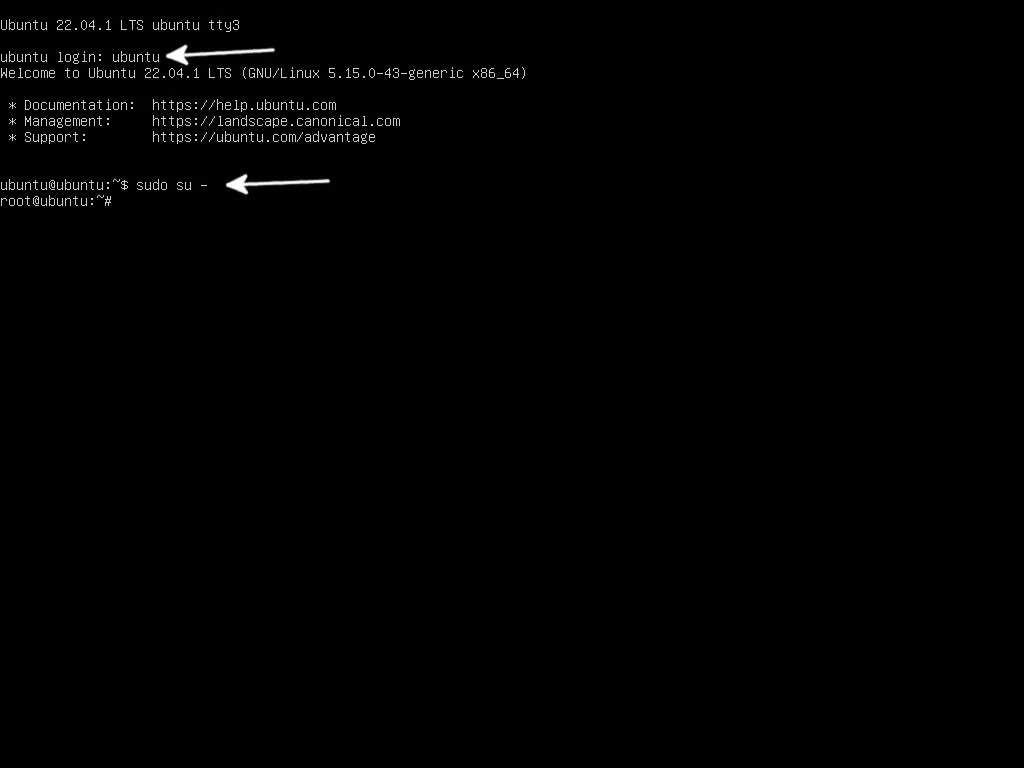
The first command you need here is lsblk (see picture below). It will list all the “disk-like” devices on your computer. You’re probably looking for sda (for HDDs and SSDs) or nvme0n1 (for NVMe drives). Once you determine the correct disk, you can execute the parted command with all the required parameters for all partitions. To do so, please run the following command (root between 16-32GB):
parted /dev/sda mklabel gpt mkpart boot 1MiB 1025MiB mkpart grub 1025MiB 1027MiB mkpart EFI-SP 1027MiB 1155MiB mkpart swap 1055MiB 2179MiB mkpart root 2179MiB 34947MiB mkpart home 34947MiB 100%
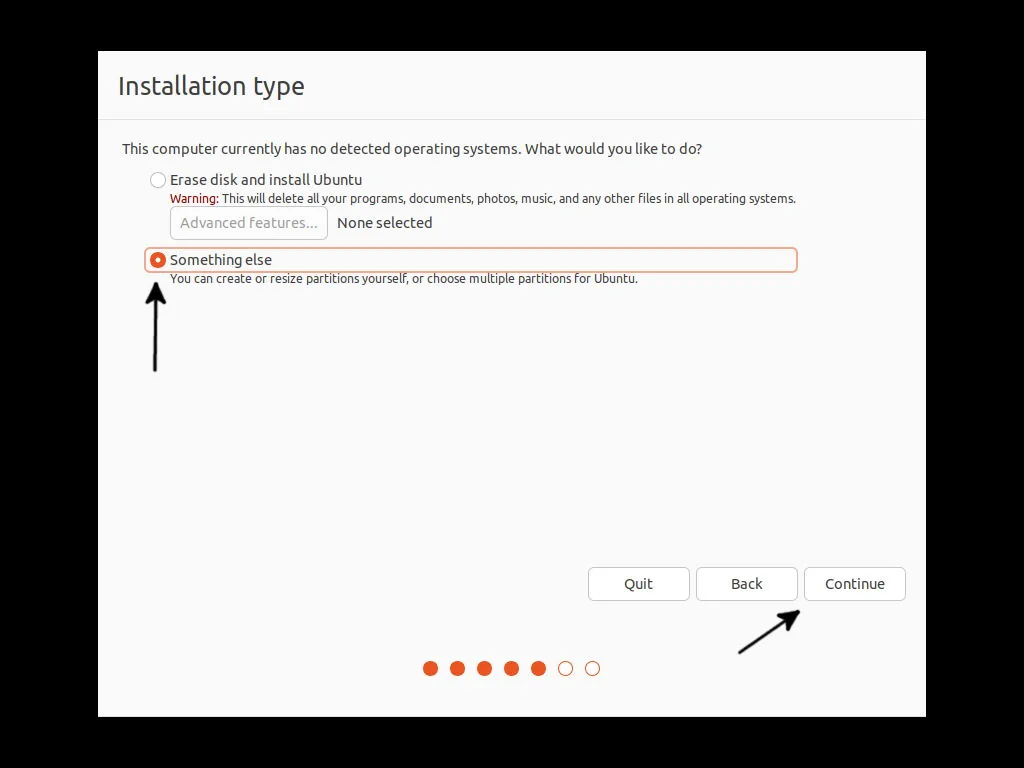
Once you’re done, press Ctrl and F1 keys on your keyboard simultaneously to return to the installer. From there, make sure Something else is selected and click on the Continue button:
At this stage, all the partitions can be prepared (formatted) for installation. Start with boot and work your way down to the home partition.
Select /dev/sda1 (1), click on the Change… button (2), select Ext2 file system, and check Format the partition (3). Select /boot (4) and click the OK button (5) to confirm:

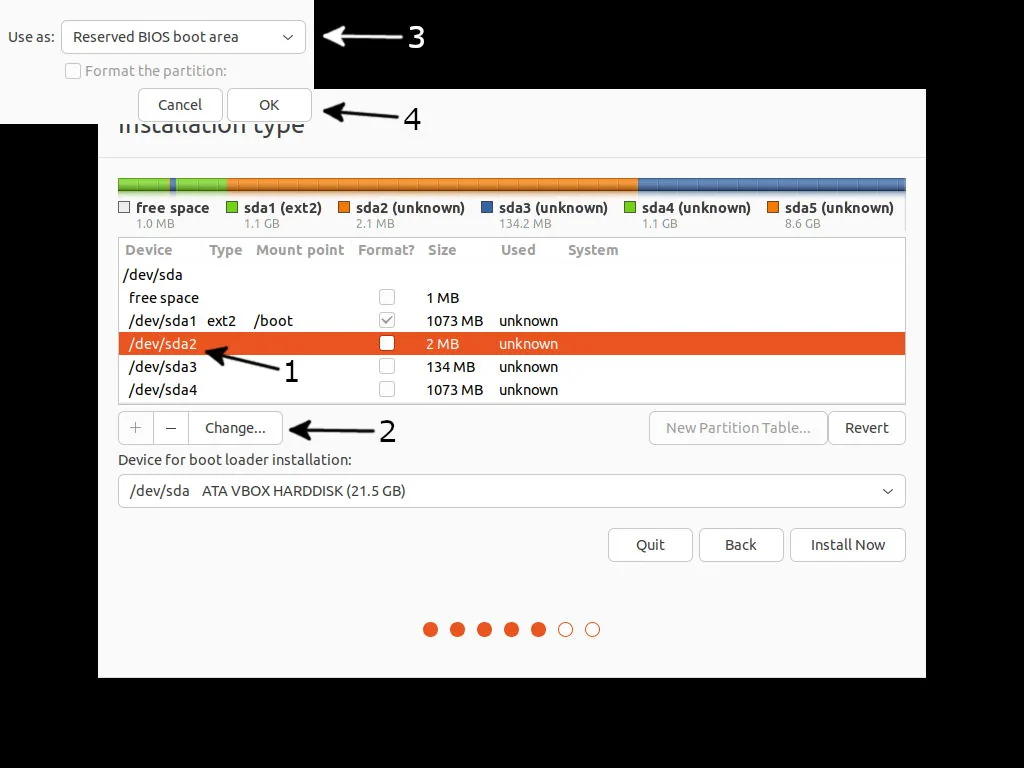
Select /dev/sda2 (1), click on the Change… button (2), and select Reserved BIOS boot area (3). Click the OK button (4) to confirm:
Select /dev/sda3 (1), click on the Change… button (2) and select EFI System Partition (3). Click the OK button (4) to confirm:

Select /dev/sda4 (1), click on the Change… button (2) and select swap area (3). Click the OK button (4) to confirm:

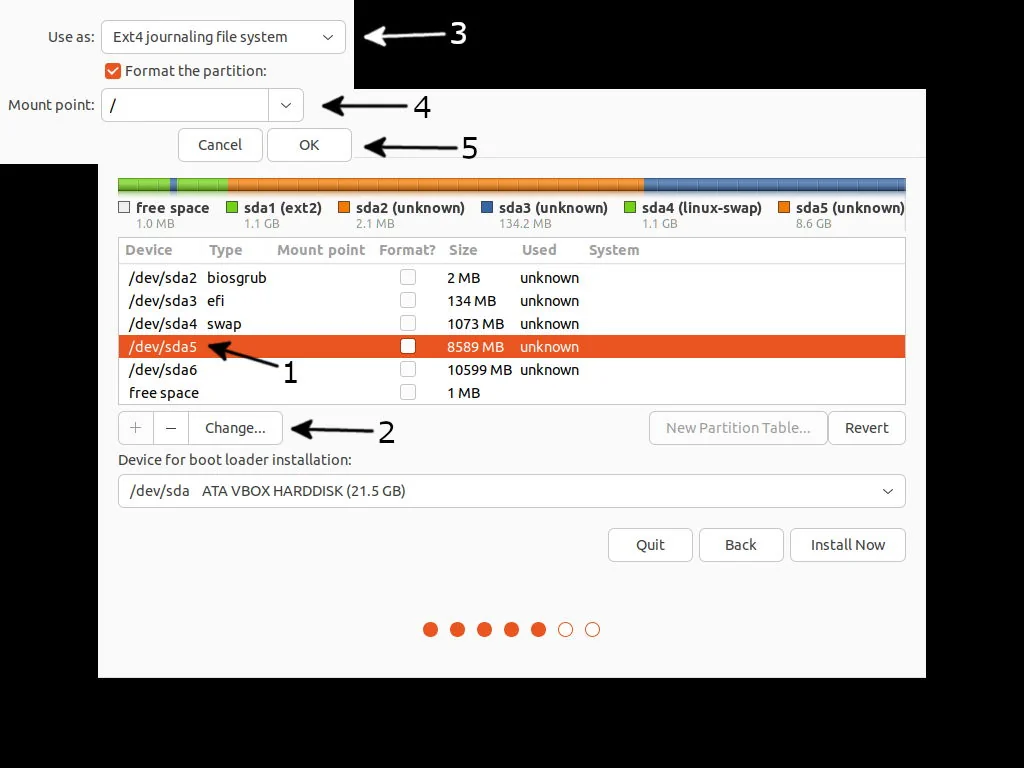
Select /dev/sda5 (1), click on the Change… button (2), select Ext4 journaling file system, and check Format the partition (3). Select / (4) and click the OK button (5) to confirm:
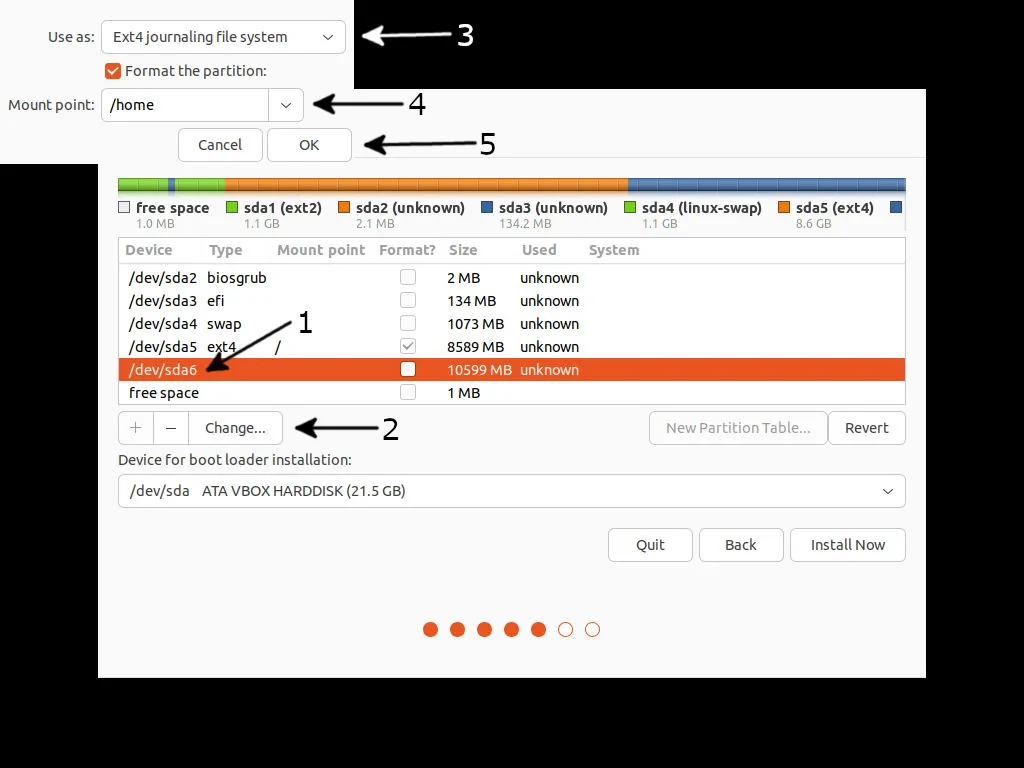
Select /dev/sda6 (1), click on the Change… button (2), select Ext4 journaling file system, and check Format the partition (3). Select /home (4) and click the OK button (5) to confirm:
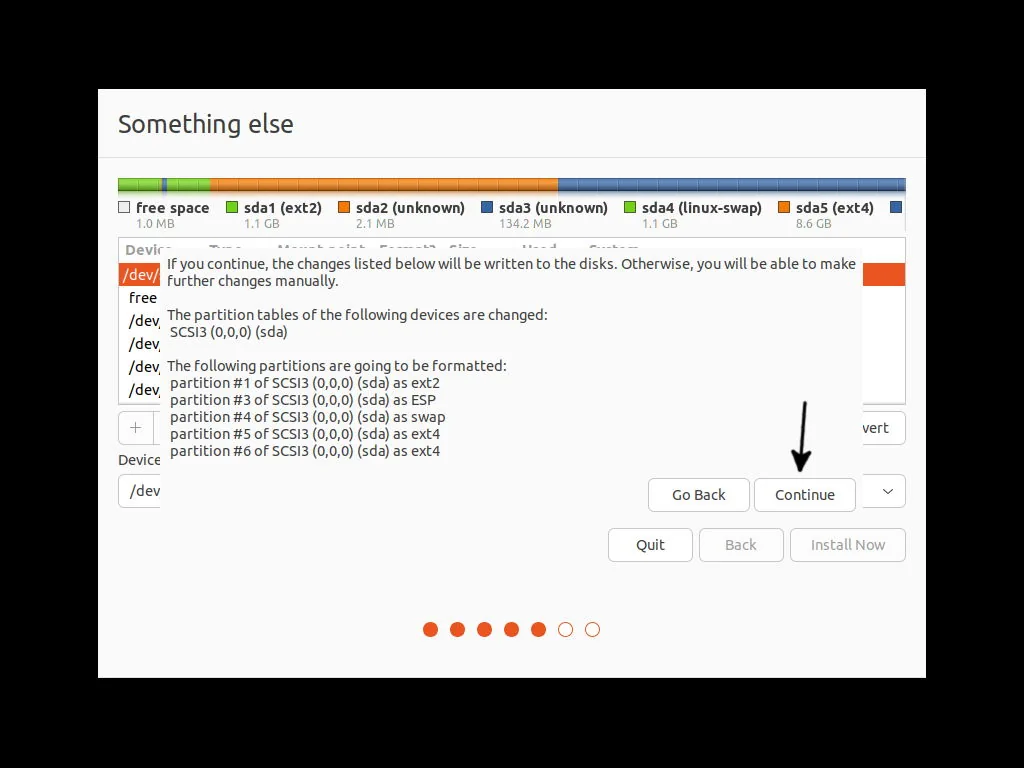
With all of the partitions prepared, please click on the Install Now button to continue with the installation:

On the next screen, please click on the Continue button to confirm all the changes on the disk:
Your location (1) will be (most probably) detected automatically, but you can manually enter the correct one if the automatic choice is incorrect. Once done, click on the Continue button (2):

Setting the correct location affects how your operating system will “behave” regarding some tasks it will perform, among others:
- Software using location information
- Today, many software programs (e.g., web browsers and any map software) use location information to give users as much relevant information as possible.
- Operating system updates
- Ubuntu will try to access the closest update mirror server when pulling updates. If you defined your location correctly and there is an update mirror server in your country, updates will be downloaded from that server. This will save you both time and bandwidth while performing updates.
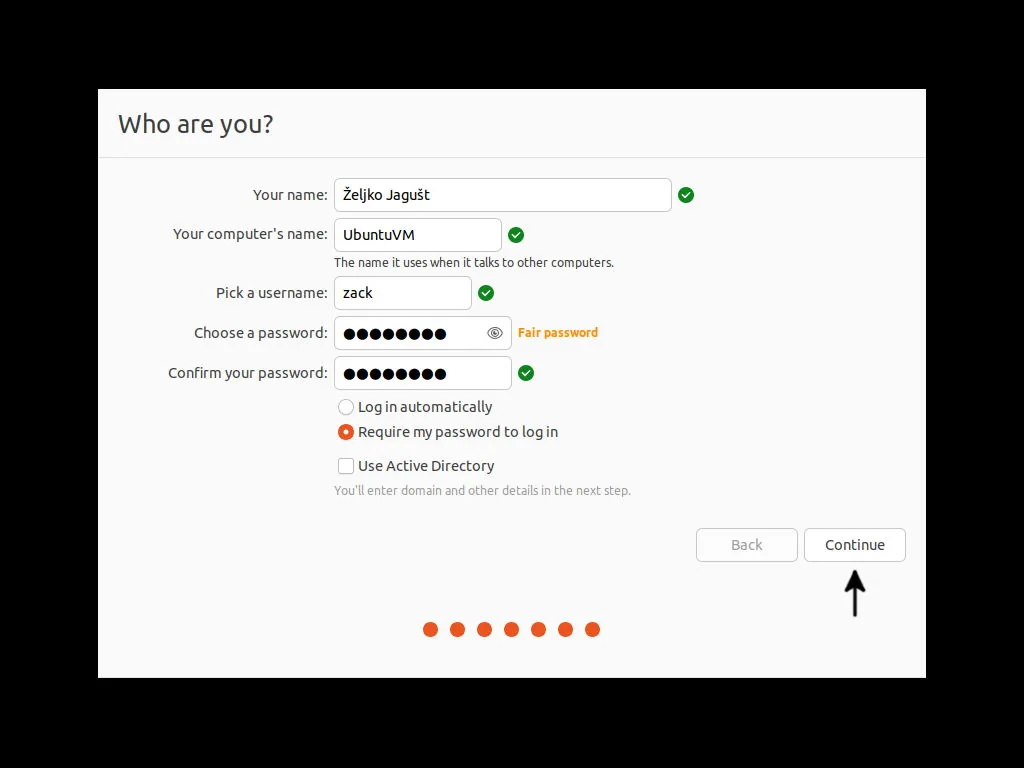
The last information the installer will require from you is your user data. The picture below is self-explanatory enough, so fill in all the required data and click the Continue button once you do:
Now, you can sit, relax, and pat yourself on the back for a well-done job. The installation itself will take some time to complete:

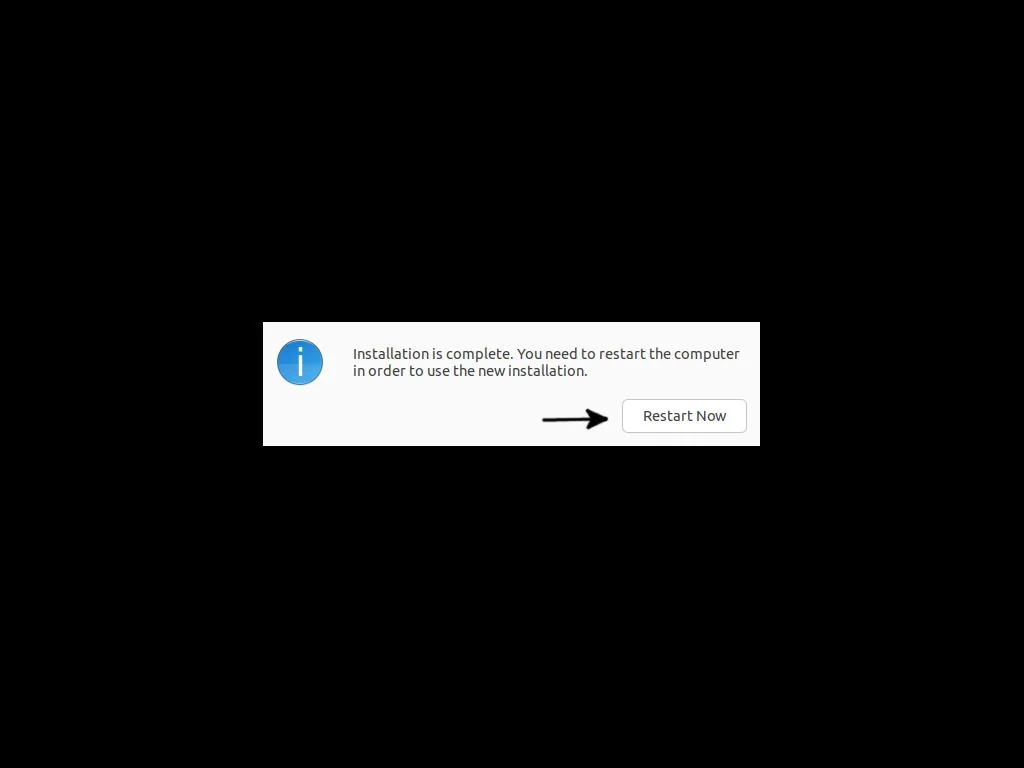
Once the installation is complete, please restart your computer by clicking on Restart Now button:
Ubuntu Desktop 22.04 – Final Steps
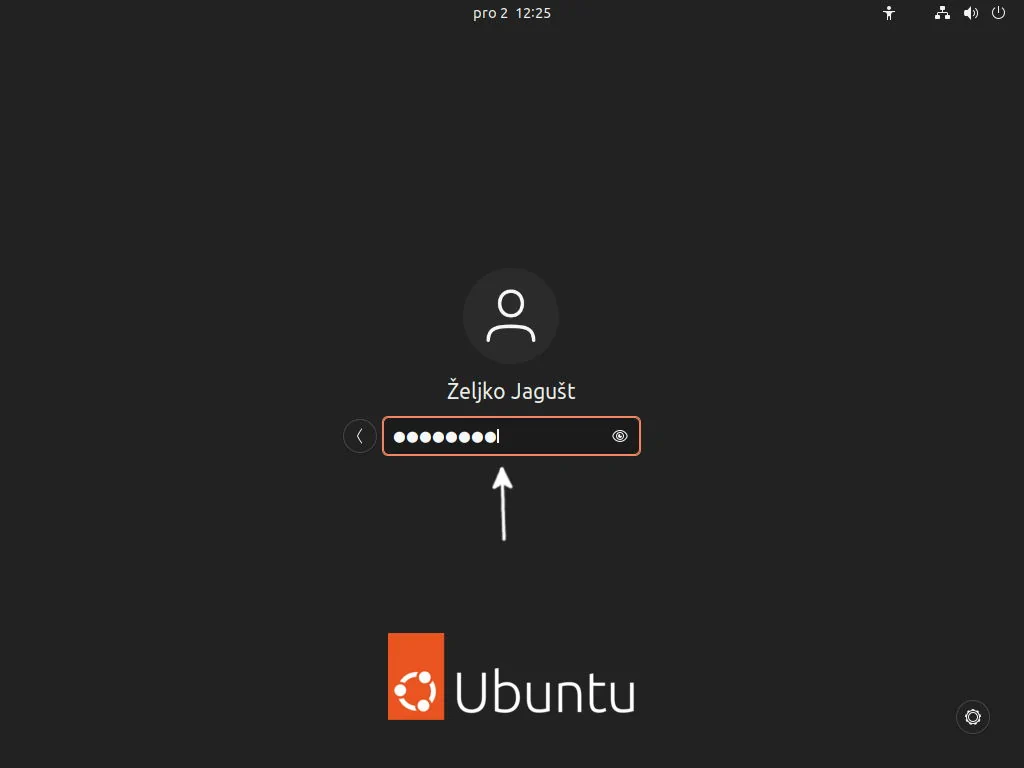
Once your computer boots up again, a login screen will be displayed. Click on your username:

On the following screen, write your password and press Enter key to continue:
After you log in, there will be some additional steps your new Ubuntu will ask you to do. First, you will have the option to sign in to one of many offered online services. You can skip this step if you wish:

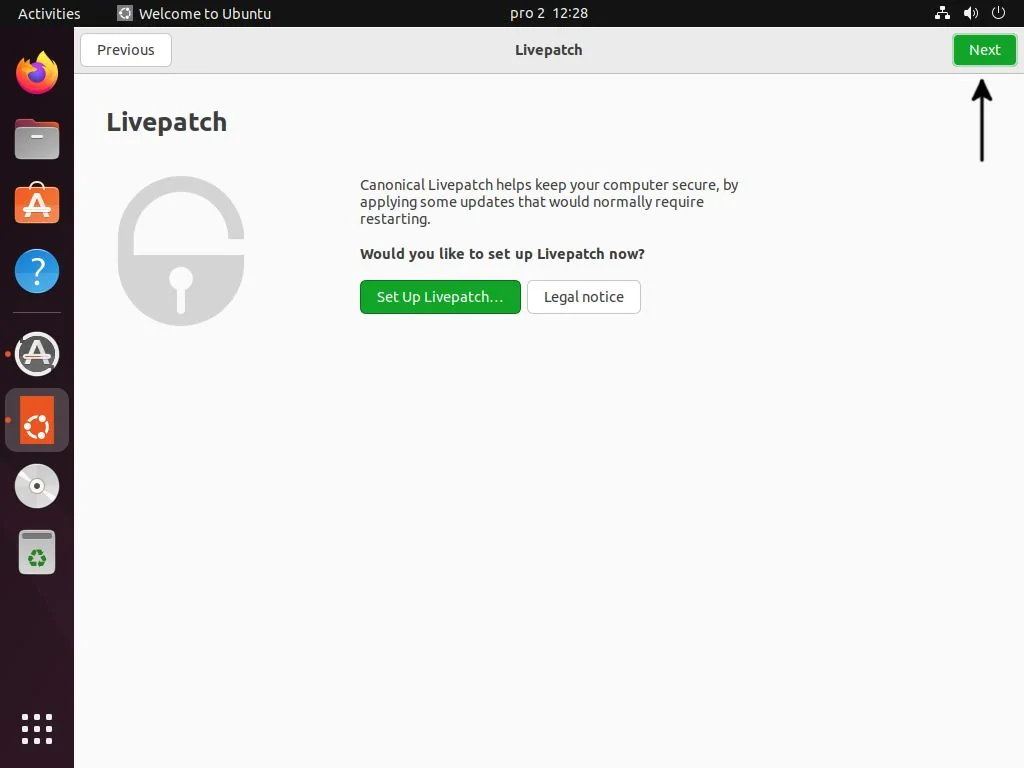
On the next screen, unless you have an Ubuntu Pro subscription, you can click the Next button and skip Livepatch setup:
Help improve Ubuntu screen will allow you to send usage information to Canonical (Ubuntu creators). I opt not to send it, but the choice is yours here (1). Once you make up your mind, click on the Next button (2):

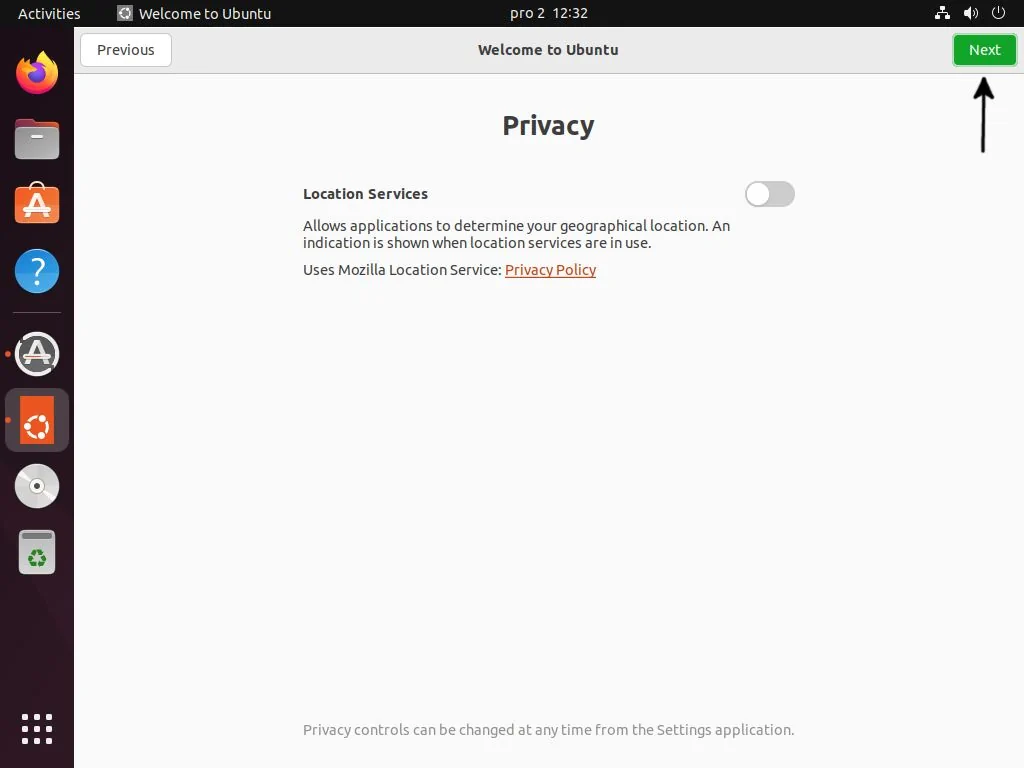
Again, it is up to you whether to enable the location service. It may have little effect on how your apps behave. Once you decide, click on the Next button.
And you’re finally ready to go! I will not show you how to install any software here, as we will soon have an article on how to install some applications we recommend for Ubuntu Desktop 22.04. Until then, click on the Done button to exit to the desktop:

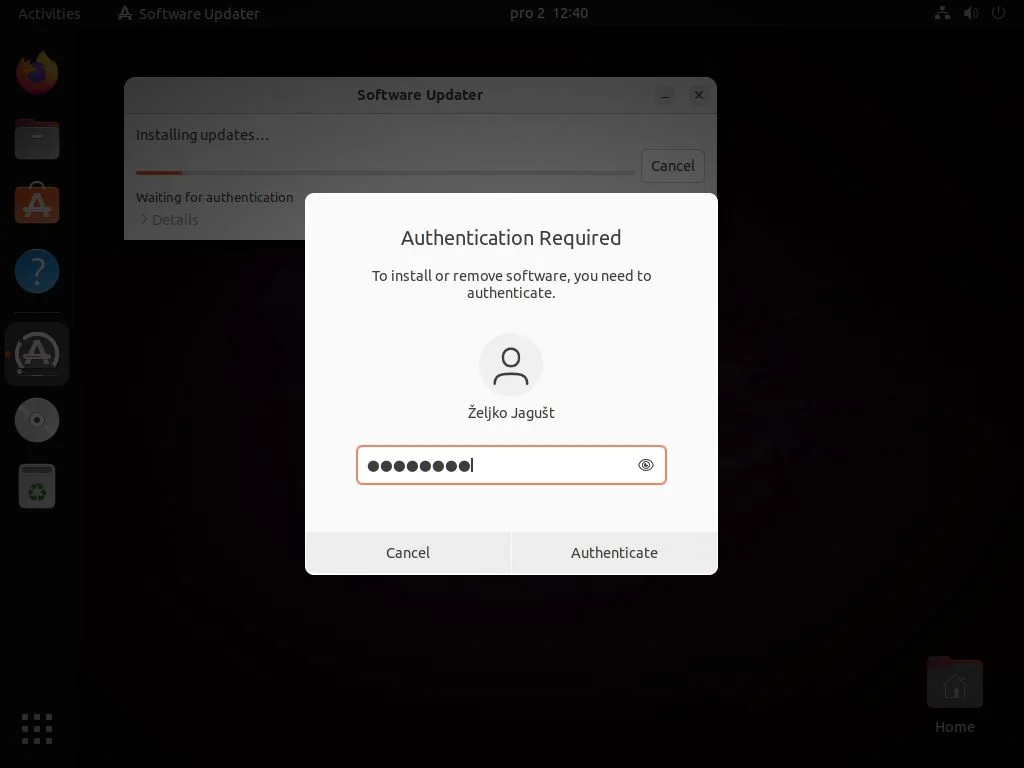
You may notice a Software Updater application popped up before while you were still performing the last few steps. Please feel free to click on the Install Now button to install the latest updates for your Ubuntu Desktop 22.04:

You will be asked to enter your password to continue and install updates, so please do so once the Authentication Required window pops up:
With updates installed, your Ubuntu Desktop 22.04 system is ready for usage:
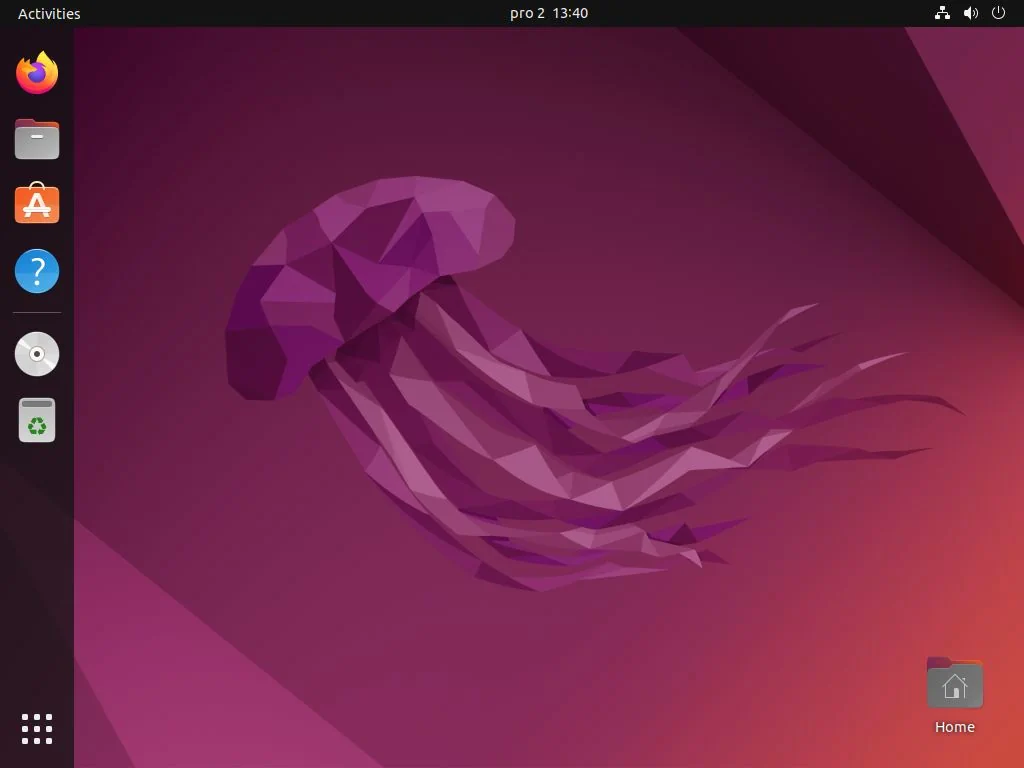
Thank you for reading, and enjoy your Ubuntu Desktop 22.04 – Jammy Jellyfish.
dd commands to copy binary data better to finish with oflag=sync to sleep well after.
Hey rion,
Thanks for the suggestion! However, I need to highlight a few caveats. Using `oflag=sync` ensures that the system syncs after each output block, which could significantly slow down the entire data transfer process. Additionally, if we don’t use `oflag=direct`, large volumes of writes can accumulate in the system’s page cache, potentially degrading the performance of all devices.