
Author:
Željko Jagušt
Publish Date:
September 25, 2023
Estimated Reading Time:
9 minutes
GNOME is renowned for its elegant and user-friendly interface. It combines simplicity with advanced features, making it suitable for newcomers and experienced Linux users. Whether you’re looking for a beautifully designed workspace, an intuitive application launcher, or seamless multitasking capabilities, GNOME has you covered. If you are a fan of GNOME Desktop, Debian is a great choice to experience it.
Introduction
Installing the GNOME Desktop Environment on your Debian system may seem daunting, but fear not. Our step-by-step guide will make the process effortless, ensuring you can enjoy the GNOME experience without hassle. And as a bonus, we will provide you with a script that will automatically do it all for you. How great is that! Let’s get started.
Prerequisites
An installation of the Debian minimal system is a requirement for this guide. Don’t worry; we’ve got you covered here also. We have a complete guide on how to install the Debian minimal system along with an initial customization guide of the same:

Debian 11 Server – Minimal Installation Guide
Follow this guide for a Debian 11 Server minimal installation, providing a solid foundation for any server setup or project you want to build.

Debian 11 Server – Initial Customization Guide
Discover introductory steps to streamline performance, security, and administration in our Debian Server Initial Customization guide.

Encrypting your hard drive is something you may consider if you intend to install GNOME Desktop Environment along with Debian on your notebook computer. Hypothetically, you may leave your notebook unattended, and it might get stolen. With a hard drive encrypted, accessing the data on your laptop and booting the operating system will be almost impossible. In combination with our Home/Small Office – Debian Server guide, you can also check our guide on encrypting hard drives:

Securing Your Data – Installing Debian Linux with Disk Encryption
This step-by-step guide will teach you how to set up “almost” full disk encryption on the Debian Linux operating system.
GNOME Desktop Environment – Installation
The latest version of the Debian operating system (codename Bookworm) is 12 (at the time of writing this article), and with it comes GNOME 40, which is also the latest version and the one we will install.
With the prerequisites fulfilled, and if you followed our guides, once you boot your Debian and log in as root, you will see the following screen:

From here, you will first update the APT catalog (repositories). To do it, please execute the following:
apt updateWith the APT catalog up to date, you can install the required packages for the GNOME Desktop Environment. In the example below, only the most essential packages will be installed. Only the GNOME Desktop Environment will be installed without additional software or programs. To install it, please execute the following:
DEBIAN_FRONTEND=noninteractive aptitude install -y -R alsa-utils bat chrome-gnome-shell cups-common \
dbus-user-session dbus-x11 dconf-editor firefox-esr fuse_ fuse3 gdm3 gjs gkbd-capplet gnome-applets \
gnome-control-center gnome-disk-utility gnome-keyring gnome-online-accounts gnome-session \
gnome-shell-extension-dashtodock gnome-shell-extensions gnome-shell-extensions-extra \
gnome-shell-extension-manager gnome-terminal gnome-tweaks mutter nautilus nautilus-extension-gnome-terminal \
network-manager-gnome power-profiles-daemon rclone sane-airscan sane-utils seahorse software-properties-gtk \
sudo xdg-desktop-portal xdg-desktop-portal-gnome xdg-desktop-portal-gtk xdg-user-dirs
GNOME is now installed, but you’re not done yet. You need to set your user and reconfigure the network setup a bit. Let’s do that.
Create User
By default, the root user cannot log in to the desktop environment (it’s disabled by default but can be enabled). For that purpose, you need to create a “desktop” user. In the example below, I will demonstrate how to create a user John Doe whose login name will be jdoe. I will also add that user to all groups the desktop user requires. To do all that, please execute the following:
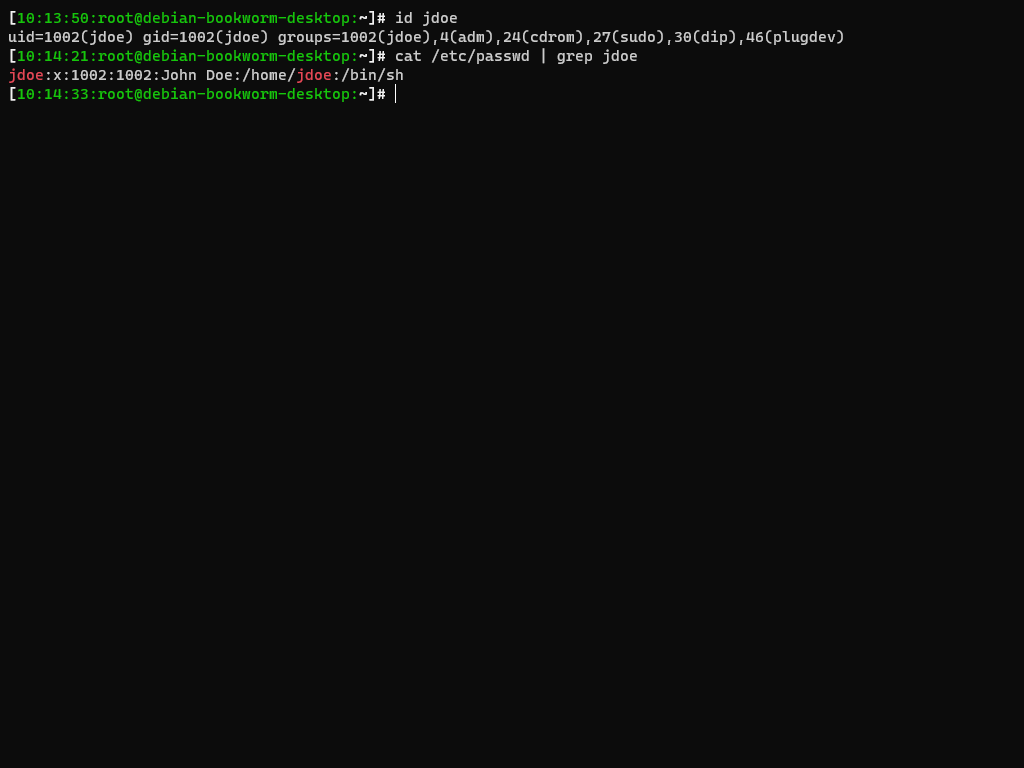
useradd -m -c "John Doe" -G adm,cdrom,sudo,dip,plugdev -s /bin/bash jdoeIn the above command, the -m parameter will create jdoe’s home directory at /home/jdoe. Parameter -c will set jdoe’s first and last name, which you will see on the login screen once you reboot the computer. Last, the -G parameter will add the jdoe user to all required groups. To check if everything is correct, you can execute the following two commands:
id jdoe
cat /etc/passwd | grep jdoe
The output of those commands should be identical to the one in the image below:
Now, you need to set a strong password for your user. You can do it by executing the following command (please replace passpass with your password and jdoe with your username):
usermod --password $(echo passpass | openssl passwd -1 -stdin) jdoeTo complete your user setup, you need to grant it sudo privileges. To do so, please execute the following:
/etc/sudoers.d/jdoe” style=”color:#d8dee9ff;display:none” aria-label=”Copy” class=”code-block-pro-copy-button”>
echo "jdoe ALL=(ALL) NOPASSWD: ALL" > /etc/sudoers.d/jdoeOptionally, you can now log in as a user you created and generate an SSH key. To do so, first execute the following:
su - jdoeTo create SSH key, please execute the following:
ssh-keygen -b 4096 -t rsa -f /home/jdoe/.ssh/id_rsa -q -N ""You can also authorize your user for local SSH connections by executing the following:
/home/$USER/.ssh/authorized_keys” style=”color:#d8dee9ff;display:none” aria-label=”Copy” class=”code-block-pro-copy-button”>
echo "From=\"127.0.0.1\" $(cat /home/$USER/.ssh/id_rsa.pub)" > /home/$USER/.ssh/authorized_keysPress Ctrl + D on your keyboard to log out when you’re done. You can also “extend” the PATH variable for your user here. To do so, please execute the following:
> /home/jdoe/.bashrc” style=”color:#d8dee9ff;display:none” aria-label=”Copy” class=”code-block-pro-copy-button”>
printf "\n# Extend \$PATH variable\nexport PATH=\$PATH:/usr/local/sbin:/usr/sbin:/sbin" >> /home/jdoe/.bashrcWith your user in place, the last thing you need to do is reconfigure the network. Let’s do that in the following subsection.
Network Setup
If you followed our prerequisites and suggested guides there (and I hope you did), you will have GNOME Desktop Environment installed on top of the Debian minimal installation at this stage. In Debian minimal installation, the network is controlled (configured) over a static file at /etc/network/interfaces.
In desktop environments, such as GNOME, the network is controlled by the Network Manager. For the Network Manager to take control of the network, you need to remove all configuration options from the /etc/network/interfaces file. To do so, open the /etc/network/interfaces file in your chosen text editor and comment all interface-related lines with a # character. Everything should look like in the example below:
# This file describes the network interfaces available on your system
# and how to activate them. For more information, see interfaces(5).

source /etc/network/interfaces.d/*

# The loopback network interface
#auto lo
#iface lo inet loopback

# The primary network interface
#allow-hotplug eth0
#iface eth0 inet static
#       address 172.17.0.2/24
#       gateway 172.17.0.1
#       # dns-* options are implemented by the resolvconf package, if installed
#       dns-nameservers 8.8.8.8 8.8.4.4
Once done, save and exit the file. At this stage, you can reboot your computer by executing the following command:
shutdown -r nowGNOME Desktop Environment – Post-Install Steps
Once the operating system boots again, you will be greeted by the Debian welcome screen:
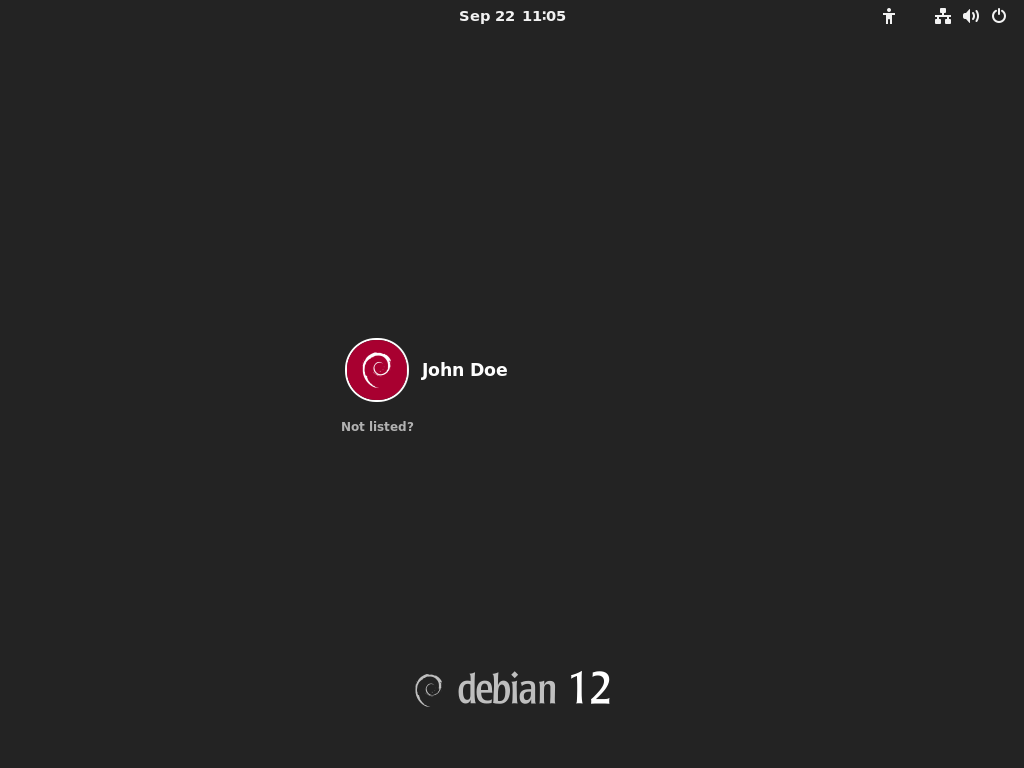
Once you click on your user’s name, a password prompt will be displayed, so please input your password and press Enter on your keyboard to continue. Once login is complete, the following screen will be displayed:

Click on Show Applications button (01 on the image above), and on the next screen, click on Terminal:
Once the Terminal is started, you can enable the dash-to-dock GNOME shell extension. To enable the extension, please execute the following in the Terminal window:
gnome-extensions enable [email protected]The default behavior of the dock is to auto-hide once any application is started in full screen. I’m not too fond of that; it can be turned off. To turn off such a behavior, please execute the following in Terminal:
gsettings set org.gnome.shell.extensions.dash-to-dock autohide false
gsettings set org.gnome.shell.extensions.dash-to-dock dock-fixed true
With the extension enabled, a small application dock will appear at the bottom of the screen:
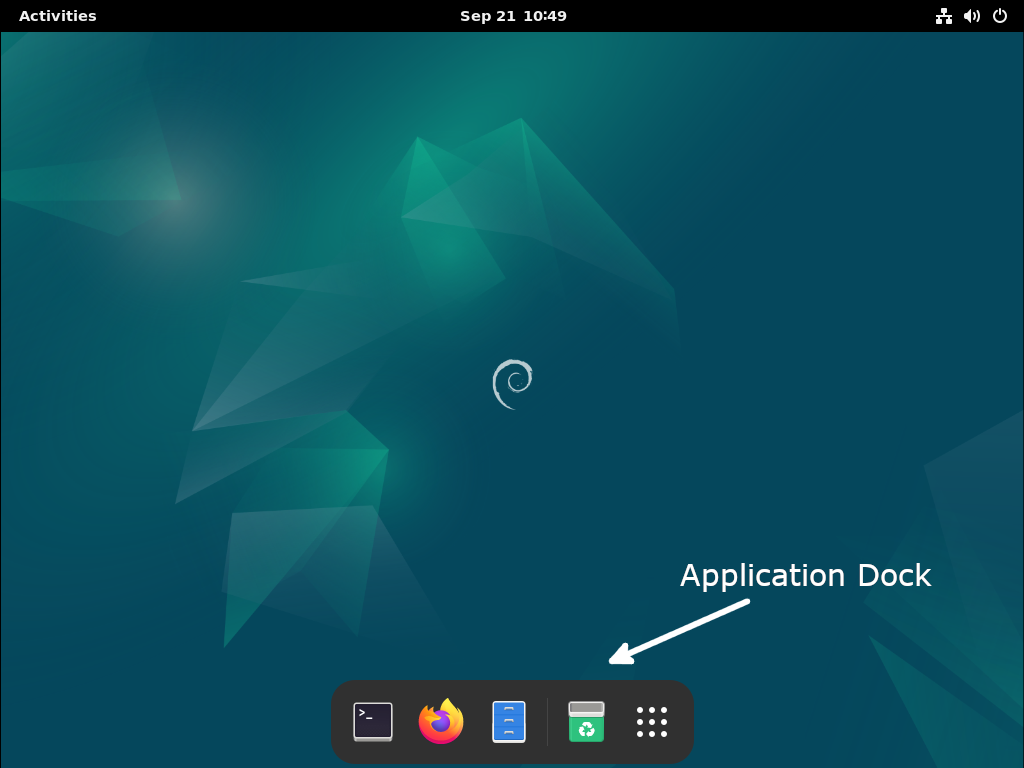
If you are on a DHCP-enabled network, then congratulations! You have successfully installed the GNOME Desktop Environment on Debian. You’ll need additional steps if you are on a static network.
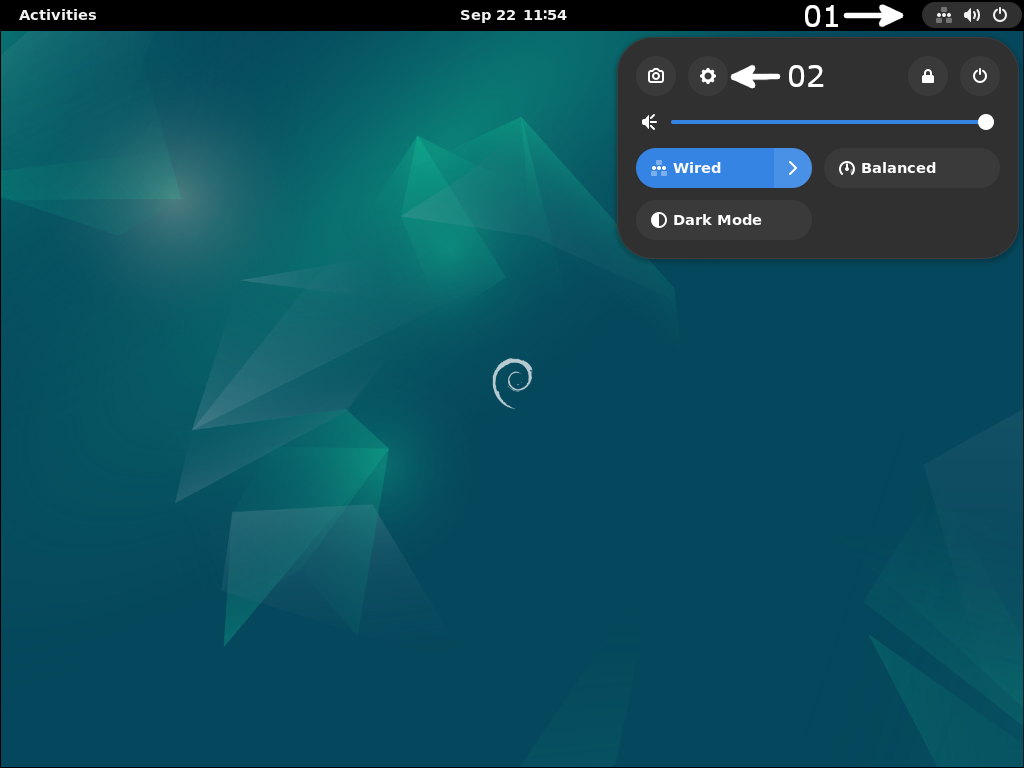
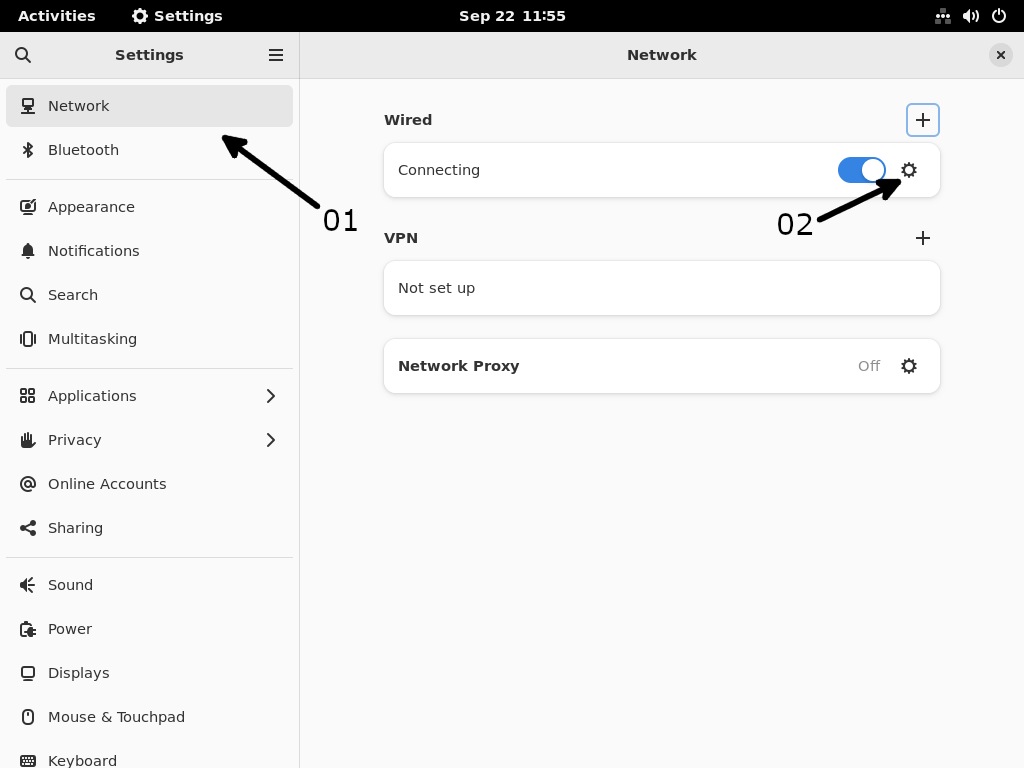
To configure the static network, click on the menu bar in the top-right corner of the screen (01), and once the menu pops up, click on a gear-like icon (02) to access the Settings:
To access the network configuration screen, click on Network (01) and then again on the gear-like icon on the right (02):
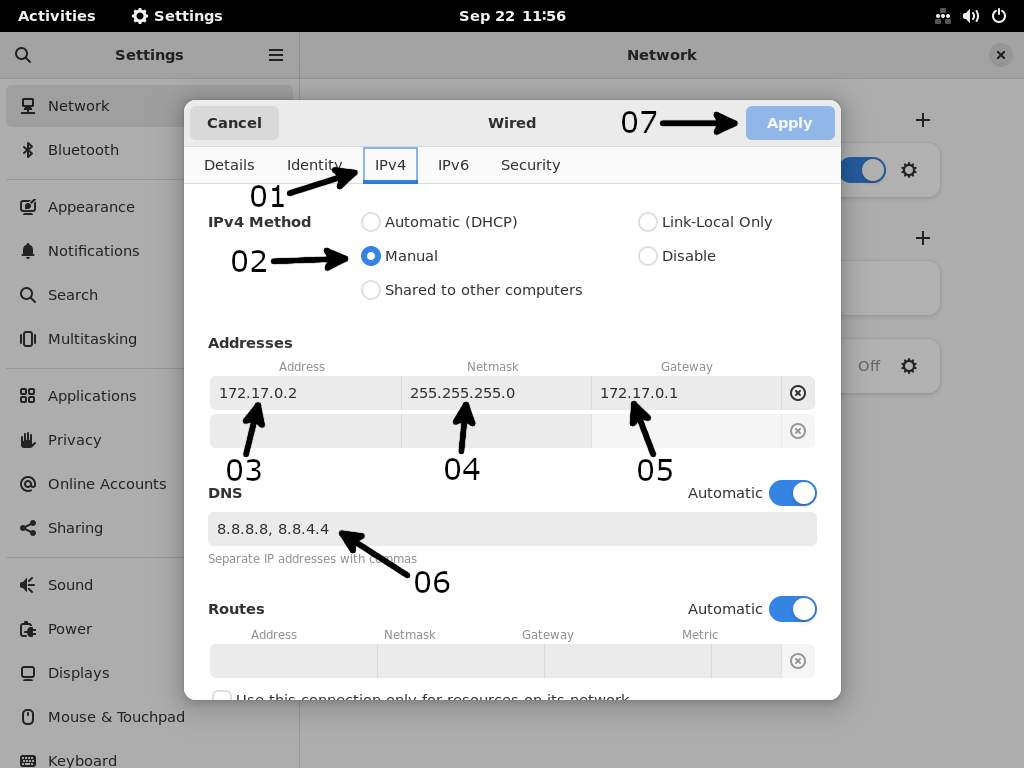
Once the network configuration screen opens, click first on the IPv4 tab (01). There, click the Manual radio button (02). Under the Addresses section, insert your IP address (03), Netmask (04), and Gateway (05). Under the DNS section, insert the IP address(es) of the name servers (06) which will be used for resolving. You can use the ones from Google (8.8.8.8,8.8.4.4) or Cloudflare (1.1.1.1). Your network should be active in a few seconds once you click the Apply button (07).
To finish this, you can optionally set all user directories (i.e., Downloads, Desktop, Videos, Pictures…) by executing the xdg-user-dirs-update command. You can do it in the Terminal without sudo privileges:
xdg-user-dirs-updateGNOME Desktop Environment – Automation Script
We have a script that will do everything described in this guide automatically. The script is available on GitHub along with the instructions, and you can find it by clicking on the link button below this text:
And that’s it. You have successfully installed GNOME Desktop Environment on your computer. Congratulations, and thank you for reading.