
Author:
Željko Jagušt
Publish Date:
September 4, 2023
Estimated Reading Time:
13 minutes
Data security is paramount in an increasingly interconnected world. Whether you’re a seasoned Linux user or just embarking on your journey with Debian, one of the most crucial steps you can take to protect your data is to enable disk encryption during the installation process.
Introduction
Our motto here at Zack’s is to give credit where credit is due. This time, we must credit Tj for writing a great how-to article on full disk encryption on Ubuntu Linux. This guide is a “rewrite” of Tj’s guide, but it is suited for Debian minimal installations.
We will walk you through the steps to enable disk encryption during the Debian Linux minimal installation, and we’ll cover everything you need to know to keep your data safe from unauthorized access. While disk encryption can be set on any computer, it is more common on notebooks. Hypothetically, suppose someone steals your notebook with disc encryption in place. In that case, they will not be able to access the data on your disk nor boot the operating system without knowing the passphrase to unlock the disk.
By the end of this tutorial, you’ll have a fully functioning Debian Linux minimal system and the peace of mind that comes with knowing your data is secure. Let’s dive in and ensure your Debian installation is fortified with the power of disk encryption.
Prerequisites
We will not go through a complete Debian Linux minimal installation as we already have an article that covers that topic:

Debian 11 Server – Minimal Installation Guide
Follow this guide for a Debian 11 Server minimal installation, providing a solid foundation for any server setup or project you want to build.
You can follow that guide until the Disk Partitioning step, where we will start with the disk encryption configuration.
Before you start, make sure your computer or virtual machine is configured to start in UEFI mode. You can set that up in your computer’s BIOS or in virtual machine settings. If you plan to install Debian either on a real computer or a virtual machine and you use Debian ISO image, once you boot from it, please select Advanced options from the installer menu, followed by Expert install. This way, you will ensure all installation options are available.
Disk Encryption Setup
Once you choose the language and locales and configure your keyboard, you will be presented with a menu option to Load installer components from installation media. Once there, please select (with the Space key on your keyboard) the following two options:
- crypto-dm-modules
- parted-udeb
Once selected, you can continue configuring all the other options from the menu until you reach the Partition disks option. This is where you will start configuring the disk encryption.
Disk Partitioning – Stage 01
Once you configure everything and you’ve come to the Partition disks option in the Debian installer menu, please stop here:
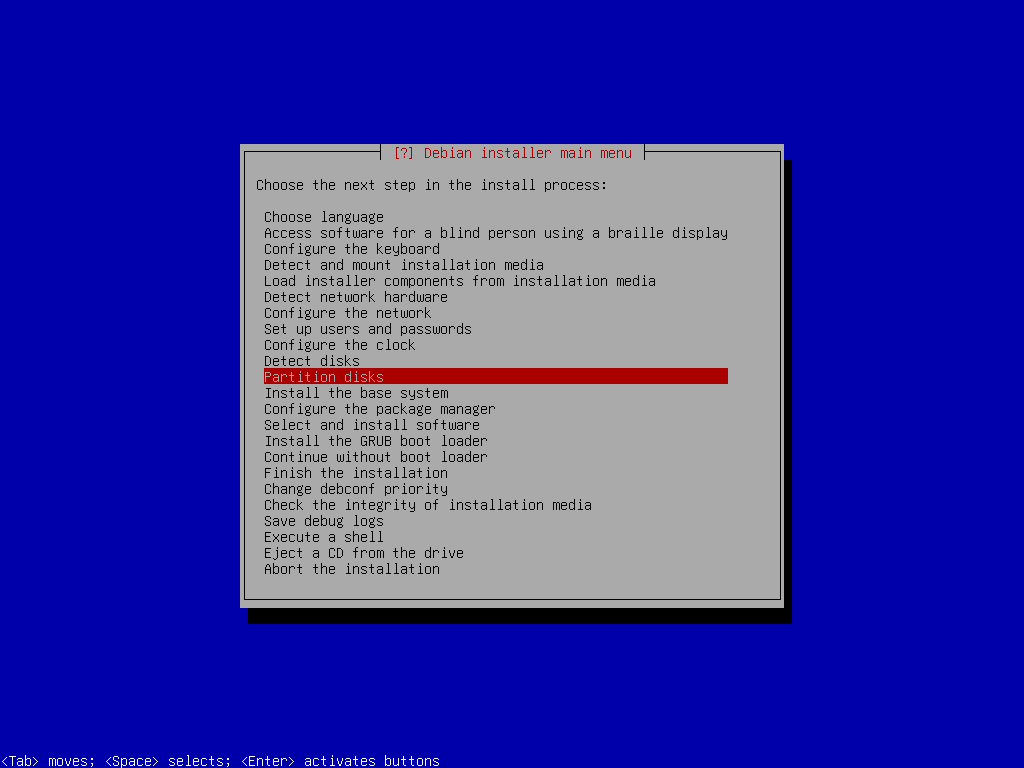
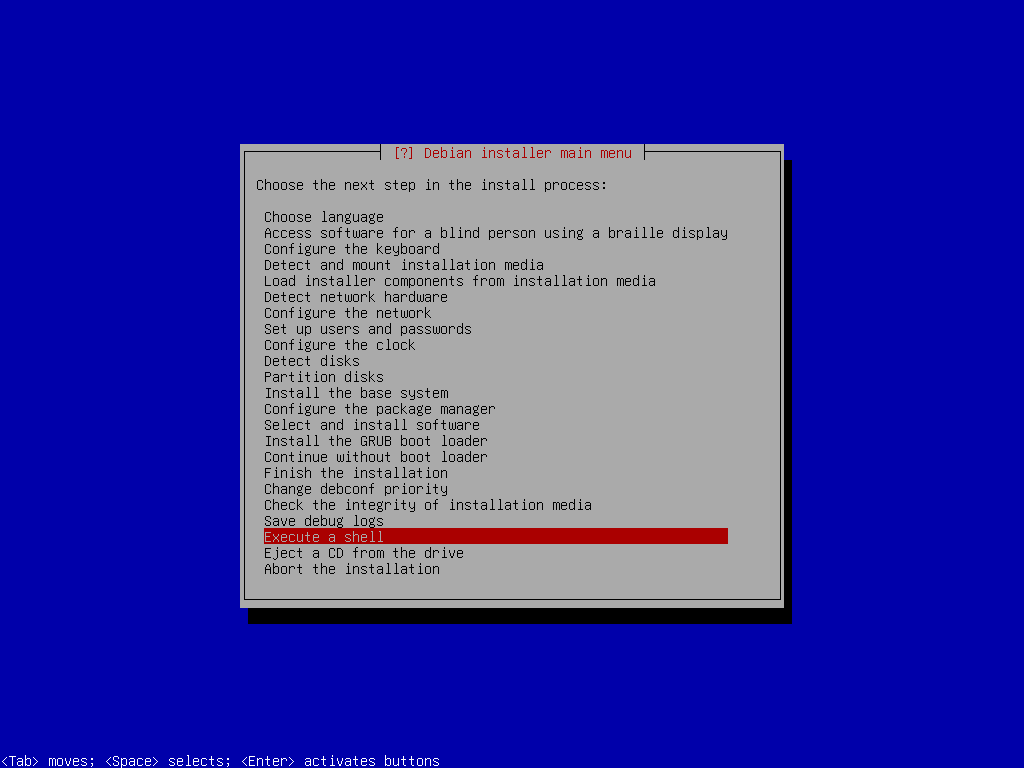
Please do not press Enter once you hit the Partition disks option. Instead, scroll down to Execute a shell option and press Enter there to continue:
Once you confirm you want to execute the shell, the installer will drop to that shell. You must first install two additional packages required for disk encryption setup. Execute the following to install those packages:
anna-install cryptsetup-udeb
anna-install lvm2-udeb
With packages installed, you can start with disk partitioning. Presuming you have only one disk, you will either have /dev/sda in case you have a mechanical disk (HDD) or solid-state drive (SSD), possibly a /dev/vda if you use a virtual machine or /dev/nvme0n1 if you have an NVME drive. You can check it out by executing the lsblk command (look for either sda, vda, or nvme0n1):
lsblkOnce you determine your disk type, you can execute parted to partition your disks. I will use /dev/sda as an example, but you should use the device from the lsblk output above:
parted /dev/sdaHere, you need to create your partitions. For UEFI systems, GUID Partition Table (GPT) is mandatory, so set that first:
mklabel gptFor the partitions, you can create a “satisfy-all” basic set. Usually, I set the following partitions:
- Boot partition – size 1GB
- GRUB partition – size 2MB
- EFI System partition – size 128 MB
- Root FS partition – rest of the space on the disk

To create the required partitions from above, please execute the following:
mkpart boot 1MiB 1025MiB
mkpart grub 1025MiB 1027MiB
mkpart EFI-SP 1027MiB 1155MiB
mkpart rootfs 1155MiB 100%
With partitions created, you can exit the parted by typing quit:
quitTo confirm all partitions are in place, you can execute blkid, and you will get a result similar (if not identical) to the one in the image below:

LUKS Encrypt
We will use the LUKS (Linux Unified Key Setup) encryption for full disk encryption… well, almost full. We will encrypt boot and rootfs partitions, which will not only encrypt all of the data on the disk but also prevent the computer from booting the operating system without knowing the passphrase to unlock the disk.
For the boot partition, you need to explicitly define LUKS version 1 type when enabling encryption because otherwise, the GRUB boot loader will not be able to install or unlock the encrypted device. To do so, while still in the shell, execute the following:
cryptsetup luksFormat --type=luks1 /dev/sda1Once asked, type YES (in capital letters) to confirm the operations, and then type in a solid password, which will be used to unlock the boot partition. Now you will do the same for the rootfs partition. The only exception is you will use the default LUKS version 2. To do so, please execute the following:
cryptsetup luksFormat /dev/sda4Again, confirm the operation by typing YES and use the same password you used for the boot partition. Now, you need to unlock both partitions to continue with the setup. To do it, please execute the following (use the same passphrase for both partitions when asked):
cryptsetup open /dev/sda1 LUKS_BOOT
cryptsetup open /dev/sda4 sda4_crypt
To confirm both partitions are open and in place, please execute ls /dev/mapper:
ls /dev/mapper/
control LUKS_BOOT sda4_cryptNext, you must set the file system to boot and EFI-SP partitions. Otherwise, the installer partitioner will disable the ability to write a file system to this device without having a partition table. To do so, please execute the following:
mkfs.ext2 -L boot /dev/mapper/LUKS_BOOT
mkfs.fat -F 16 -n EFI-SP /dev/sda3
Root FS LVM Setup
You must create a logical volume for the root file system and the swap space at this stage. To do that, you will use rootfs (/dev/mapper/sda4_crypt) partition. First, you need to define a physical volume (PV):
pvcreate /dev/mapper/sda4_cryptNow create a volume group (VG):
vgcreate vgdebian /dev/mapper/sda4_cryptAnd last, create a logical volume for both root and swap:
lvcreate -L 1G -n swap vgdebian
lvcreate -l 100%FREE -n root vgdebian
In my example, I’ve created 1GB of swap space and used the rest of the available space for root. A rule of thumb is to create a swap space that equals the amount of RAM, but that is totally up to you. You can exit the shell and return to the Debian installer at this stage. To exit the shell, just type exit:
exitDisk Partitioning – Stage 02
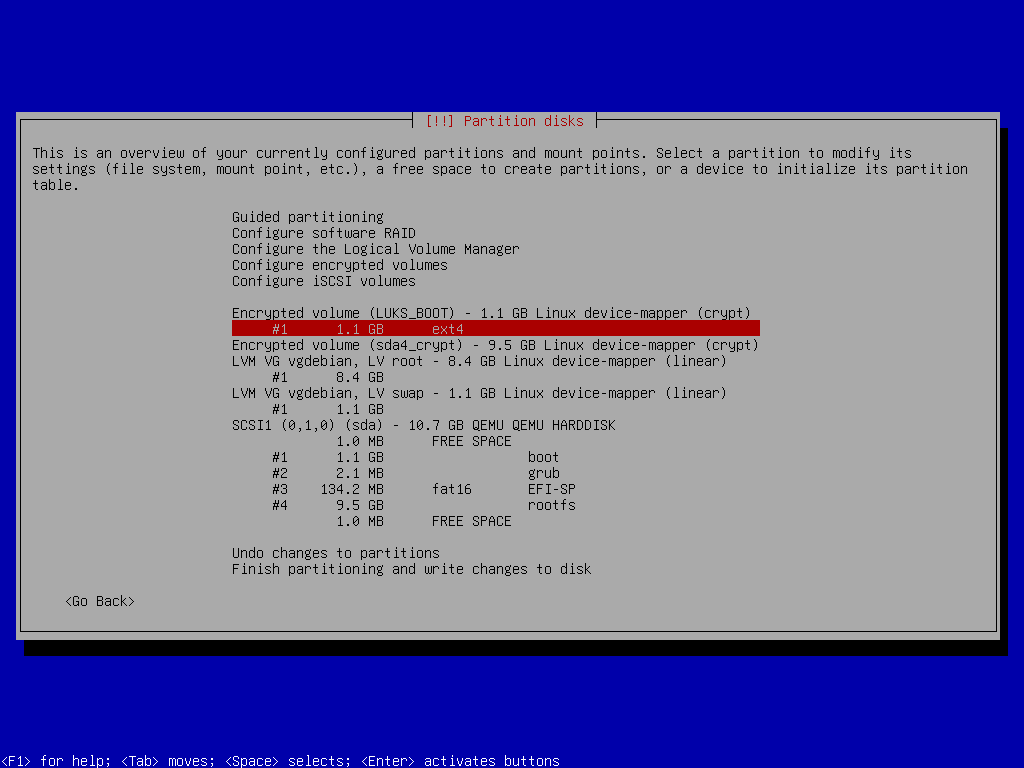
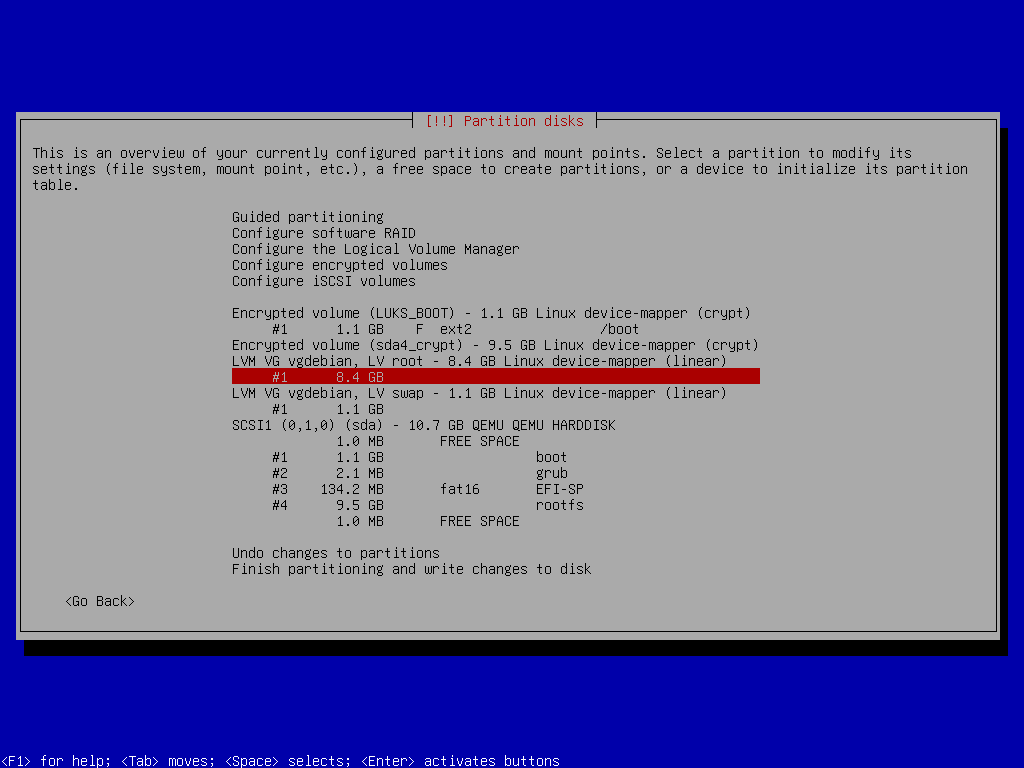
Once you’re back in the Debian installer, scroll to Partition disks and press Enter to continue:
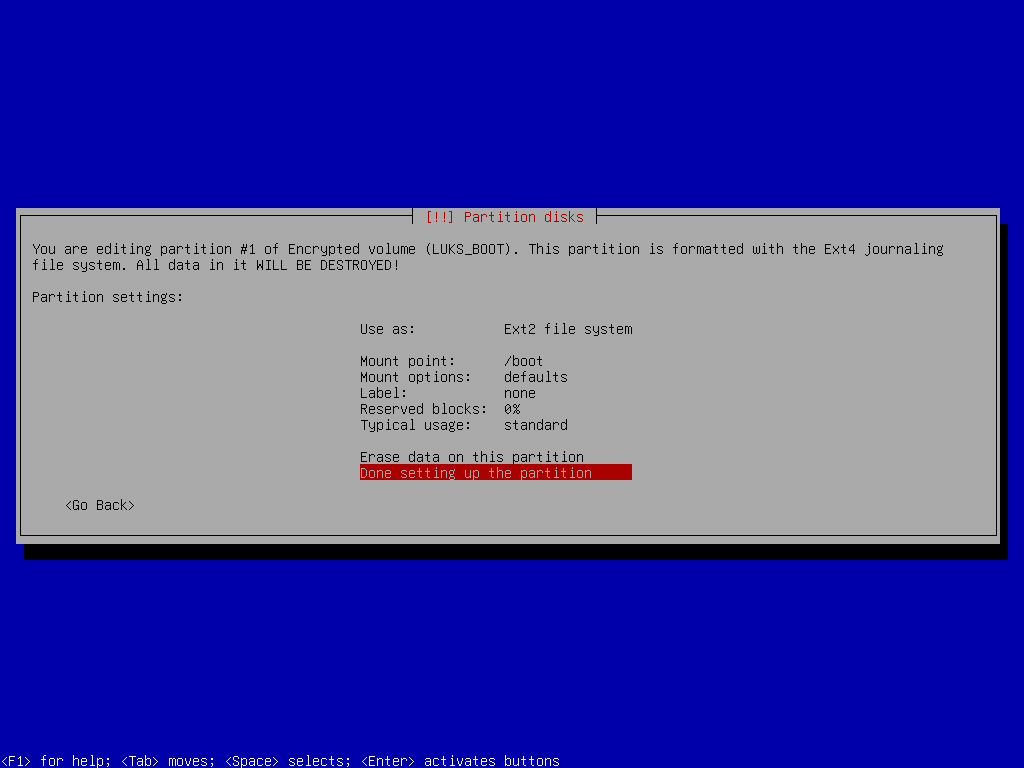
There, under LUKS_BOOT, select partition #1 and press Enter to continue:
Configure the partition per example on the picture below and confirm by selecting Done setting up the partition:
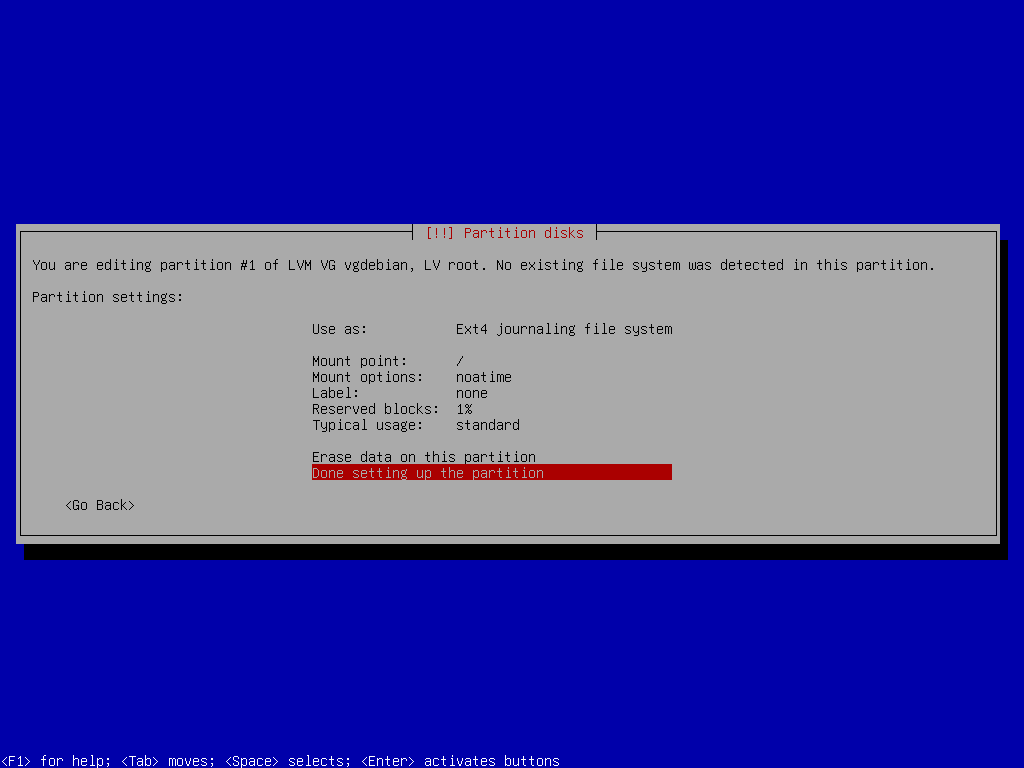
Under LV root, select partition #1:
Configure the root partition per example on the image below:
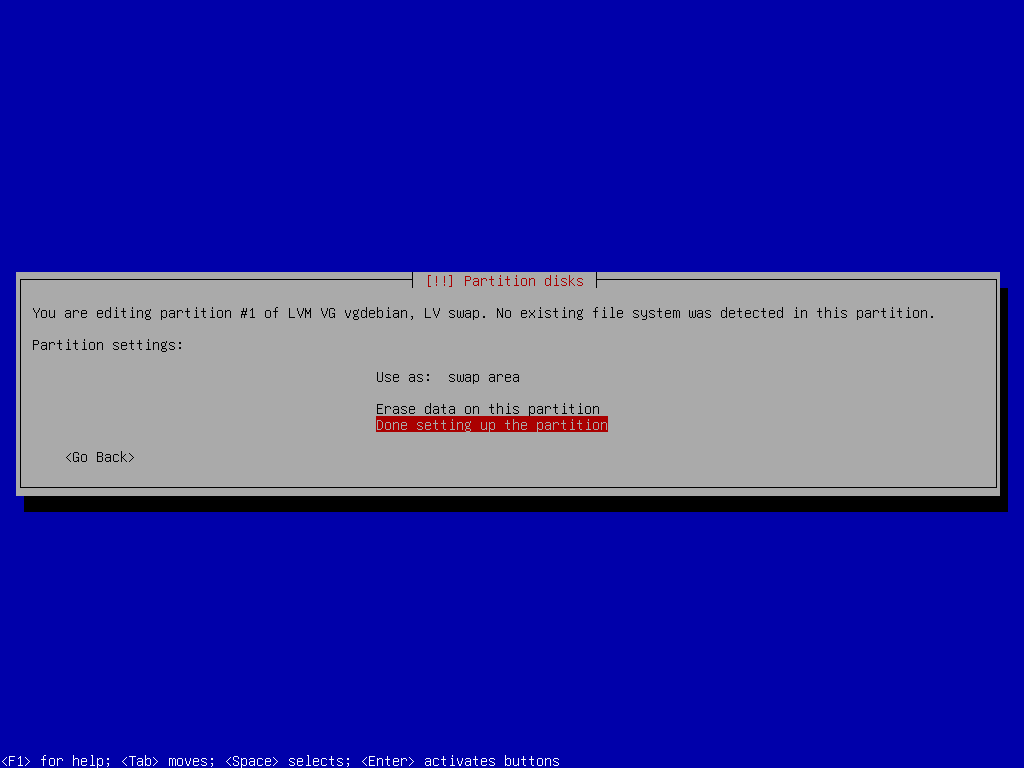
Under LV swap, select partition #1:
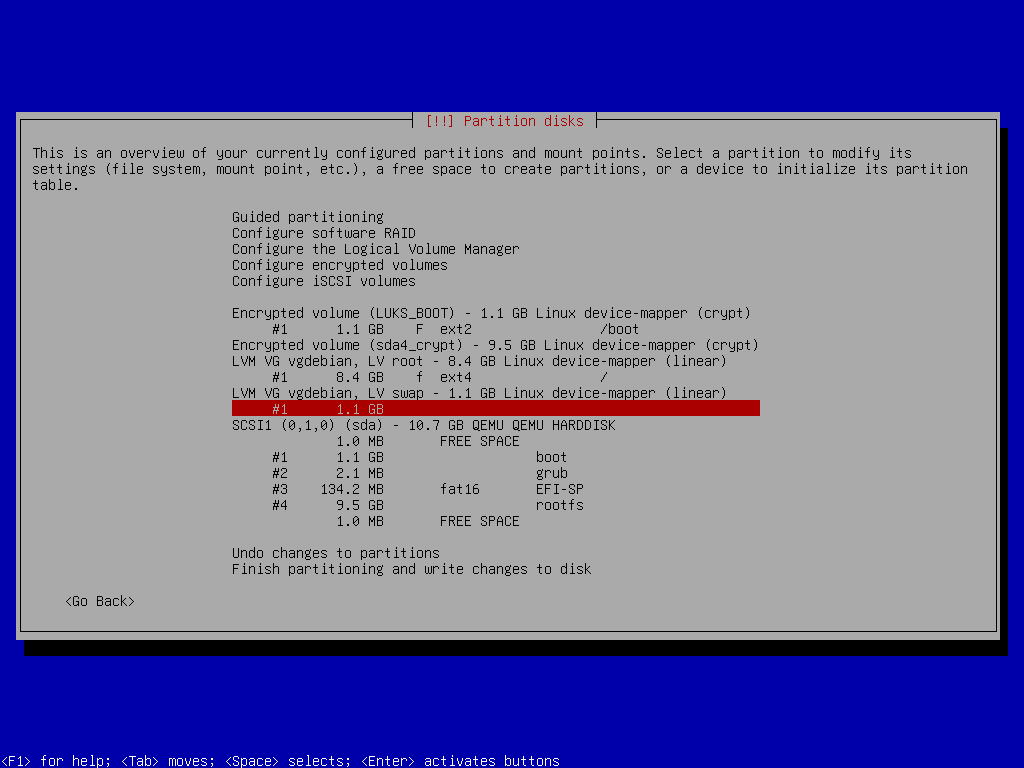
Configure swap space per example on the image below:
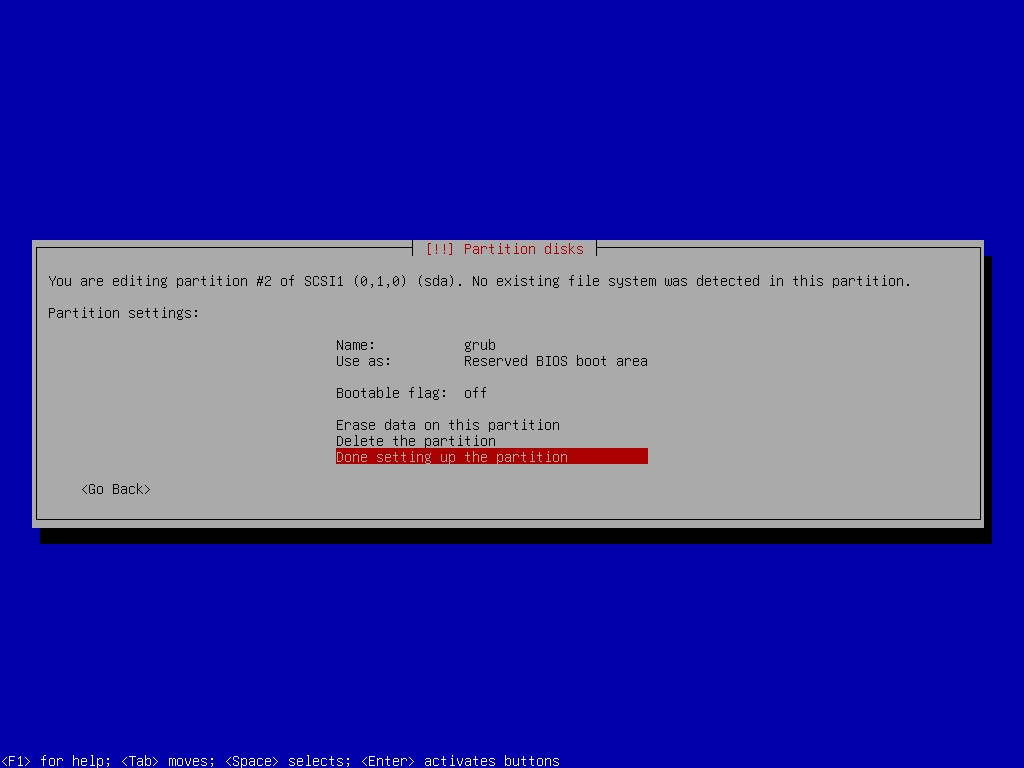
Under (sda), select partition #3 labeled grub:
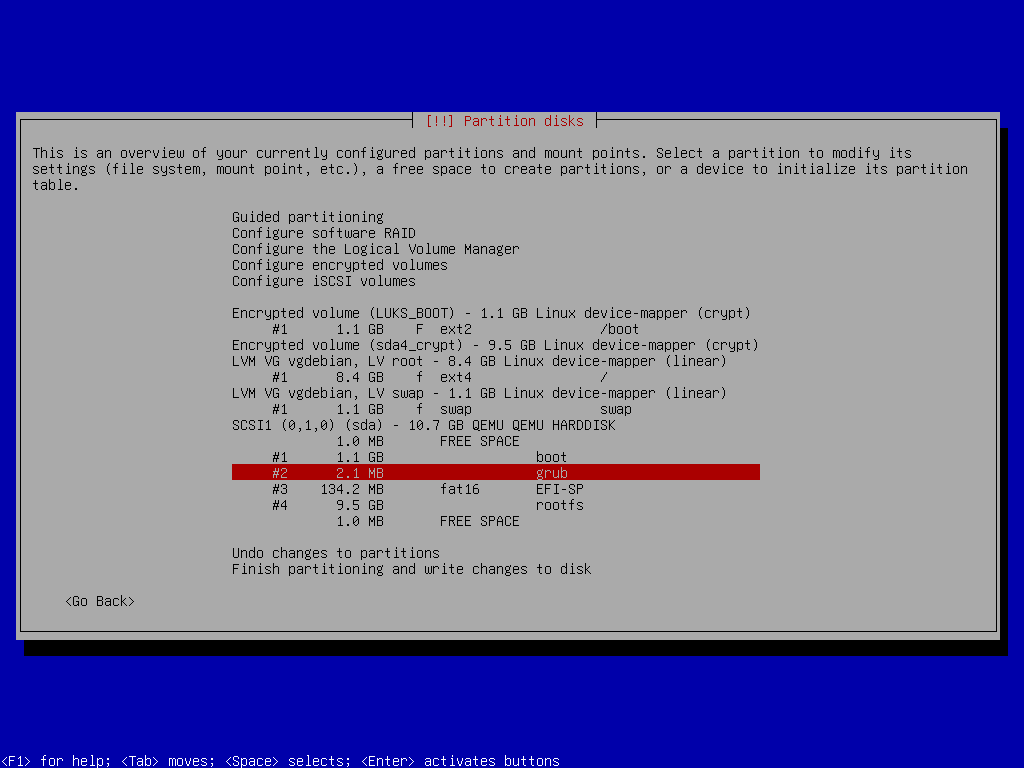
Configure the grub partition per example on the picture below:
Last, under (sda), select partition #3 labeled EFI-SP:

Configure the EFI-SP partition per the example on the picture below:

With all partitions defined, you can select Finish partitioning and write changes to the disk. When asked to confirm changes, select Yes and press Enter on your keyboard to continue:

System Install & GRUB Setup
Now that all partitions are defined, a base system can be installed. To do so, select Install the base system from the menu and press Enter to continue:
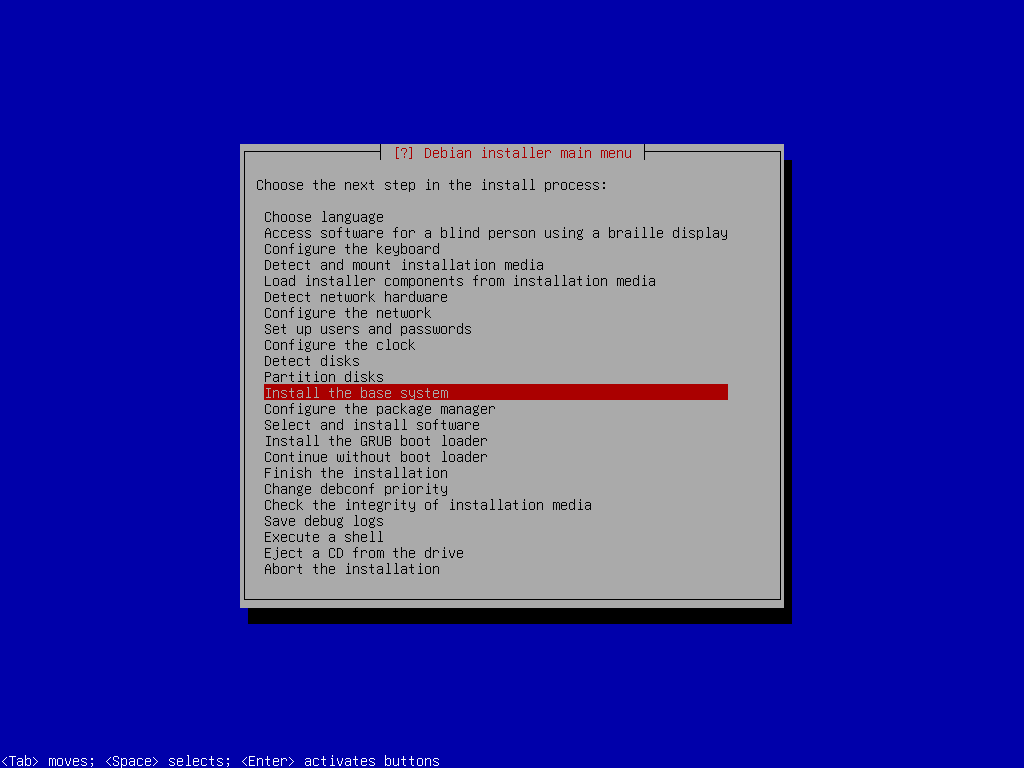
During the installation, you will be asked which kernel to install. When asked, select linux-image-amd64. You will also be asked which drivers to include, and you can choose generic ones. Once the installation is done, you can skip Configure the package manager and Select and install software packages.
The next step is to Install the GRUB boot loader, but before we can install it, we need to instruct the GRUB we are using the encrypted disk. To do so, you will once again select Execute the shell from the main menu (press Enter to continue once you do):
Once in the shell, first, create the directory in which you will store the GRUB configuration snippet:
mkdir /target/etc/default/grub.dWith the directory in place, we can pass the following content to the GRUB configuration snippet, and which will instruct the GRUB boot loader the system is using an encrypted drive:
echo "GRUB_ENABLE_CRYPTODISK=y" > /target/etc/default/grub.d/local.cfgNow you can type exit to exit the shell and return to the Debian installer. Once there, select Install the GRUB boot loader and press Enter to continue:

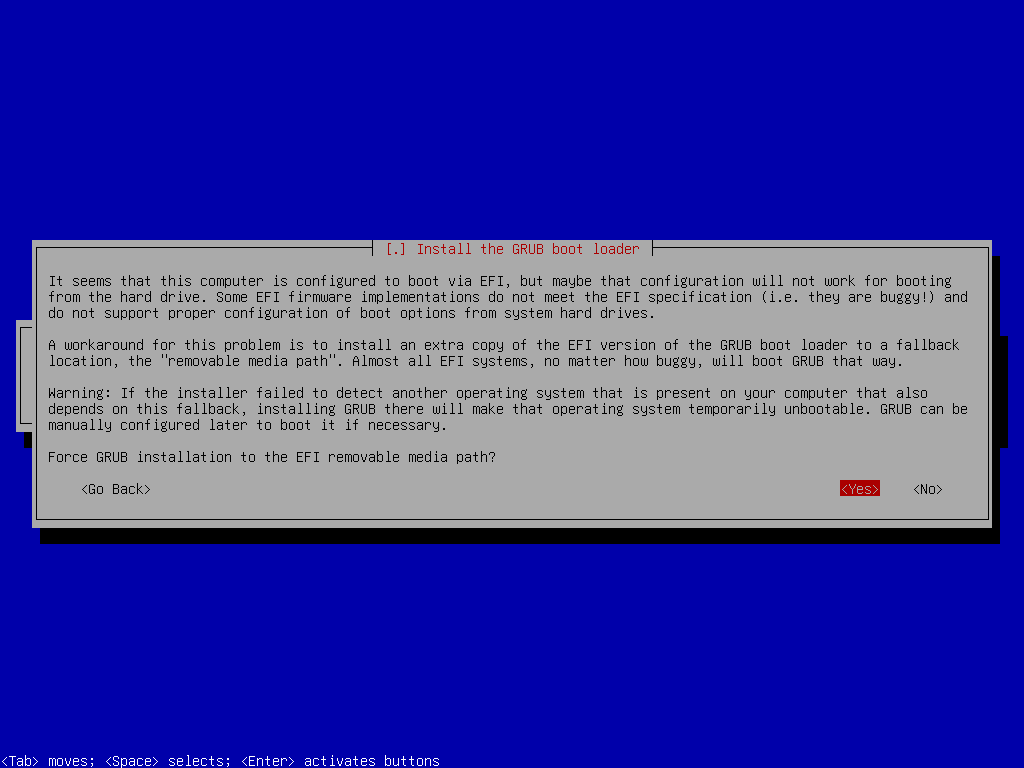
Select Yes when asked to force GRUB installation to EFI removable media:
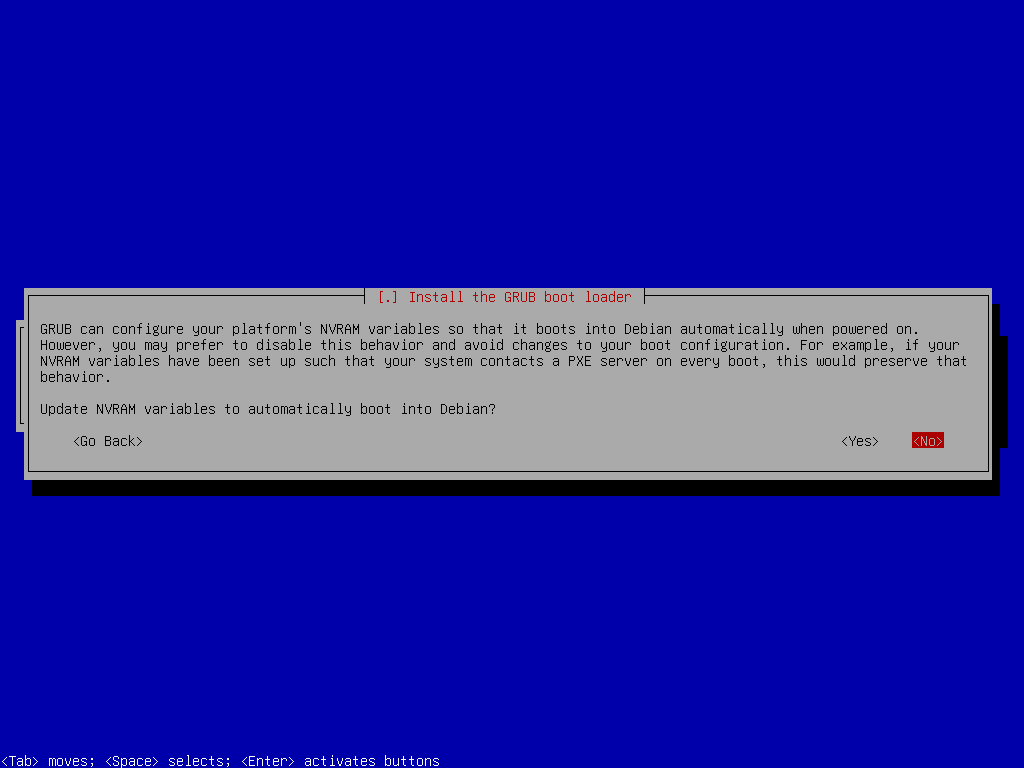
Select No when asked to update NVRAM variables:
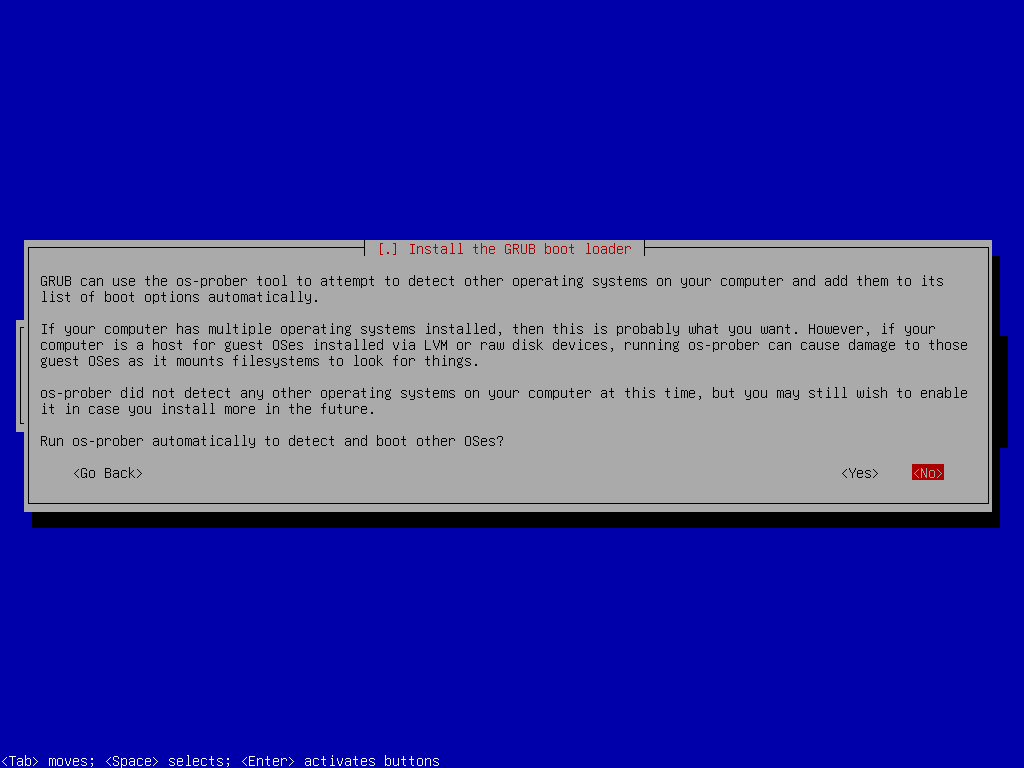
Also, select No when asked to run os-prober automatically:
Post Install Steps
One might say once GRUB is installed, we are done with the setup, but we’re not quite yet. As a final step, you must add key files, which will automatically unlock the encrypted drive (after the passphrase input) to initramfs. The key files and supporting scripts are added to the/boot/initrd.img-$VERSION files. This is absolutely safe since these files are stored in the encrypted /boot/, which is unlocked by the GRUB boot-loader (which asks you to type the passphrase), which then loads the kernel and initrd.img into RAM before handing execution over to the kernel.
To do so, first once again drop down to shell:
Once in the shell, you need to create a chroot environment to be able to work with the newly installed OS. To do so, please execute the following:
mount /dev/mapper/vgdebian-root /target/root
for n in proc sys dev etc/resolv.conf; do mount --rbind /$n /target/root/$n; done
chroot /target/root
mount -a
In the chroot environment, execute the following commands:
echo "KEYFILE_PATTERN=/etc/luks/*.keyfile" >> /etc/cryptsetup-initramfs/conf-hook
echo "UMASK=0077" >> /etc/initramfs-tools/initramfs.conf
Now, you need to create a randomized key-file of 4096 bits (512 bytes), secure it, and add it to the LUKS volumes:
mkdir /etc/luks
dd if=/dev/urandom of=/etc/luks/boot_os.keyfile bs=512 count=1

chmod u=rx,go-rwx /etc/luks
chmod u=r,go-rwx /etc/luks/boot_os.keyfile

cryptsetup luksAddKey /dev/sda1 /etc/luks/boot_os.keyfile
cryptsetup luksAddKey /dev/sda4 /etc/luks/boot_os.keyfile
Next, add the keys to the crypttab:
echo "LUKS_BOOT UUID=$(blkid -s UUID -o value /dev/sda1) /etc/luks/boot_os.keyfile luks,discard" >> /etc/crypttab
echo "sda4_crypt UUID=$(blkid -s UUID -o value /dev/sda4) /etc/luks/boot_os.keyfile luks,discard" >> /etc/crypttab
Finally, update the initramfs files to add the cryptsetup unlocking scripts and the key file:
update-initramfs -u -k allAt this stage, type exit twice to return to the Debian installer, and once there, select Finish the installation. Your computer will reboot, and once it does, you will be asked to type in the passphrase to decrypt your disk:

The standard boot will continue right after you enter the correct passphrase. Make sure you remember it or write it down somewhere safe because if you forget it, retrieving your data will be virtually impossible. We will finish this guide with this. I hope you liked it, and many thanks for reading.