
Author:
Željko Jagušt
Publish Date:
November 22, 2023
Estimated Reading Time:
5 minutes
Welcome to our comprehensive guide on setting up Gmail as a relay to send mail from your Debian Linux server. Whether you’re a system administrator or a Linux enthusiast, our step-by-step instructions will help you configure a reliable and efficient email relay. Unlock the power of Gmail for seamless communication, ensuring your messages reach their destination without a hitch. Let’s dive into the process and elevate your email-sending capabilities on Debian.
Introduction
This guide does not focus on a classic email client configuration on a desktop environment, such as Thunderbird. Instead, it will show you how to configure an “email relay” on your server system, which can send emails. This way, your server can send automatic emails to you once a significant event occurs.
For example, if you are running a backup, and once the backup is complete, you can “instruct” your server to email you whether that backup was successful or not. As another example, you can configure “monitoring” of your file system, and the server can send you an email when it’s running low on disk space (or inodes). There are many other usage scenarios; you can consider this a first step in alerting. In other words, your server telling you, “I have a problem, and I need help”.
Prerequisites
Email sending can be configured on any Linux system. It also doesn’t matter if you’re running a server or a desktop environment (although it is more common on the server). For this guide, I will use Debian and DragonFly Mail Agent.

DragonFly Mail Agent is not installed on Debian by default, but you can install it by executing the following command in the Terminal:
apt install dmaYou will need a Gmail account for this, so please create one if you don’t already have one. If you have an existing account or are opening a new one, make sure you enable 2-Step Verification.
Also, DragonFly “supports” local aliases controlled by /etc/aliases file. This can be useful in server environments where root user may sometimes receive messages from services running on the server. You can use your Gmail email as an alias for root user so that all such emails will be relayed to your Gmail account. To do so, please open a new file /etc/aliases and create a root alias as in the example below (replace [email protected] with your email address):
root: [email protected]DragonFly Configuration
DragonFly agent configuration is pretty simple. You must add your Gmail credentials in /etc/dma/auth.conf file, and you must enable several options in DragonFly’s main configuration file at /etc/dma/dma.conf.
DragonFly is a simple application; unfortunately, it doesn’t support modern security standards. If you enabled 2-step verification on your Gmail account (and I hope you did), supplying your username and password in /etc/dma/auth.conf will not work. Since the DragonFly agent doesn’t have the mechanism to use 2-step verification, you must create a unique application password to overcome that obstacle. You can do this on the Google’s App password website. Once you’re there, you will be asked to type in the name for your application password, so please do so:
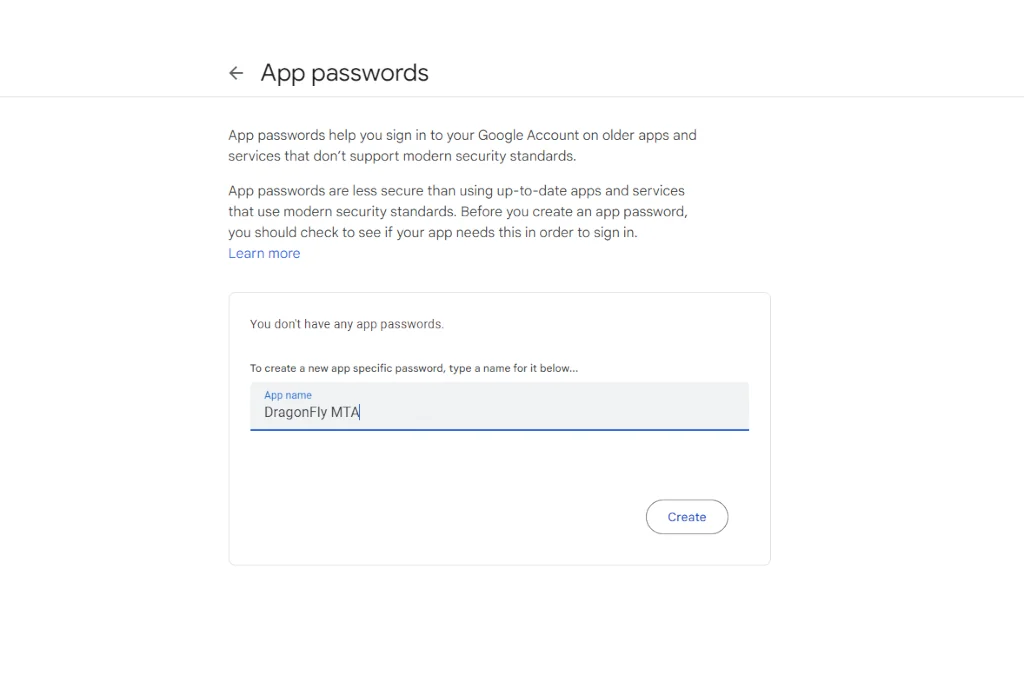
Once you type in the name, click on the Create button. Your password will then be displayed (write it down somewhere safe):
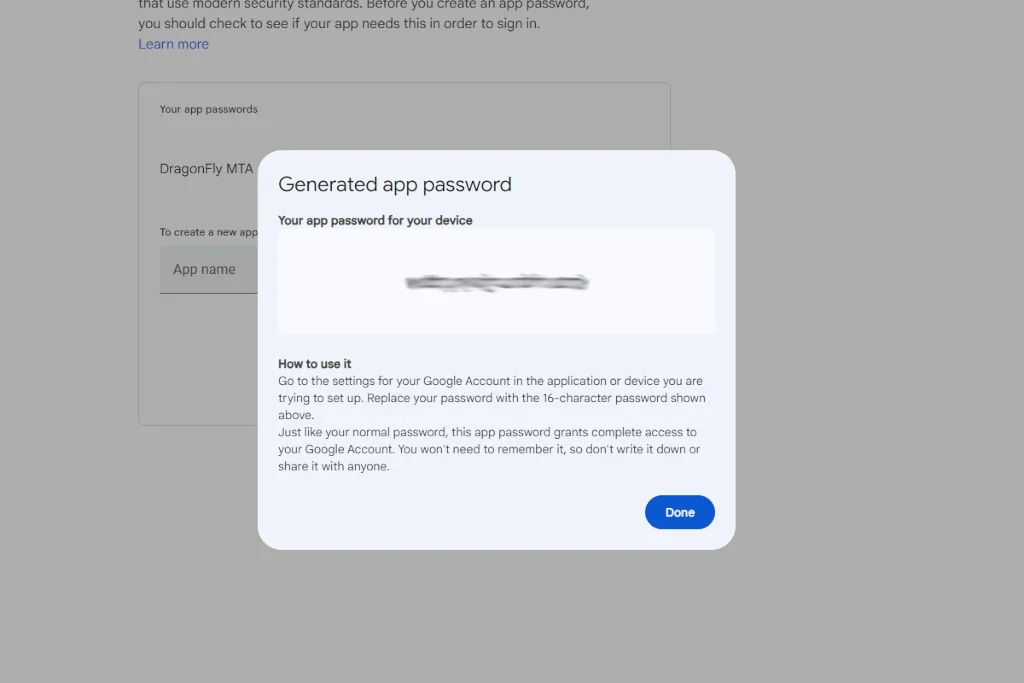
Now you can open /etc/dma/auth.conf file and add the required credentials to the bottom of the file. Please replace [email protected] with your email address and apppassword with the Google App password generated in the previous step:
[email protected]|smtp.gmail.com:apppasswordSave and close the file. Now open /etc/dma/dma.conf file and adjust the following options:
SMARTHOST smtp.gmail.com
PORT 587
ALIASES /etc/aliases
SPOOLDIR /var/spool/dma
AUTHPATH /etc/dma/auth.conf
SECURETRANSFER
STARTTLS
Once you’re done, save and close the file, and with that, the setup is complete. You can try and send a test message to ensure everything is working. You can execute something similar to the example below. Just replace [email protected] with your email address:
echo "This is a test message." | mail -s "Test Email" [email protected]Check your inbox, and the test message should be there. Thank you for reading, and please share this article if you liked it.